background image

Geno Range RO/DI Water System, Series 5 Operation Manual

Avidity Science, LLC

ii

Contents

This page left intentionally blank.

DOMINIQUE 

DUTSCHER 

SAS

Summary of Contents for GENO20

Page 1: ...Geno Range RO DI Water System GENO20 GENO40 Series 5 Operation OP 000112 Revision C March 2021 D O M I N I Q U E D U T S C H E R S A S...

Page 2: ...does not represent a commitment on the part of Avidity Science LLC AMERICAS 819 Bakke Avenue Waterford WI 53185 USA Tel 833 898 3420 262 534 5181 E mail US TechSupport avidityscience com ASIA JAPAN I...

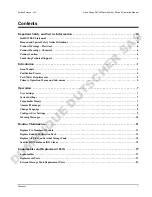
Page 3: ...ication Process 2 Feed Water Requirements 4 Primary Operation Menus and Sub menus 5 Operation 7 User Settings 7 System Settings 7 Consumable Timers 7 Alarms Warnings 8 Change Language 8 Configure User...

Page 4: ...Geno Range RO DI Water System Series 5 Operation Manual Avidity Science LLC ii Contents This page left intentionally blank D O M I N I Q U E D U T S C H E R S A S...

Page 5: ...tement Avidity Science water treatment automated watering environmental monitoring and access control sys tems specified within this manual are manufactured in compliance with the RoHS Directive EU Di...

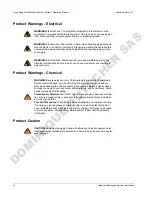
Page 6: ...G Severe personal injury Chlorine tablets are harmful if swallowed Avoid contact with eyes skin and clothing Wear protective gloves and eye wear when handling the chlorine tablet Keep chlorine tablets...

Page 7: ...bles below Europe Middle East Africa Support Americas Support Asia Greater China Support Asia Japan Support Phone E mail Web Site 44 0 1844 201142 UK TechSupport AvidityScience com AvidityScience com...

Page 8: ...Geno Range RO DI Water System Series 5 Operation Manual Avidity Science LLC vi Important Safety and Service Information D O M I N I Q U E D U T S C H E R S A S...

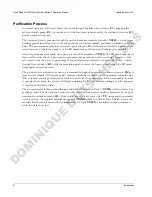
Page 9: ...ocated on the front panel of the unit All components of the system are assembled in a metal chassis and protected by a plastic housing that is designed for bench or wall mounting The front panels are...

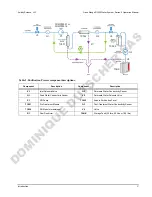
Page 10: ...water referred to as concentrate is sent to drain through flow restrictor R1 while the remaining water re enters the loop to pass through the RO mem brane again conserving water The product water refe...

Page 11: ...e Water Conductivity Sensor Q1 Feed Water Conductivity Sensor V5 Permeate Water Solenoid Valve P1 RO Pump TC002 Endure Purification Pack 1 TC001 Pre Treatment Module Q3 Post Treatment Water Conductivi...

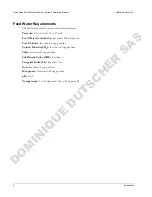
Page 12: ...ed Water Conductivity less than 1400 S per cm Free Chlorine less than 0 1 mg per liter Carbon Dioxide CO2 less than 15 mg per liter Silica less than 15 mg per liter Silt Density Index SDI less than 3...

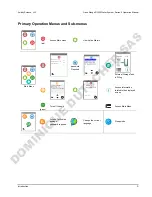
Page 13: ...menus red Access Main menu View Active Alarms Main Menu password Required External Storage Tank is Filling Access information related to the displayed screen green Turn off the unit Access Main Menu A...

Page 14: ...Geno Range RO DI Water System Series 5 Operation Manual Avidity Science LLC 6 Introduction This page left intentionally blank D O M I N I Q U E D U T S C H E R S A S...

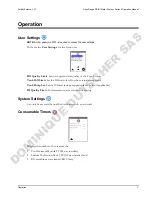
Page 15: ...ull Limit Set the Full water level for the external storage tank Tank Pump Set Set the 100 litre tank pump pressure set point if applicable DI Quality Limit Post treatment water conductivity setting S...

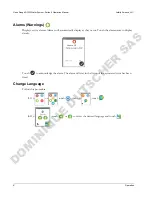
Page 16: ...utomatically display as they occur Touch the alarm name to display details Touch to acknowledge the alarm The alarm will stay in the list until the associated issue has been fixed Change Language Foll...

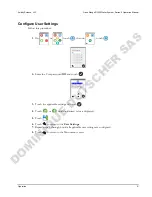
Page 17: ...hen on touch 2 Enter the User password 1111 and touch 3 Touch the applicable setting and touch 4 Touch or until the desired value is displayed 5 Touch 6 Touch to return to the User Settings 7 Repeat s...

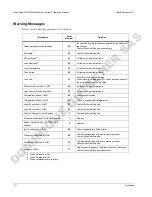
Page 18: ...rage tank and the machine DI Quality Sensor Fault LOW 62 Follow on screen instructions Loop Conductivity Sensor Fault 63 Follow on screen instructions Temperature Sensor HIGH 64 Allow system to flush...

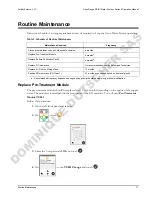
Page 19: ...edure 1 Lift the left front panel and remove 2 On select 3 Enter the User passcode 1111 and touch 4 On touch TC001 Change and touch Table 3 Schedule of Routine Maintenance Maintenance Required Frequen...

Page 20: ...seconds as shown below 6 When the pressure screen shown below appears observe the pressure gauge to verify the system has depressurized NOTE The system does not measure the pressure so it is essential...

Page 21: ...front panel and remove the Pretreatment module TC001 from it s brackets and disconnect the elbow fitting at each end 9 Place the cartridge is a safe location for disposal later 10 On touch The consum...

Page 22: ...nected touch The Pretreatment Module is flushed for 300 seconds 5 minutes At the conclusion of the flush the Pretreatment Module replacement is complete 13 Touch to return to the main menu 14 Replace...

Page 23: ...tenance 15 Replace Endure Purification Pack Follow this procedure to replace the Endure Purification Pack TC002 1 If you have not already done so remove the left front panel 2 On select 3 Enter the Us...

Page 24: ...e pressure gauge to verify the system has depressurized NOTE The system does not measure the pressure so it is essential that the user verify that there is zero pressure before continuing 7 When the s...

Page 25: ...low 12 Place the applicable purification pack in its defined location 13 Lift up on the back of the pack to slide the receptacles over the tubes on the back wall 14 Be sure the pack is resting against...

Page 26: ...ation pack following your site requirements for disposal Replace Air Filter on External Storage Tank All tanks use air filter TC005 The air filter connects to the top of the storage tank Follow this p...

Page 27: ...tes View Number of Hours Since Last RO Clean Follow this procedure 1 On or select 2 On Last RO Clean shows the total number of hours Required Equipment You will need this equipment for this process Pr...

Page 28: ...30 seconds as shown below 4 When the pressure screen shown below appears observe the pressure gauge to verify the system has depressurized NOTE The system does not measure the pressure so it is essent...

Page 29: ...ule TC001 from it s brackets and disconnect the elbow fitting at each end 7 Place the cartridge is a safe location It will be reconnected after the cleaning process 8 On touch 9 When appears connect S...

Page 30: ...m depressurizes for 30 seconds as shown below 11 When the pressure screen shown below appears observe the pressure gauge to verify the system has depressurized NOTE The system does not measure the pre...

Page 31: ...rine tablets in tightly closed container and away from heat combustible materials and hot surfaces Wash hands thoroughly after handling Precautionary Statements Contact with skin or eyes may cause sev...

Page 32: ...hown below 16 When the pressure screen shown below appears observe the pressure gauge to verify the system has depressurized NOTE The system does not measure the pressure so it is essential that the u...

Page 33: ...20 When appears reconnect the Pretreatment Module TC001 21 When the Pretreatment Module is reconnected touch The Pretreatment Module is flushed for 300 seconds 5 minutes At the conclusion of the flus...

Page 34: ...Geno Range RO DI Water System Series 5 Operation Manual Avidity Science LLC 26 Routine Maintenance D O M I N I Q U E D U T S C H E R S A S...

Page 35: ...UV Lamp External Storage Tank 7120 3500 102 TC005 Air Filter External Storage Tank 1 7120 0100 205 TC086 Chlorine Tablets CT 1 1 Table 5 Replacement parts US Part Number European Part Number Descript...

Page 36: ...4000 210 SENS00008 Pressure Sensor 1 7120 2200 121 DISP00006 Display Touchscreen 1 1600 3000 002 TUBE00002 Tube 1 4 inch white 1 metre section 2 1600 3000 001 TUBE00001 Tube 5 16 inch white 1 metre se...

Page 37: ...k with pump EU 7120 2200 128 LEAD00001 Power Cord for 100 litre Tank with pump UK 7120 2200 127 LEAD00004 Power Cord for 100 litre Tank with pump US 7120 2200 131 LEAD00005 Power Cord for 100 litre Ta...

Page 38: ...Geno Range RO DI Water System Series 5 Operation Manual Avidity Science LLC 30 Consumables and Replacement Parts This page left intentionally blank D O M I N I Q U E D U T S C H E R S A S...

Reviews: