10-6
System Failures
LOSS OF KEYBOARD
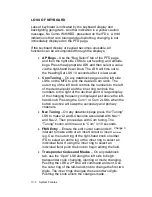
Loss of keyboard is indicated by the keyboard display and
backlighting going dark. Another indication is a yellow caution
message, No Comm With KBD, presented on the IFDs. A third
indication is that com tuning and autopilot bug changing is not
immediately displayed on the PFD page.
If the keyboard display or keypad becomes unusable, all
functions can be accomplished through the displays.
•
AP Bugs
– Use the “Bug Select” tab of the PFD page
and then the right side LSKs to set heading, and altitude
bugs. Press the appropriate LSK and then select a value
via the right-hand bezel knob. The LSK will time out to
the Heading Set LSK 10 seconds after it is last used.
•
Com Tuning
– On any datablock page use the left side
LSKs on the MFD to pick the desired Com radio. The
outer ring of the left knob controls the numbers to the left
of the decimal point and the inner ring controls the
numbers to the right of the decimal point. A large display
of the changing frequency is displayed just above the left-
hand knob. Pressing the Com 1 or Com 2 LSKs when the
button is active will swap the secondary and primary
channels.
•
Nav Tuning
– On any datablock page press the “Tuning”
LSK to make L3 and L4 become associated with Nav 1
and Nav 2. Then proceed as with Com tuning. The
“Tuning” button will time out to “Com” in 10 seconds.
•
FMS Entry
– Ensure the edit cursor surrounds the leg of
interest to make edits or an insert cursor to insert a new
leg. Use the outer ring of the right-hand knob on either
IFD to select an entire leg or the inner ring to select an
individual field. If using the inner ring to select an
individual field, push the knob to begin editing the field.
•
Transponder Codes and Modes
– On any datablock
tab, use the “Xpdr” LSK along the left side to begin
transponder code changing, identing or mode changing.
Pushing the LSK a 2
nd
time will command an Ident. Use
the outer ring of the left-hand knob to change the first two
digits. The inner rings changes the second two digits.
Pushing the knob enters the changes made.
Change 3
Summary of Contents for Entegra
Page 1: ......
Page 2: ......
Page 40: ......
Page 48: ......
Page 92: ......
Page 112: ......
Page 116: ......
Page 117: ...System Alerts 9 1 9 System Alerts 9 2 CAS SYSTEM 9 2 MISCOMPARES 9 6 CROSSCHECK MONITOR 9 8 ...
Page 125: ......
Page 136: ......
Page 150: ......
Page 190: ...D 2 Appendix D SYS Pages MAP MAP TAB ...
Page 191: ...Appendix D SYS Pages D 3 MAP SPLIT TAB ...
Page 192: ...D 4 Appendix D SYS Pages MAP CHART TAB ...
Page 193: ...Appendix D SYS Pages D 5 MAP CHART TAB ...
Page 209: ...Appendix D SYS Pages D 21 ...
Page 210: ...D 22 Appendix D SYS Pages SYS ALERT TAB ...
Page 213: ...Appendix D SYS Pages D 25 SYS SETUP TAB ...
Page 214: ...D 26 Appendix D SYS Pages SYS ICE O2 TAB KC 100 ONLY ...
Page 220: ......
Page 224: ......


