Cruise / Enroute 5-11
INSERTING A WAYPOINT
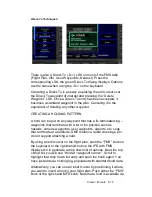
From any tab where the flight plan is displayed (e.g. “FMS” Page
on PFD, “FPL” tab of FMS Page on MFD), a new waypoint can be
inserted. Use the “FMS” knob on the keyboard to scroll up or
down the flight plan until the insert cursor is positioned where the
new waypoint is to be inserted. At that point, push the “FMS”
knob to generate a drop-down box from the cursor position. Scroll
up and down in that drop down box until you find the option you
seek. Press the knob again on the desired option. If it involves
typing in a waypoint identifier, start typing on the keypad. Note
that Geofill™ will typically find the correct waypoint by the 2
nd
character.
DELETING A WAYPOINT
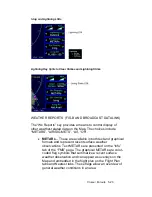
From any tab where the flight plan is capable of being edited, use
the “FMS” knob on the keyboard to scroll up and down the flight
plan until the edit cursor surrounds the waypoint to be deleted.
Press the “CLR” button on the keypad to delete the waypoint.
Continue pressing the “CLR” button and it will walk up the flight
plan deleting waypoints as you go. The other method is to press
the Delete Waypoint LSK on the Flight Plan Tab.
EDITING A WAYPOINT
From any tab where the flight plan is displayed, the “FMS” knob
on the keyboard can be used to edit an existing waypoint. Using
the MFD knob scroll up or down the flight plan until an edit cursor
surrounds the waypoint to be modified. Use the inner ring of that
knob to highlight one of the editable fields with reverse video.
Pushing the knob provides a drop down box from which the
changes can be made.
ADDING A VERTICAL CONSTRAINT
On virtually every waypoint, you can elect to assign a vertical
constraint (e.g. cross the waypoint at or above a specific altitude,
be at a specific altitude a specified distance prior to the waypoint,
etc). This is accomplished by ensuring an edit cursor surrounds
the waypoint of interest. Use the inner ring of the MFD knob or
the “FMS” knob of the keyboard to highlight one of the vertical
constraint fields of the flight plan leg. Push the knob and enter the
desired value.
Summary of Contents for Entegra
Page 1: ......
Page 2: ......
Page 40: ......
Page 48: ......
Page 92: ......
Page 112: ......
Page 116: ......
Page 117: ...System Alerts 9 1 9 System Alerts 9 2 CAS SYSTEM 9 2 MISCOMPARES 9 6 CROSSCHECK MONITOR 9 8 ...
Page 125: ......
Page 136: ......
Page 150: ......
Page 190: ...D 2 Appendix D SYS Pages MAP MAP TAB ...
Page 191: ...Appendix D SYS Pages D 3 MAP SPLIT TAB ...
Page 192: ...D 4 Appendix D SYS Pages MAP CHART TAB ...
Page 193: ...Appendix D SYS Pages D 5 MAP CHART TAB ...
Page 209: ...Appendix D SYS Pages D 21 ...
Page 210: ...D 22 Appendix D SYS Pages SYS ALERT TAB ...
Page 213: ...Appendix D SYS Pages D 25 SYS SETUP TAB ...
Page 214: ...D 26 Appendix D SYS Pages SYS ICE O2 TAB KC 100 ONLY ...
Page 220: ......
Page 224: ......


