21
SETTING
THE
TEMPERATURE
CONTROL
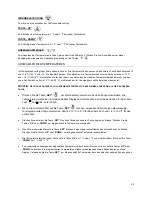
The wine cooler has two temperature zones. The temperature settings of LOWER ZONE and UPPER ZONE are adjustable
with the range 5º-22ºC/40º-72ºF. It is recommended to set the LOWER ZONE to 13-22ºC / 55-72ºF which is ideal for storing
white and red wines and the UPPER ZONE to 5-13ºC / 40-55ºF which is ideal for storing sparkling and white wines.
NOTE:
The temperature set for the LOWER ZONE must always be the same or higher than that in the
UPPER ZONE.
•
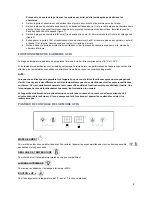
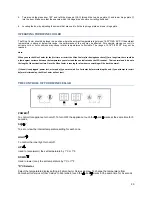
You can touch
SET
mark to set the internal temperature for each zone. The degrees indicators will appear in
the display window marked for UPPER ZONE and for LOWER ZONE.
•
When you touch the
SET
mark for the first time, the LED readouts will show the original temperature sets previously (the
preset temperature at the factory for UPPER ZONE is 10ºC / 50ºF and for LOWER ZONE is 16ºC / 60ºF).
•
Touch
the
SET
mark once. The left LED indicator for UPPER ZONE will flash. Then touch the
UP
or
DOWN
marks to set
the desired temperature.
•
When you touch the
SET
mark again, the right LED indicator for LOWER ZONE will flash. Then proceed to touch the
UP
or
DOWN
marks to set the desired temperature for the LOWER ZONE.
•
The temperature will increase 1°C or 1ºF if you touch the
UP
mark once, or the temperature will decrease 1°C or 1ºF if
you touch the
DOWN
mark once.
•
To view the “set” temperature in either zone at any time, touch the
UP
or
DOWN
mark, the “set” temperature will
temporarily “flash” in the LED display for 5 seconds. You can touch the
SET
mark to view the temperature setting from one
zone to the second zone.
TEMPERATURE
DISPLAY
During normal operation, the temperature display on the control panel shows the temperature inside the appliance.
The
temperature display will flash
if:
- A different temperature is being set,
- The temperature in the zone deviates by more than 5°C from the set temperature. The temperature display flashing
ensures that the temperature can not rise or fall un-noticed and impair the wine.
SHELVES
•
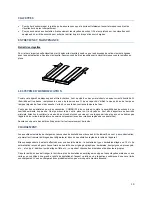
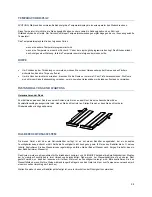
To prevent damaging the door gasket, make sure the door is fully open when pulling shelves out of the rail compartment.
•
For easy access to the bottles stored, pull the shelves out approximately 1/3. The shelves are designed with an
emergency stop to prevent them being removed too far when loaded.
CARE
AND
MAINTENANCE
Removing Shelves
•
To remove any of the shelves from the rail compartment, move the shelf to the position where the notch of wooden shelf
is exactly under the plastic post and lift the wooden shelf. Please ensure these are replaced when the shelf is put back.

