45
•
Do not extract flavors.
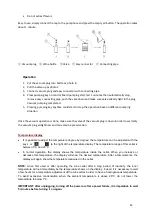
Easy to use, simply connect the cap to the pump hose and press the empty air button. The operation takes
about 1 minute.
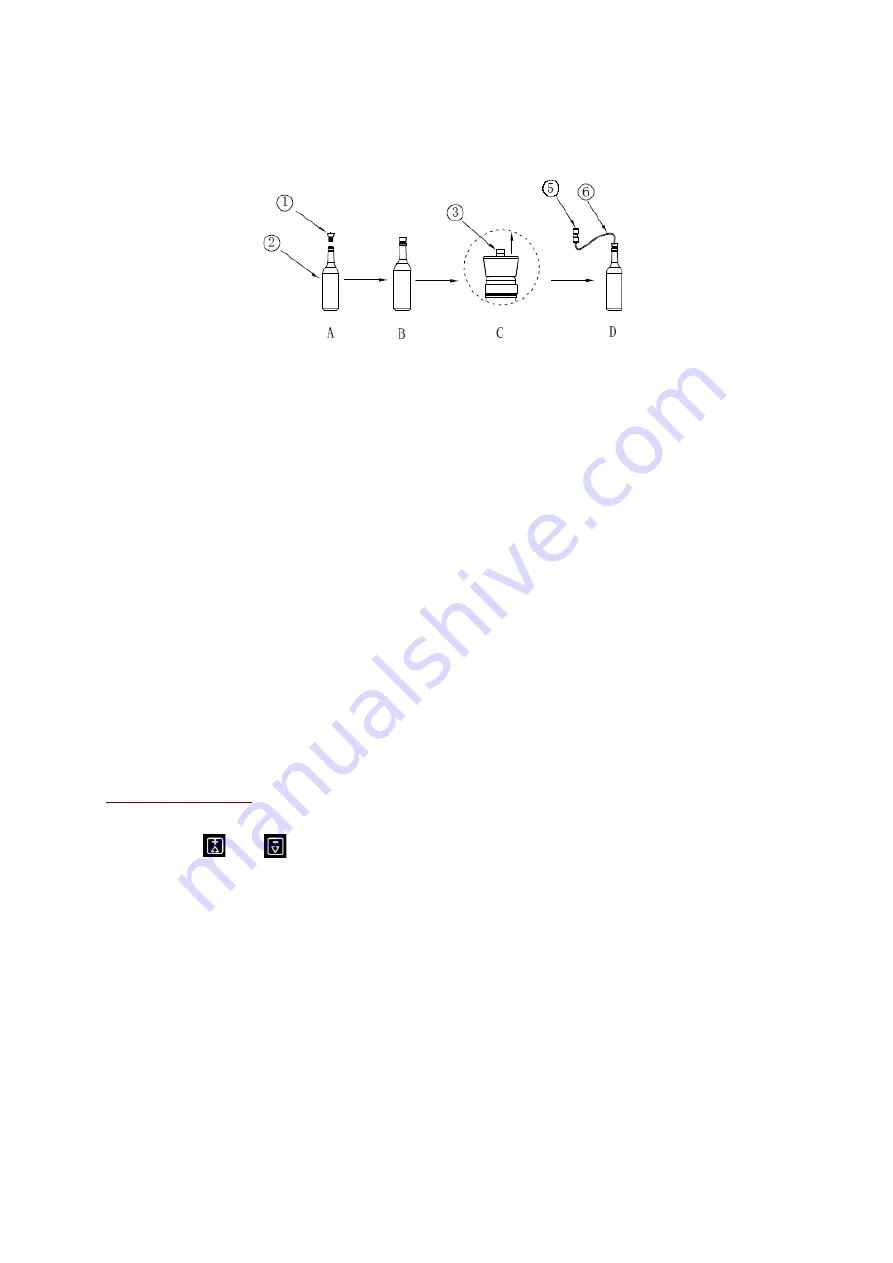
①
Vacuum plug
②
Wine bottle
③
Valve
⑤
Easy connector
⑥
Connecting pipe
Operation
1.
Put the vacuum plug into bottle as photo B
2.
Pull the valve up as photo C
3.
Connect vacuum plug and easy connector with connecting pipe
4.
Press pumping key on control board pumping start, last 1 minutes then automatically stop,
remove easy connecting pipe, push the vale down and make sure valve already tight in the plug.
Vacuum pumping completed.
5.
Pressing pumping key anytime could start or stop the operation base on different pumping
situation
Once the vacuum operation is done, make sure the valve of the vacuum plug is down in order to warranty
the vacuum plug airtightness and correct wine preservation.
Temperature display
•
It is possible to adjust the temperature degree by degree; the temperature can be adjusted with the
keys or
to the right of the temperature display. The temperature range of this cellar is
between 5°C and 20°C.
•
In normal operation, the display shows the temperature inside the cellar. When you increase or
decrease this temperature, the display will show the desired temperature. After a few moments, the
display will again show the temperature measured in the cellar.
NOTE:
when first used or after operating the wine cellar after a long period of inactivity, the inner
temperature will not immediately be the temperature shows on the display. Indeed, it is necessary to wait
a few hours for a temperature adjustment of the wine cellar in order to have a homogeneous temperature.
To avoid excessive condensation when the ambient temperature is above 28°C, do not lower the
temperature to below 7°C.
IMPORTANT: after unplugging, turning off the power or after a power failure, it is imperative to wait
5 minutes before turning it on again.
Summary of Contents for AVI63CSZA
Page 2: ...2...


