background image

38

Settings

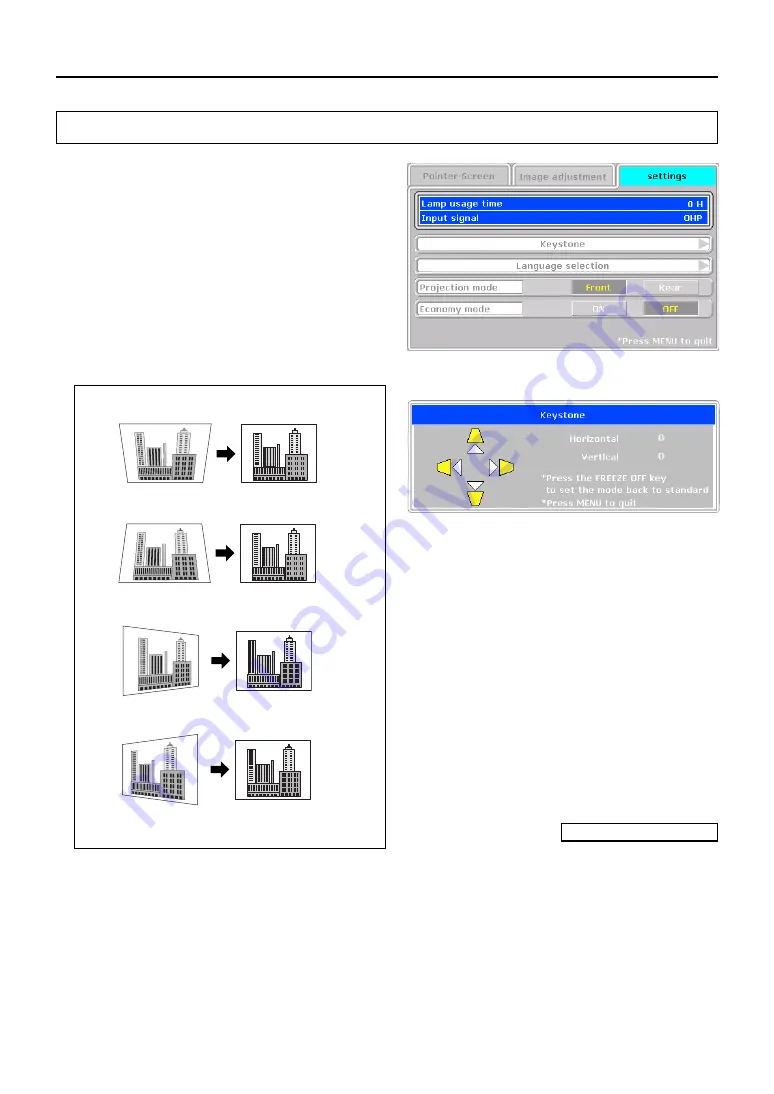
This performs settings related to the projector unit or while

the projector is in use.

 Lamp usage time ........... Displays the usage time of the lamp.

"Replacement of the Lamp Unit" 

 See Page E-42

 Input signal ..................... The name of the currently selected

input is displayed.

Setting Items

 Keystone ........................ Performs keystone correction of the

projection image.

▽ 

▽ 

Press the 

 button to make the top of the projected image

narrower.

Press the 

 button to make the bottom of the projected

image narrower.

NOTE:

• When keystone compensation is performed, the resolution at the edges of the projected image is reduced, making small char-

acters difficult to read. To prevent this, place the projector on as level a surface as possible, and set the Keystone menu to “0” (No

compensation).

• As image processing is performed for keystone compensation, displayed images (characters, etc.) are displayed slightly blurred

when keystone compensation is used compared with when it is not used.

• When displaying an image with VGA resolution less than 640 x 480 pixels with a excessive horizontal keystone compensation

may cause parts of the image to become fuzzy. See page E-19 for more information.

• The degree to which keystone compensation can be adjusted depends on the image signal.

• If the horizontal value is adjusted to its largest (or smallest) the vertical adjustment value can not be moved in the plus direction

when doing keystone compensation.

Continued on the next page

▽ 

Press the 

 button to make the left side of the projected

image narrower.

▽ 

Press the 

 button to make the right side of the projected

image narrower.

A press of the Cancellation button of the projector or re-

mote control will return the settings to "0" (no correction).

Menu Description

Summary of Contents for IP-55E

Page 1: ...A Proposal for New Presentations Intelligent Projector User s Manual iP 55E English Deutsch Fran ais Espa ol Italiano...

Page 2: ...inherent in the design Offers an easy fit when in use or when stored Expressive color pictures High resolution 2 million pixel CCD camera is built in It provides faithful and clear reproduction of the...

Page 3: ...wires or cause fire or electric shock Always hold the plug itself when pulling it out of the power outlet Do not damage the power cable If the power cable is damaged e g the core is exposed or cut co...

Page 4: ...atching the glass surface Take care not to scratch the glass surface of the scanner with hard or pointed objects Scratches on the glass may distort the projected image Battery When inserting battery i...

Page 5: ...t put anything heavy on the projector Do not step on the projector rack or stand Do not hold or hang on the projector Doing so could cause the projector to roll over or break resulting in injury Espec...

Page 6: ...Image E 22 Adjusting the Projection Image E 22 Making Focus Zoom Adjustments E 22 Adjusting the Tilt Slant E 22 Regular Operation E 23 Select the Input E 23 Changing the Orientation of the Projection...

Page 7: ...the Supplied Items and the Names of the Parts Supplied Parts Check Please check that the supplied parts are included Lens cap iP 55E Projector Power cable 3 m Remote control iP 55E User s Manual PC c...

Page 8: ...Lens cap Zoom lever Turn this to adjust the screen size See Page E 22 Projection lens The image is projected from here Be sure to remove the lens cap before projecting Focus adjustment ring Turn this...

Page 9: ...r The projection lamp unit is located inside See Page E 42 Remote control IR sensor Tilt foot Air Vent B Air is discharged from the inside to the outside through this vent Scanner Place documents or p...

Page 10: ...personal computer are output directly See Page E 16 4 USB connector This connector is used for USB connections with a personal computer Please see the iP Viewer Software Program Operating In struction...

Page 11: ...ation of the projection screen See Page E 24 1 POWER Button Switches the power of the projector on or off standby mode Only this button is effective when the projection lamp is off See Page E 21 2 ON...

Page 12: ...e pointer disappear 7 SCROLL Buttons Sets the selection of the item or the adjustment value at the menu screen Moves the zoom position during a zoom dis play Moves the pointer when the pointer is bein...

Page 13: ...rol Do not subject the remote controller to such severe impact as dropping it on the floor Doing so may damage it and cause it to cease functioning Keep the remote sensor away from water Wipe the remo...

Page 14: ...Switch Off the Power See Page E 21 4 Switch on the power of the personal computer or video equipment 5 Properly adjust the projection image to the screen 6 Select the input equipment See Page E 23 7...

Page 15: ...projection im age size adjustment using the zoom lens Setup Location Do not place the projector in locations that will reach high temperatures or low temperatures Operation ambient temperature 0 C 32...

Page 16: ...ng off the display of the notebook computer will result in a proper display The method of switching off the display of the notebook computer will differ depending on the PC manufacturer Please read th...

Page 17: ...connected to a digital output type personal computer Plug and play is not supported y GND u GND i GND o NC 0 GND 1 NC 2 Pull up 5V 3 H SYNC 4 V SYNC 5 Pull up 5V q RED VIDEO w GREEN VIDEO e BLUE VIDEO...

Page 18: ...l computer is correct but the image is not projected properly Please check the functions of the personal computer Even though the LCD screen of the notebook computer is properly displayed the projecte...

Page 19: ...1280 960 85Hz 1280 960 85 9 85 Yes 1280 1024 60Hz 1280 1024 64 0 60 Yes 1280 1024 75Hz 1280 1024 80 0 75 Yes 1280 1024 85Hz 1280 1024 91 1 85 Yes 1600 1200 60Hz 1600 1200 75 0 60 Yes 1600 1200 65Hz 16...

Page 20: ...made S video will be given priority for display When a video signal have a lot of noise the image may be displayed in monochrome Should this occur make a setting with the Video select menu to suit th...

Page 21: ...l 1 Press and hold the POWER button for 1 second or longer Press POWER button again to turn off will appear on the projection screen 2 Press the POWER button one more time The lamp will go off The LAM...

Page 22: ...use the tilt foot to adjust the projector vertically When the image is slanted turn the left or right tilt foot to adjust When there is keystone distortion of the image adjust with Keystone of the men...

Page 23: ...the items on Page E 32 Menu Operation Method and Page E 35 Menu Description for information about operation using the menu OHP PC2 VIDEO PC1 NOTE The input mode at starting time will be the same as it...
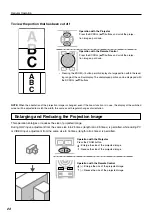
Page 24: ...y of a large portion within the read ing range of the vertical display The undisplayed portion can be displayed with the SCROLL buttons Regular Operation Enlarging and Reducing the Projection Image Th...

Page 25: ...on will toggle the display between a display that matches the horizontal width and a display that matches the vertical width The display will also change in the same way when the zoom magnification ha...

Page 26: ...nal memory as OHP history images for up to 32 pages The projected image will become a frozen fixed display USB Connection Is Not Available Once 32 pages have been stored each time a new image is captu...

Page 27: ...or one of the remote control OHP PC VIDEO buttons during a still image display will cancel the still image of the PC or video deck OHP will retain the still image Regular Operation Cancelling the Stil...

Page 28: ...th a USB cable history images can be transferred to the per sonal computer Please switch the input to PC and press the data TRANSFER button Operation with the Projector Press the TRANSFER button NOTE...

Page 29: ...while the pointer is displayed the pointer will disappear temporarily however it will reappear soon Deleting the Projection Image and Audio This operation deletes the currently projected image and aud...

Page 30: ...projected even when the document cover has not been closed however in this instance unnec essary items may be projected which will make the image difficult to view When paper having luster such as ma...

Page 31: ...put OHP PC VIDEO Common During PC Input During VIDEO Input The adjustment setting items and content will differ depending on the input selection and the permitted information will be displayed on the...

Page 32: ...nu Returns the set or adjusted item to the standard value shipping default condition of our factory Returns to the menu that is one layer higher MENU Button Used to display a menu and to close a menu...

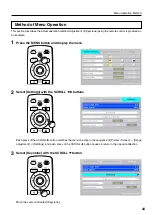
Page 33: ...xample 1 Press the MENU button and display the menu 2 Select Settings with the SCROLL buttons Each press of the SCROLL button switches the menu one step in the sequence of Pointer Screen Image adjustm...

Page 34: ...n will become narrower Scroll button Each press decreases the value of the ver tical orientation The bottom part of the pro jection screen will become narrower Scroll button Each press decreases the v...

Page 35: ...P image re gardless of the input selection Mute mode Sets the image that will be displayed at the time of screen deletion Black Displays an entirely black screen Wallpaper Displays an image that was s...

Page 36: ...nt Adjusts the deepness of the red color in the range of 50 to 50 Blue Blue color adjustment Adjusts the deepness of the blue color in the range of 50 to 50 The following items will be displayed only...

Page 37: ...es the sharpness of the image is enhanced Sub menu Video Select This selects the input signal system Auto detects the signal system automatically NTSC 3 58 NTSC 4 43 SECAM PAL B G H I PAL M PAL N Duri...

Page 38: ...age processing is performed for keystone compensation displayed images characters etc are displayed slightly blurred when keystone compensation is used compared with when it is not used When displayin...

Page 39: ...an French Spanish Italian Chinese and Ko rean Projection mode Selects the projection system of the projector from between Front front projection and Rear rear projec tion Economy mode ON Economy mode...

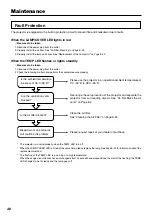
Page 40: ...an operation ambient temperature of 0 C 32 F to 35 C 95 F Are the ventilation vents blocked Rearrange the setup location of the projector and separate the projector from surrounding objects See Do No...

Page 41: ...C 95 F Are the ventilation vents blocked Is the air filter blocked Breakdown of an internal cir cuit could be the problem Please use the projector in an operation ambient tempera ture of 0 C 32 F to...

Page 42: ...exceeds 1400 hours When Lamp usage time on the menu display screen becomes 1400 hours The LAMP COVER LED flashes red The lamp usage time is displayed in the Settings menu and can be checked See Page...

Page 43: ...unit Hold the handle of the lamp unit and pull it up and out 4 Install a new lamp unit Take the lamp unit and press it into the projec tor Tighten the 2 mounting screws of the lamp unit Align the 2 t...

Page 44: ...eparately are sold together with an air filter as a set in a lamp kit therefore please also replace the air filter at the same time as lamp unit replacement See Page E 45 Lamp units can be disposed of...

Page 45: ...r filter should be replaced with a new one when it becomes difficult to clean out the dust 2 3 Install Installation is performed by following the steps for removal in reverse order Press in the air fi...

Page 46: ...onnected input been selected Is the cable of the connected equipment properly connected Have Brightness and Contrast of the Image adjustment menu been set all the way to the minus side Have you checke...

Page 47: ...problem contact the dealer where you bought the product When asking for repair service provide your dealer with the following information Description of the problem as many details as possible Date of...

Page 48: ...CCD camera 288 mm 216 mm 11 3 in 8 5 in Separate Signal System Analog 0 7Vp p 75 Separate composite TTL Level positive negative Sync on green 0 3 Vp p Negative 15 pin Mini D sub 2 ch NTSC PAL SECAM PA...

Reviews: