9
Names and Functions of Each Section
Names and Functions of Each Section
Projector
Document Cover
The pickup section for documents and
printed matter is located under this cover.
See page 29.
Air Vent A2
Air is discharged from the inside to
the outside through this vent.
Air Vent A1 (air filter)
Air is taken in through this vent.
An air filter is provided to prevent
dust from getting inside the
projector.
See page 48.
Adjustment/Operation Panel
Buttons for setting adjustment menus and
operating the projector are located here.
Power ON/STANDBY, input selection,
FREEZE, OHP zoom ratio,
BRIGHTNESS, and other indicator LEDs
are also located here.
See pages 12 and 13.
Air Vent A3
(bottom of main unit)
Air is taken in through this vent.
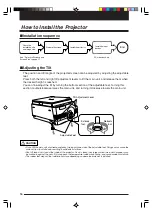
Adjustable Feet
These feet are for adjusting the tilt angle as
well as the left and right balance of the
projected image. Turning them
counterclockwise raises the main unit, and
turning them clockwise lowers the main
unit.
See page 16.
Anti-theft Lock
See the NOTE on the next
page.
Focus Adjustment Section
Turn this to adjust the focus.
See page 27.
Projection Lens
Images are projected through
this lens.
Remote Control
Sensor
Zoom Adjustment Ring
Turn this ring to adjust the
screen size.
See page 26.
Lamp Unit Cover (bottom of main unit)
The projection lamp unit is housed inside this
cover.
See page 46.
Tilt Adjustment Lever
Press this to adjust the
adjustable feet.
See page 16.

