2.3
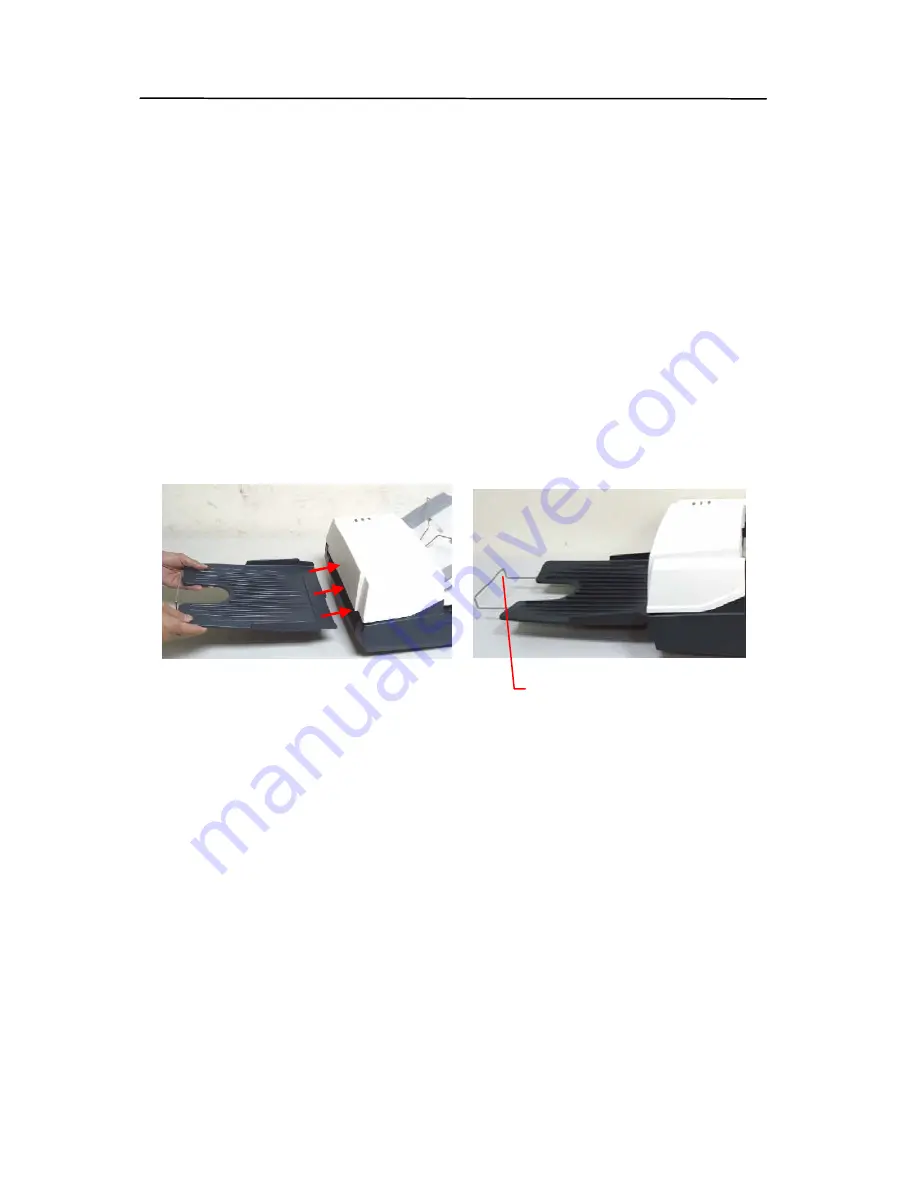
ADF Output Tray
1.
Hold the output paper tray some 30 degrees aslant as
shown in Figure 2-4.
2.
Insert the three protrusions on the output paper tray
to the three slots on the ADF.
3.
Release the paper tray gently. Make sure the tray is
firmly attached to the ADF.
4.
Pull out the output paper tray extension wire to the
desired length.
output
paper tray
extension
Figure 2-4 Install the ADF Output Paper Tray
2-6
Summary of Contents for DF-0902H
Page 1: ...High Speed Document Scanner User s Manual Regulatory model DF 0902H Avision Inc ...
Page 34: ...Error Diffusion Image 4 10 ...
Page 37: ...User s Manual Normal Photo Document Threshold 230 Normal Photo Document Threshold 230 4 13 ...
Page 48: ...The Compression tab dialog box 4 24 ...
Page 50: ...The Color Dropout dialog box 4 26 ...
Page 52: ...Remove Blue Threshold 20 Background 255 Remove Blue Threshold 20 Background Level 210 4 28 ...
Page 63: ...User s Manual Detection Area Outside the Range Box Top 3 Bottom 7 4 39 ...
Page 89: ...6 2 Roller ADF Pad ...
Page 95: ...6 8 5 Reinsert the paper feed roller cover and snap it into place 6 Close the ADF cover ...
Page 104: ...User s Manual 9 3 Normal Rotated 4 60 Transport Timeout 4 33 Ultrasonic Detection 4 40 ...


