Page 2-5
9.)
Remove the folding leg support arms saving the bolts, nuts, and
locking levers.
10.)
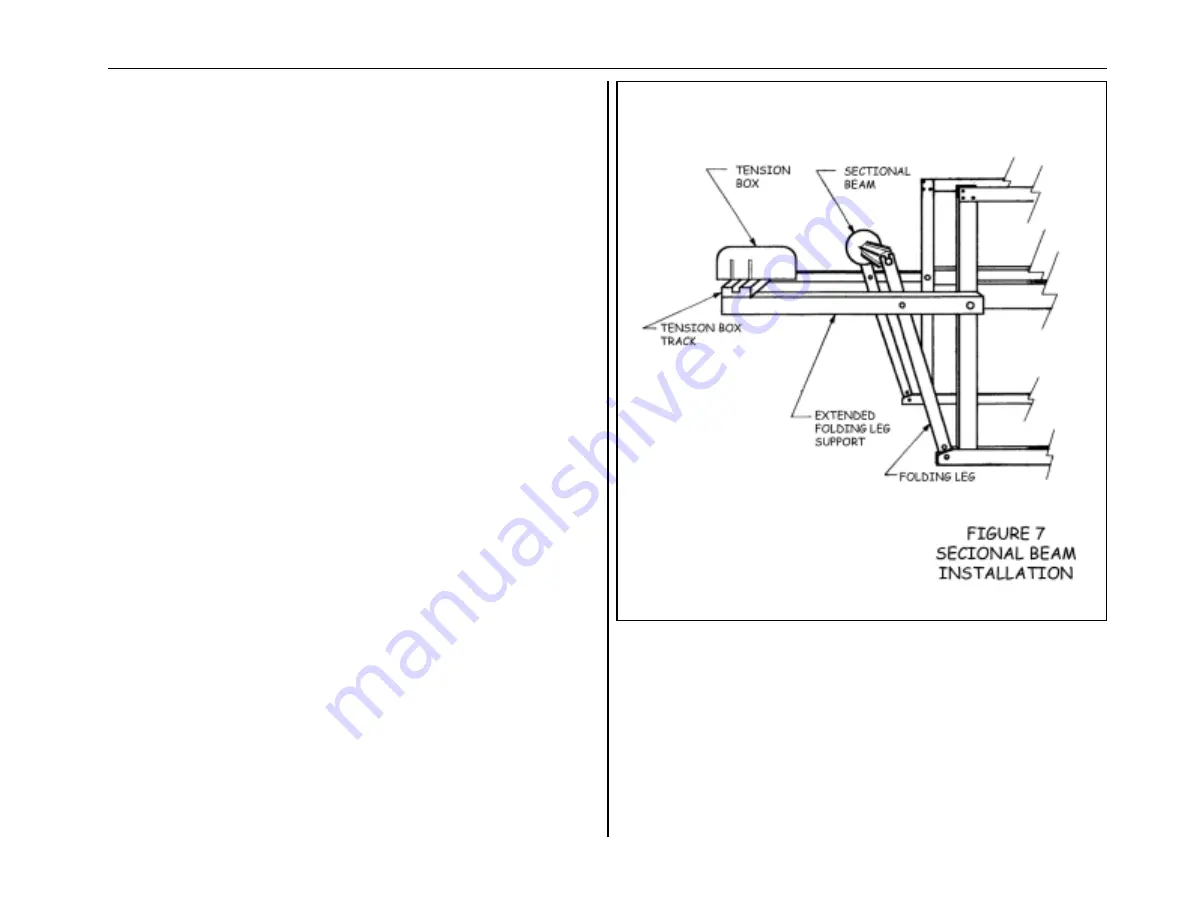
Attach the extended support arms (see Figure 7) and secure to
the folding legs. (Be sure to insert the bolt from the outside,
through the support arms and castle side, then slip the locking
lever on as before. Next, screw on the nut).
11.)
Secure one folding leg to each support arm with the washers and
nuts to the inside.
12.)
Mount your tension box track to the top rear of the support arms
with the lengthwise groove facing up.
13.)
Mount the warp beam crank to the drilled end of the sectional
beam axle (see Figure 6).
14.)
Attach the brake cable. As shown in Figures 4 and 5, attach the
snap at the free end of the warp beam brake cable to the steel
ring at the end of the steel brake lever. To make sure the brake
cable is routed correctly, check it against Figure 5.
15.)
At this point, your loom should be nearly ready for warping.
Make certain that you have unstrapped the beater and harness
frames from their shipping configuration. For looms equipped
with polyester heddles, continue to step #16. If your loom has
metal heddles, skip on to step #17.


