Page 6-3
TYING ONTO THE APRON
Attach the apron to the beam and wind the cloth beam up (so that the
apron is winding up on the top surface of the beam) until the notched end
of the apron is about ten to fifteen inches from the beater (when it is in
its “back” position). Now engage the cloth beam pawl.
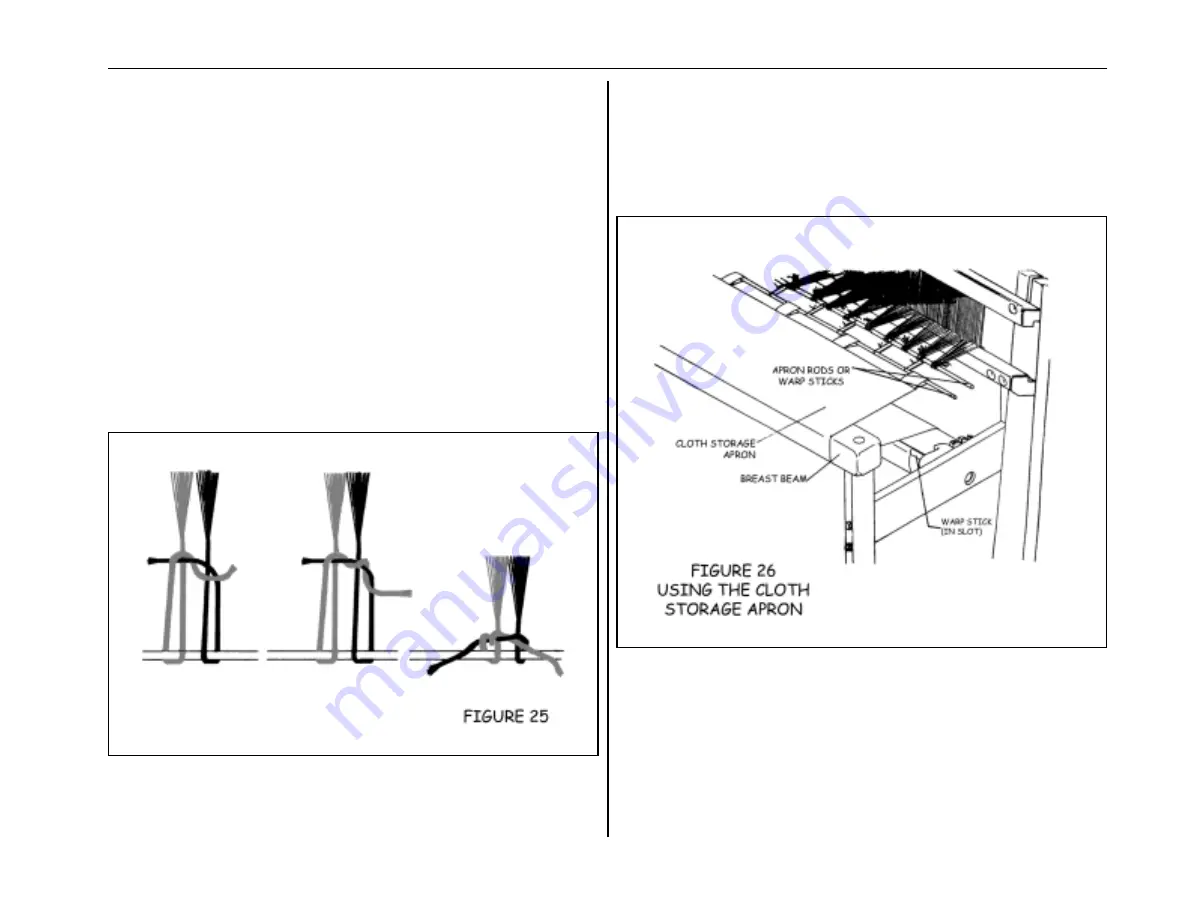
Insert the apron rod into the apron notches. Now tie the ends to the
metal rod. Starting from the middle, bring a first bundle toward you
over the apron rod, then around and under it. Divide it in half and bring
one half up on each side of the bundle. Use the ends to tie a surgeon's
knot. It is the same as the first tie you make tying a shoelace, except you
loop the end twice through. This kind of knot is very good for readjust-
ing the tension.
Start with one section in the middle, then the far right and the far left
outside ones. Work your way in.
By now, the sections that were tied first are quite a bit looser than the
ones tied last. To correct this, you do not need to untie the knots;
simply grasp the ends and pull them away from you, then re-tighten the
knots. Repeat this until all of the sections are at approximately the same
tension.
Now pat the warp between the reed and the apron rod left to right and
right to left. If the warp tension feels even, increase the warp tension by
lifting up on the cloth beam handle until you reach the desired tension.
Now pat the warp again, if it feels even, from left to right and right to
left, continue to the next section. If not, release the warp tension (by
stepping on the brake release pedal) and retighten the loosest sections.


