Using the WDL
Workshop Dobby Loom User’s Manual
Page | 38
Warping Section
W
ARPING
S
ECTION
AVL advocates warping from back to front. We believe that this system
works best with our looms and our warping tools are designed around this
philosophy. If you prefer other warping methods, you will be able to adapt
them to work on your new loom. However, we suggest you study the
following warping techniques and try them out to get the most out of the
Workshop Dobby Loom.
To learn more about your AVL loom and to learn how to get the most out of
it, you may want to take a class at the AVL Weaving School. Complete
information and a current class schedule can be obtained by phoning the
AVL office (1 800 626-9615 or 530 893-4915) or on-line at
http://www.avlusa.com/workshops
.
Tying onto the Warp Beam
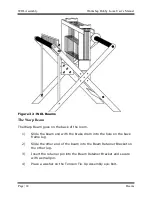
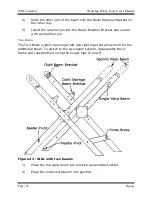
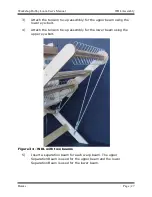
The WDL comes with a sectional beam that can be used as a plain beam
when the metal hoops are removed. You might want to make a permanent
set of Extension Cords to use when warping the Beam. Extension Cords are
also called “apron cords” and serve the same function as the apron on other
Plain Beams. They give you “reach” from the Warp Beam and allow you to
weave every possible inch until the end of the warp touches the last Harness
you are using. Make them out of a strong non-stretchable linen or cotton
cord. You will need to make one Extension Cord for each section of your
warp. When using the beam as a sectional beam, this will be one cord per
section. Using the same number for the sectional beam and the plain beam
will work well. For each Extension Cord:
1)
Measure a piece of cord long enough to reach from the axle of the
Warp Beam, at least one and a half revolutions around the Beam
and then reach to the back most Harness.
2)
When measuring the length of the cords, take into account that,
when the warp is attached to the Extension Cord the knot between
the cord and the warp needs to fall between the Crosspieces of the
Sectional Beam, not on them. This will keep the warp smooth on
the Beam so it doesn’t go over the knots created when attaching
the warp to the cords.
3)
Now double that length and cut it. All Extension Cords should be
exactly the same length, so cut them all at the same time.

