User and Installation Manual -
5
AvMap
Ultra EFIS
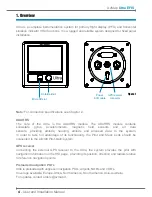
Micro SD card
A microSD card is included in the Ultra box. The microSD card is a blank card without data preloaded.
The microSD card should be used for updating the software and navigation POI’s.
Note:
For more details see Chapter 4.
Rotation knob
The rotor plus centre click allow to switch from one mode to the other and to select different
menu option.
Note:
For more details see Chapter 4 and 5.
2. Installation
The installation procedure is divided in the following steps:
•
Location
•
Mechanical installation
•
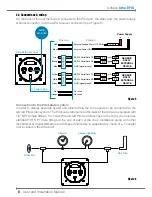
Connections & wiring
2.1 Location
The Ultra is designed to be installed on the aircrafts instrument panel.
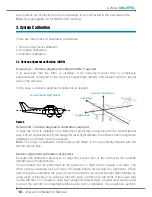
It is assumed that the instrument panel is completely perpendicular to the level and straight
flight attitude.
In case the instrument panel is rotated the simple horizon alignment calibration procedure
is required.
Note:
For calibration see Chapter 3.
IMPORTANT:
The Ultra contains a magnetometer and other precision electrical sensors.
The location selected for installation should be clear of strong magnetic or electromagnetic
disturbances as much as possible. Avoid installing the Ultra near electronic equipment (other
digital EFIS, radios, transponders, etc), AC or variable DC cables, alternators, electrical
motors, ferrous materials, etc. In such cases the proper behaviour of the compass is not
guaranteed (i.e. the compass may be crossed as “out of order” or may give erroneous
indications).
Hint:
use a hand-held compass to verify the magnetic disturbance in the area selected for
installation. If the needle shows relevant changes or unstable indication, the location is not
suitable for installation. Make sure to perform this test with all on-board electronic devices
switched ON.
2.2 Mechanical installation
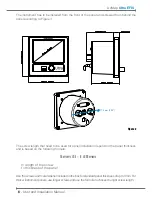
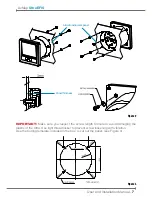
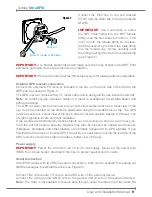
Make sure you have enough space on the front and behind the cockpit panel to install the
Ultra. Check the Ultra measurements on Figure 2.
Ultra is designed to be installed in a standard 3 1/8” (79,5 mm) diameter hole.


