Revision Date: 5/31/2019
27
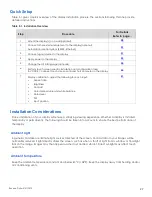
Quick Setup
Table 3-1 gives a quick overview of the display installation process. The sections following this one provide
detailed instructions.
Table 3-1. Installation Overview
Step
Procedure
For Details
Refer to page...
1
Mount the display(s) on a wall (optional)
2
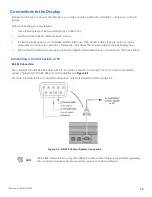
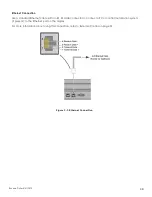
Connect other external equipment to the display (optional):
Automation/control system (RS232, Ethernet)
3
Connect signal sources to the display
4
Apply power to the display
5
Change the OSD language (optional)
6
Perform touch screen-specific installation and configuration tasks
(AVOCOR): Connect touch screen controller host computer to the display
7
Display calibration - adjust the following
for each input
:
Aspect ratio
Brightness
Contrast
Color temperature and white balance
Color level
Tint
Input position
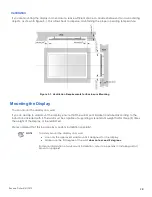
Installation Considerations
Proper installation of your display will ensure a satisfying viewing experience. Whether a display is installed
temporarily or permanently, the following should be taken into account to ensure the best performance of
the display.
Ambient Light
In general, minimise or eliminate light sources directed at the screen. Contrast ratio in your images will be
noticeably reduced if light directly strikes the screen, such as when a shaft of light from a window or floodlight
falls on the image. Images may then appear washed out and less vibrant. Direct sunlight may affect touch
operation.
Ambient Temperature
Keep the ambient temperature constant and below 40°C (104°F). Keep the display away from heating and/or
air conditioning vents.


