Revision Date: 5/31/2019
39
4. Operation
Using the On-Screen Menus
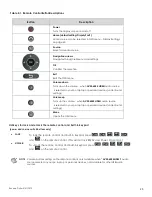
To display the on-screen menus, press MENU on the remote control (Figure 2-3) or built-in keypad (Figure 2-1).
To select a sub-menu, use the and buttons to highlight it. Then, press to enter that sub-menu.
To select a menu item, use the and buttons to highlight it. Then, press or to adjust that setting and
press OK.
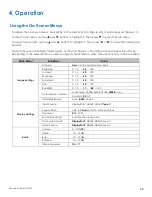
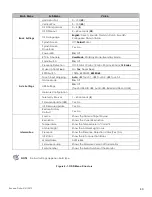
The OSD menus are arranged hierarchically, as shown in Figure 4-1. The default values appear in bold type.
Depending on the selected input source and signal characteristics, some menu options may not be available.
Main Menu
SubMenu
Value
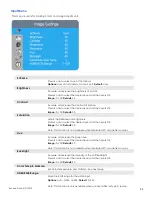
Image Settings
Scheme
User
, Vivid, Cinema, Game, Sport
Brightness
0, 1, 2, ....,
50
, ....100
Contrast
0, 1, 2, ....,
50
, ....100
Sharpness
0, 1, 2, ....,
50
, ....100
Saturation
0, 1, 2, ....,
50
, ....100
Hue
0, 1, 2, ....,
50
, ....100
Backlight
0, 1, 2, ...., 50, ....,
80
, ....100
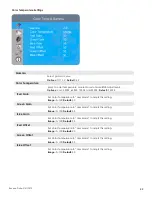
Color Temp & Gamma
Color Temp: 5000K; 6500K; 7500K;
9300K
; User
Gamma:
2.2
;
off
HDMI RGB Range
Auto;
0-255
; 16-235
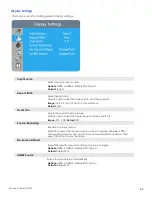
Display Settings
Input Source
DisplayPort1; HDMI2; HDMI3;
Type C
Aspect Ratio
16:9; 4:3;
Auto
; Point To Point; Letterbox
OverScan
0%
~ 10%
Source Renaming
Rename the input source.
No Source Default
DisplayPort1
; HDMI2; HDMI3; Type C
Home Source
DisplayPort1
; HDMI2; HDMI3; Type C
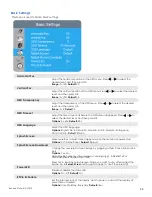
Audio
Volume
0 ~ 100 (
70
)
Treble
-10 ~ 10 (
0
)
Bass
-10 ~ 10 (
0
)
Balance
-10 ~ 10 (
0
)
Internal Speaker
On
; Off

