background image

16

Overlay Settings continued

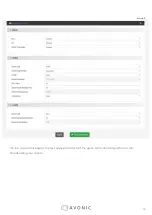
From top to bottom the settings for the text and picture overlay are as follows:
Text Settings:
1 .  

Overlay Mode  


Text only, off

2 . 

Overlay Text   


Fill in the overlay text to be displayed 

3 . 

Overlay Color   


White, Yellow, Green

4 .  

Font Size 


Size of the text shown

5 .  

Location X 


Horizontal location

6 .  

Location Y 


Vertical location

Picture Settings:
1 .  

Picture Switch  


Enable, Disable

2 . 

Location 


Manual, Top Left, Top Center, Top Right, Middle Left, Middle Center,   


Middle  Right, Bottom Left, Bottom Center, Bottom Right

3 . 

Position X 


Horizontal placement of overlay picture

4 . 

Position Y 


Vertical placement of overlay picture

5 .  

Size Width 


Horizontal size of overlay picture 

6 .  

Size Height 


Vertical size of overlay picture

7 . 

Empty uploaded pictures 

Delete all uploaded pictures fomr the gallery below .

* A short guide to create a usable BMP file as transparant overlay using Adobe Photshop:

1 .  

Create workspace roughly 200x200

Select your imagefile with transparent background

3.  

Select your imagefile in the layers windows holding the CTRL button 

4 .  

go to the channel window and save your selection as channel

5 .  

uncheck the colors, leaving only the alpha channel selected

6.  

save the file as 32 bit Bitmap with alpha channel

Summary of Contents for AO-REC200

Page 1: ...Recorder Encoder with HDMI SDI input AV REC200 www avonic eu User Manual Version 1 0...

Page 2: ...tialization of the AV REC200 6 2 1 Operating the webinterface 6 2 2 Live Service Streaming Setting 8 2 2 1 Live Service Streaming Setting Basic options 9 2 2 2 Live Service Streaming Setting Advanced...

Page 3: ...able Use a soft damp cloth to clean the device do not use strong or abrasive detergent to clean that will damage the device If you wish to dispose this product please contact Avonic to obtain info abo...

Page 4: ...LS RTMP RTSP live output and USB SD card recording the AV REC200 enables corporate streaming live streaming to various platforms and live high bitrate full HD 1080P60 recording A simple to use webinte...

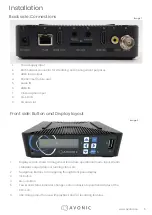
Page 5: ...4 6 7 8 1 2 3 4 5 6 7 8 9 3 1 2 6 4 5 Front side Button and Display layout 1 Display screen shows management IP address operational mode input stream standard output protocol running status etc 2 Nav...

Page 6: ...00 directly to a pc or to a networkswitch 2 The default ip address on which the AV REC200 can be found is 192 168 1 100 Make sure that the ip address of your computer has been put in the same subnet r...

Page 7: ...ogging in you will be directed to the status page of the AV REC200 with a live preview of the incoming video signal on top and information about the incoming signal recording status and streaming stat...

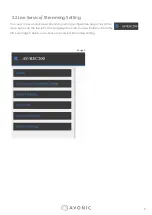
Page 8: ...To access the Live Service and Streaming Setting configuration page click on the menu button on the top left of the webpage the main menu will slide out from the left see image 3 below and choose Liv...

Page 9: ...96kbps audio 4mbps 480p video 128kbps audio 2mbps 480p video 96kbps audio RTMP RTMPS when one of these options is selected you need to authorize the device for the chosen service Facebook or Youtube s...

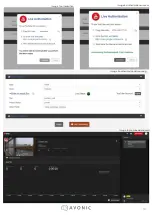
Page 10: ...10 Image 7 authorization Image 8 authorization success Image 9 authorized and streaming Image 10 youtube dashboard...

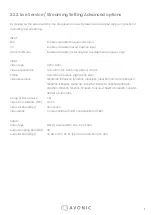
Page 11: ...ain Baseline High H 265 Main Video Resolution 1920x1080 1680x1200 1600x900 1440x1050 1440x900 1360x768 1280x1024 1280x720 1280x800 1280x768 1024x768 1024x576 960x540 850x480 800x600 720x576 720x540 72...

Page 12: ...12 The last step on this page is to press Apply and after that the green Start streaming button to start broadcasting your stream Image 11...

Page 13: ...whether or not a SD card is inserted 3 Storage Device Select either USB or SD to record 4 Record File Format ts mp4 mov 5 Record Name name the recorded file 6 Record Mode Loop Size Time 7 Record Time...

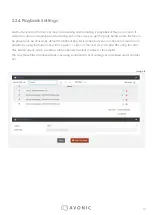
Page 14: ...e chosen By default the Default play list is active but you can choose to create more playlists by using the folder icon with the green sign in it The next step is to add files using the add files but...

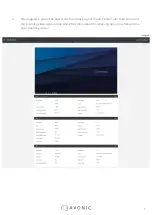
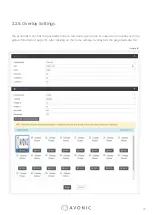
Page 15: ...00 has the possibility to put a text and or picture on its output as an overlay over the picture bottom of page 16 After clicking on the menu settings Overlay tab the page looks like this 2 2 5 Overla...

Page 16: ...ottom Right 3 Position X Horizontal placement of overlay picture 4 Position Y Vertical placement of overlay picture 5 Size Width Horizontal size of overlay picture 6 Size Height Vertical size of overl...

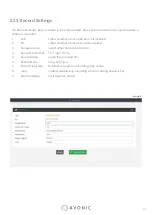
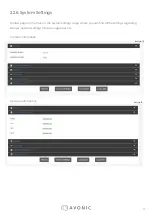
Page 17: ...on the menu is the System Settings page where you can find all the settings regarding licenses network settings firmware upgrades etc 1 Version information 2 License information 2 2 6 System Settings...

Page 18: ...18 3 Network Settings 4 System operation Upgrade import or export license if available Import or export a configuration file Image 17 Image 18...

Page 19: ...19 5 Other Operation Reboot Restore Factory Settings Export logfile and Clear all logs Image 19...

Page 20: ...t dry microfibre cloth to clean If the recorder is very dirty clean it with diluted neuter detergent Do not use any type of solvents which may damage the surface Turn the recorder off and on again and...

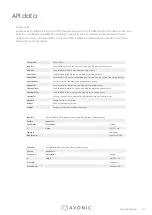
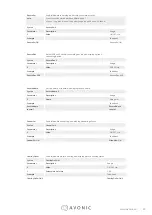
Page 21: ...of overlay text and display content of overlay text Network Display status of network Reboot Reboot the running system System Display system information of product Commands Commands should be sent us...

Page 22: ...Value USB SD sta Example Feedback RecordDev USB RecordDev USB RecordName Set the name of record and display record name Syntax RecordName X Parameter Description Range X Name String sta Example Feedba...

Page 23: ...ion Range X Status sta Example Feedback Network sta IP 192 168 1 100 Gateway 192 168 1 1 NetMask 255 255 255 0 DNS1Addr 8 8 8 8 DNS2Addr 192 168 1 1 MACAddr 98 14 xx xx xx xx Reboot Reboot the running...

Reviews: