www.avonic.eu
10
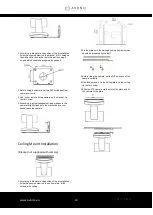
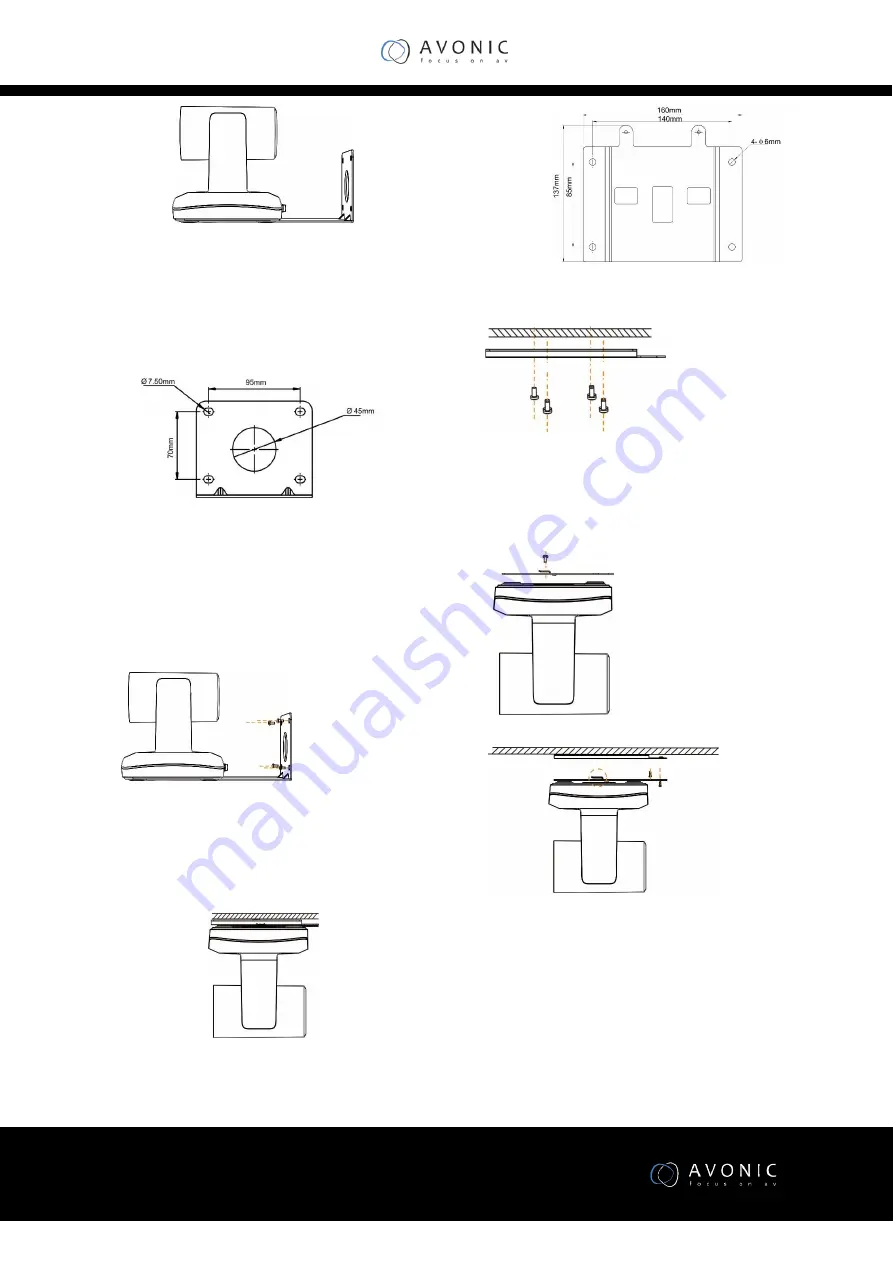
1. According to diameter and position of the 4 installation
holes (As shown below) on the bracket, drill 4 holes on
the wall and fix the bracket onto the wall by using 4
screws which should be prepared by yourself.
1. Before fixing the camera, set the DIP switches of the
camera correctly.
2. Use inch screws to fix the camera on the bracket, fix
the limit screw
3. According to actual requirement, and make sure the
camera is tightly fixed onto the bracket before your
hands leave the camera.
Ceiling Mount Installation
(Bracket not supplied with camera)
1. According to diameter and position of the 4 installation
holes (As shown below) on the bottom plate, drill 4
holes on the ceiling.
2. Fix the plate onto the ceiling by using 4 screws which
should be prepared by yourself.
3. Before fixing the camera, set the DIP switches of the
camera correctly.
4. Use inch screws to fix the bottom plate on the ceiling,
fix the limit screw
5. Slide the PTZ camera via the slot of the plate and fix
the camera to the plate.
Summary of Contents for CM55-VCU
Page 4: ...www avonic eu 4 Troubleshooting 22...
Page 11: ...www avonic eu 11...
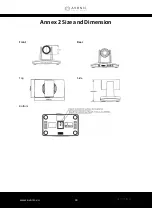
Page 18: ...www avonic eu 18 Annex 2 Size and Dimension Front Rear Top Side Bottom...
Page 21: ...www avonic eu 21 reserve reserve reserve DIP No 8 Mounting Type ON Ceiling OFF Desktop...
Page 23: ...www avonic eu 23...
Page 24: ...www avonic eu 24 CM55 VCUSB3 0 MAN2 2 Avonic 2017...


