background image

9

TECHNICAL SPECIFICATIONS

TECHNICAL FEATURES HC37.53

Supply:

Mod. E

230 VAC / 50Hz.

Mod. US

115 VAC / 60Hz.

Power:

10 W

Starter (push-button not included):

Instantaneous / 1 A to 230 VAC

Noise level:

< 15 dB

False ceiling minimum height:

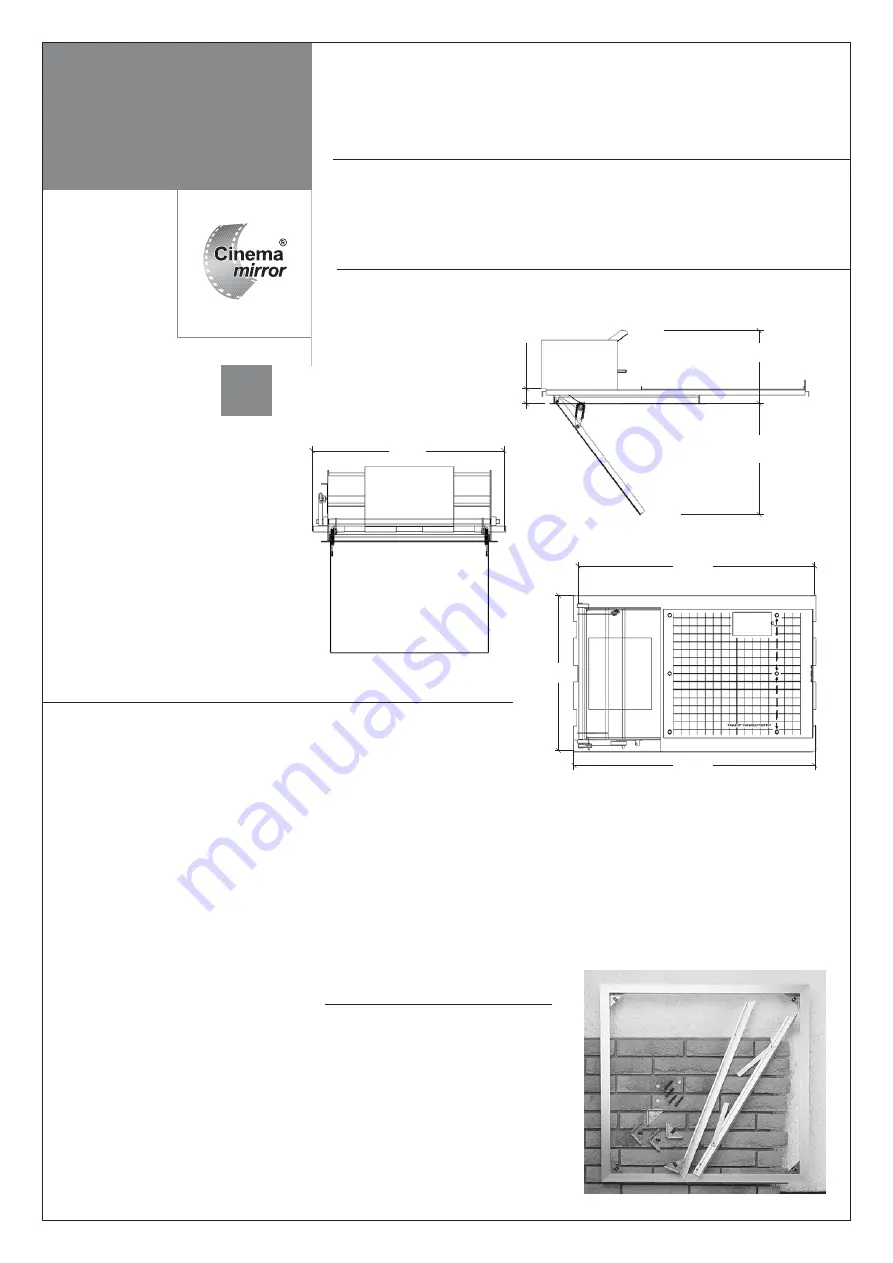
From 170 mm to 217 mm

Maximum height of floodgate slope:

265 mm

Mirror opening time:

30”

Motor reducer:

500/1

Minimum dimension of the hole to embed: 

335 mm x 335 mm

Mechanical Dimensions (mm):

LONG

 625 / 

WIDE

 395 / 

HIGH

 170

Packed Dimensions (mm):

LONG

 680 / 

WIDE

 460 / 

HIGH

 240

Max. weight admitted:

5,0 Kg

Net weight:

8.2 Kg

Gross weight with packing:

12.3 Kg

ACTIVE

MIRROR

DOOR

OPTIONAL ACCESSORIES

Frame Kit HC 635

Four aluminium sections, squares, screws, etc..
to build a frame that replace the technical
ceiling outlines (Armstrong or similar), and
gives a professional ending and support in
plaster ceilngs, wood ceilings, etc… With a
professional ending as support on your

Cinema Mirror

 installations.

Inside Dimensions:

597x597 mm

Outside Dimensions:

640x640 mm

395

610

625

395

max 217 / min 170

max 265

max 43

min 24

( d i m e n s i o n s   i n   m m ) .

INSTRUCTIONS AND TIPS FOR THE INSTALLATION
OF THE HC 37.53 MODEL CINEMA MIRROR

GENERAL RECOMMENDATIONS FOR ASSEMBLY AND INSTALLATION

Summary of Contents for Cinema Mirror HC 37.53

Page 1: ...he image thanks to its two mirrors without causing the trapeze effect on the image For that Cinema Mirror and the screen must be in the same plane or with a difference from 0 to 12 cm Fig 1 Always be...

Page 2: ...n the ceiling at a distance so that it is not within arms reach of a person Secured above the site itself or on a metallic bracket strong enoughtoholdtheweightoftheequipment plustheimageprojector Thee...

Page 3: ...veroftheactivelens 3 3 Protectioncaseoftheelectricequipment 4 Protectioncaseofthemechanic equipment 5 Connectionofthepushing buttonand connection230VAC 6 Passivelens 7 Activelens 8 Closingconnectingro...

Page 4: ...dproceed asfollows Place the projector on a table Connect the electric current to the projector and switch on the projection equipment Leave it for a few minutes so that the projector reaches itsmaxim...

Page 5: ...ivemirrorupsothattheangles between the mirror and the template coincideinparallel Fastenstronglythescrews oftheaxisofthepassivemirror UNPACKAGING AND PROCESS OF ASEMBLY OpentheboxoftheCinemaMirrorandt...

Page 6: ...decorative finish of the ceiling Insert the Cinema Mirror with the optic mirrorsfacingtheplacewheretheprojection screenwillbeinstalled Placethechassisonto the T shapedprofilesofthetechnicalroof ortheH...

Page 7: ...he rubber that blocks the door duringthetransport ifyouhavenotalready made it before triggering the movement pushbuttonoftheactivemirrorgate make sure that there are no obstacles hindering itsopeningo...

Page 8: ...mulationwiththeoriginalceiling ATTENTION PLEASE The motor system activedoor isnotpreparedtocarryheavy loads as for example parts in wood cork glass etc thatonemight wanttoinstallon thedoorasdecoration...

Page 9: ...weightadmitted 5 0Kg Netweight 8 2Kg Grossweightwithpacking 12 3Kg ACTIVE MIRROR DOOR OPTIONALACCESSORIES FrameKitHC635 Fouraluminiumsections squares screws etc to build a frame that replace the techn...

Reviews: