PAGE 42
O p e r a t i o n v i a W i n d o w s P C S o f t w a r e
The standard
IP Address
of the system is
192.168.96.66
and the standard
control
Port 10000
.
To enable a connection with your PC, you have to be in the same subnet.
Therefore, please enter an IP address from your subnet
1
or activate
DHCP
(Dynamic Host Configuration Protocol) to get the correct settings automati-
cally (if a DHCP Server is available) (see CHAPTER 5.6.4.2.8, Page 70).
To change the IP address on the front keypad of the system, press the softkey
Menu
→
system settings
→
LAN settings
→
IP Address
. Enter now the
desired IP address. When entering it manually you have to be sure that the IP
address is not already used by another unit
2
.
Please enter the correct IP address of the system under
IP Address
and the
correct Port under
Port
.
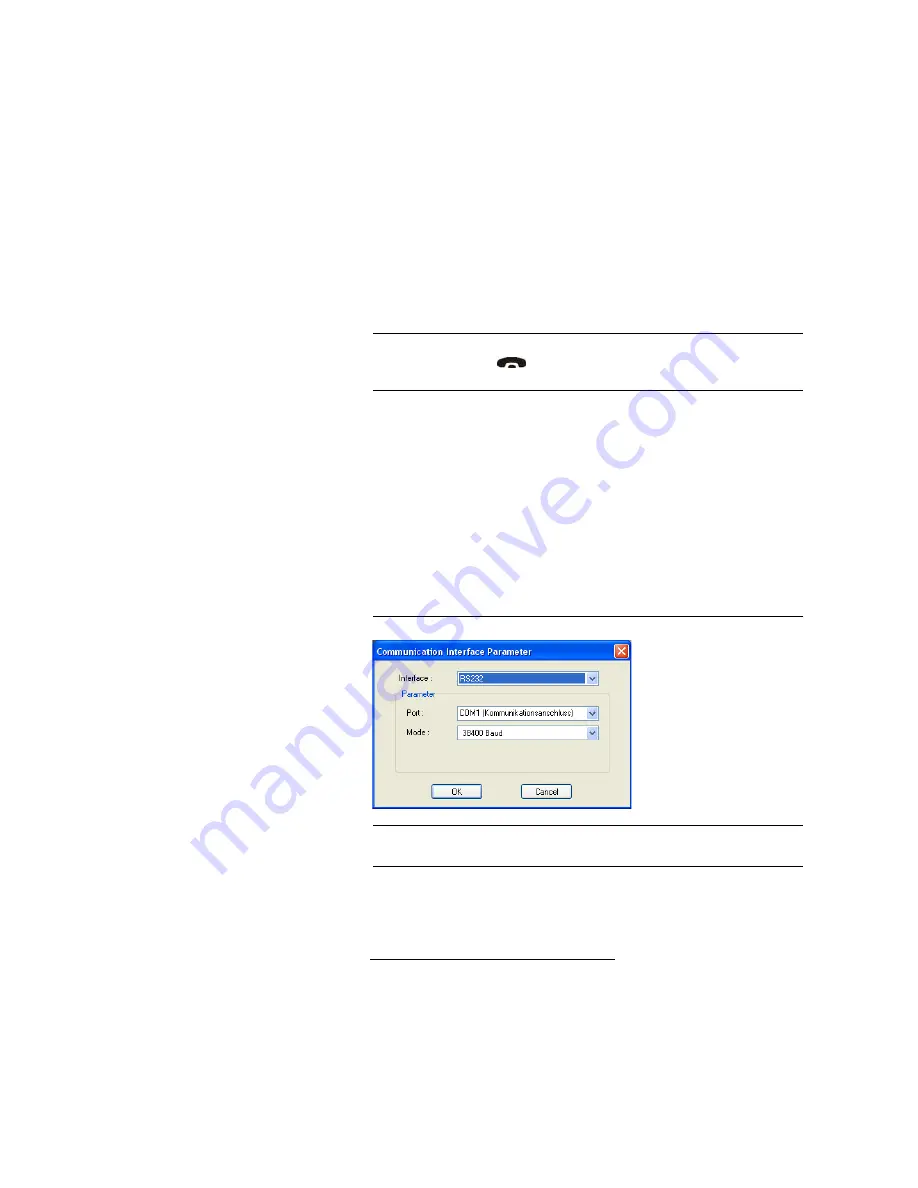
RS232
If you want to use the RS232 interface, connect the serial RS232 interface via a
1:1 connecting cable with your PC. Please select now under
Interface
→
RS232
. Under
Parameter
→
Port
the COM Port of your PC, which is con-
nected with the system and under
Mode
the desired Baud rate must be con-
figured.
If the selected COM port is already busy, an error message will be displayed.
Then select another open COM port. The default Baud rate in the system is
38400 Baud
.
FIG. 24
RS232 PARAMETER.
1
In this way you can find out your own subnet: Under Windows XP click on Start
→
Execute ....
Enter cmd in the command line. An entry window is displayed in which you must enter ipconfig.
Your IP address is displayed (e.g. 192.168.12.35). Your subnet is accordingly 192.168.12.xxx.
2
To check if the IP address is already used in the network, follow the instructions: Under Windows
XP click on Start
→
Execute .... Enter cmd in the command line. An entry window is displayed
in which you must enter ping xxx.xxx.xxx.xxx. Whereas xxx stands for the IP address you want
to check.
TIP
The currently allocated IP address of the system can be displayed by pressing
t
he telephone button
on the front keypad of the system twice if cur-
rently no Audio connection is established
.
NOTE
Instead of the PC you can also connect the optional MAGIC T6 Keypad to the
serial interface of the system (see CHAPTER 7, Page 97).
Summary of Contents for MAGIC TH6 POTS
Page 1: ...MAGIC TH6 POTS MAGIC TH6 ISDN Telephone Hybrids Hardware Software Manual...
Page 2: ......
Page 4: ......
Page 6: ......
Page 16: ...PAGE 16 C o n s t r u c t i o n...
Page 24: ...PAGE 24 P u t t i n g t h e s y s t e m i n t o o p e r a t i o n...
Page 28: ...PAGE 28 F r o n t D i s p l a y a n d K e y p a d O p e r a t i o n...
Page 92: ...PAGE 92 O p e r a t i o n v i a W i n d o w s P C S o f t w a r e...
Page 102: ...PAGE 102 O p t i o n M A G I C T H 6 K e y p a d...
Page 104: ...PAGE 104 M e n u S t r u c t u r e A1 1 System Settings POTS t b d...
Page 105: ...PAGE 105 M e n u S t r u c t u r e A1 2 System Settings ISDN t b d...
Page 106: ...PAGE 106 M e n u S t r u c t u r e A1 3 System Settings VoIP See next page...
Page 107: ...PAGE 107 M e n u S t r u c t u r e...
Page 108: ...PAGE 108 M e n u S t r u c t u r e A1 4 Operation Settings All Operating Modes...
Page 109: ...PAGE 109 M e n u S t r u c t u r e A1 5 Presets All Operating Modes...
Page 110: ...PAGE 110 M e n u S t r u c t u r e A1 6 Status information All Operating Modes...
Page 111: ...PAGE 111 M e n u S t r u c t u r e A1 7 Login All Operating Modes...
Page 112: ...PAGE 112 M e n u S t r u c t u r e...
Page 134: ...PAGE 134 I n d e x...
Page 136: ......


