49
Step7: (Optional) If your camera has LED indicators, make sure both indicators are always on, and select
Yes
to
continue.
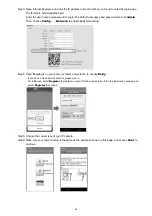
Step8: Enter or scan the MAC address.
- Find the address sticker on the camera starting with
000E53
, and type it manually. Or,
- Access the camera as shown in Step3 to scan the QR code.
Then, choose
Apply
to continue.
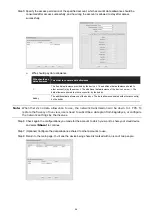
Step9: Check if the preview is what you need. Then, give a name to your camera if needed, or simply keep the
default name,
IPCAM
.
Then, choose
Apply
to continue.
Step10: Follow the on-screen instruction to complete the setup, and see if this device is added successfully to the
address book as a cloud device.
At the same time, you’ll be prompted to confirm if you want to remove the default user name and password.
When the default user name and password are removed, you can
ONLY
use the user name and password of
the cloud service to access this recorder locally and remotely. If you forget the user name and password of the
cloud service, you could only reset the device and do all configurations again.
When the default user name and password are kept, other people might be able to access this device if they
know the default user name and password of this device.
Confirm if you want to keep the default account to continue, and return to the address book. You’ll see the
newly-added device in the address with a cloud icon on it.
Note:
Enable Push Video if needed (Guard on).
Step11: Click the newly-added device and see if you could access successfully.


