10
Step6: In “Network”, select the network type based on your network environment (Static IP /
PPPoE / DHCP), and key in the information needed.
Note:
This camera doesn’t support POE router or hub.
For Static IP:
a) Enter the information of “Server IP”, “Gateway” and “Net Mask” obtained from your ISP (Internet
Service Provider).
b) Enter the port number. The valid number ranges from 1 to 9999. The default value is 80. Typically, the
TCP port used by HTTP is 80. However in some cases, it is better to change this port number for
added flexibility or security.
For PPPOE:
a) Enter the user name and password obtained from your ISP.
b) Continue the DDNS setting as instructed in “3.2.2 DDNS Setting” when you’re prompted to restart the
web browser in Step8.
For DHCP:
a) Before selecting this option, you need to finish the DHCP router settings first.
Get a router and connect it to the Internet via your PC (with Static IP or PPPoE setting). There are
different setting methods for different routers. Please refer to their respective user manuals.
b) Continue the DDNS setting as instructed in “3.2.2 DDNS Setting” when you’re prompted to restart the
web browser in Step8.
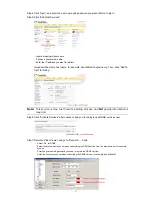
Step7: In “Apply”, all the changes are listed. Check if the changes are correct.
‧
If yes, click “Save”.
‧
If no, click “Back” to where the changes should be made for modification, and click “Save” to apply the
settings.
Note:
You can also change the settings in the system configuration page via your web
browser later. For details, please refer to “5. ACCESSING THE CAMERA VIA WEB
BROWSER” in the user manual.


