20
A2.3 Activate & Connect
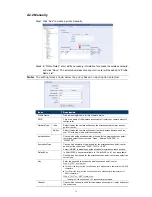
Step1: Select the profile you just added in “Profile Name List”, and check the network type of the
profile.
Then, in “Wireless Settings”, check the IP address of your camera (Server IP) as
described below and note it down.
When the network type is “Infrastructure”
“Static IP” or “DHCP” is available to choose depending on your needs.
To select “Static IP”, disable the DHCP server of the router first.
When “Static IP” is selected, change the server IP in “Server IP” when necessary or keep the default
value “192.168.2.10”.
When “DHCP” is selected, click “Reload” and check the IP address assigned in “Server IP”.
When the network type is “Ad-hoc”
Select “Static IP” only, and change the server IP in “Server IP” when necessary or keep the default
value “192.168.2.10”.
Then, click “Save” to save the setting.
Step2: Double-click the profile to activate it, and make sure the signal strength is fine.
Step3: Remove the network cable between your camera and your PC, and connect your PC to
the wireless network the same as the one your camera is configured.
Step4: Enter the IP address you just note down in the URL address box of the web browser, and
see if you can access the camera successfully.


