28
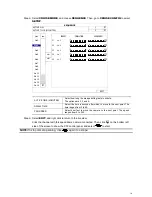
Then, follow the steps below:
Step1: Connect this camera to a PC or laptop directly, and go to its login page to log in.
Note:
To know how to connect the camera to a PC or laptop directly, please check “4 Modem / Hub
+ Modem” in “
ADVANCED NETWORK SETUP
”.
Step2: Log into the camera, and go to “Config”
“Network”
“IEEE 802.1X”. Enable this function,
and select the EAP method you want to use.
Note:
This camera supports “EAP-PEAP”, “EAP-TLS” and “EAP-TTLS”.
Step3: Enter the identity and password you get from the Certificate Authority, and select the EAPOL
version used in your switch.
Step4: Upload the certificate(s) issued by the Certificate Authority, and save.
Step5: Disconnect the camera from your PC or laptop, and connect it to the switch in the LAN
environment you want to use IEEE 802.1x, and the camera will start the authentication later.
Network Share
This function is used to assign a location in the LAN environment to save the snapshot of events.
Note:
This function is available only for Windows operating systems.
The information you set here will be applied when “Network Share” is selected in “Trigger”
→
“Snapshot”
→
“Storage Mode”.
To use this function, make sure:
A PC is installed in the same LAN environment as this camera, and you know the IP address of the
PC.
A PC account is created as “Administrator” with a user name and password.
A folder in the PC is opened as shared to the user account you assigned.
Note:
Please check “PREREQUISITES FOR NETWORK SHARE” at page 50 for more details.
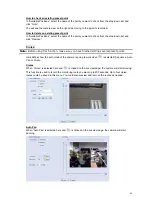
Enable this function, and enter the address of the PC, the folder being shared, and the user name and
password to access the PC. If the information is all correct, you'll see a check in the “Status” column,
and you’re ready to go to “Trigger”
→
“Snapshot” for further configurations.

