


Panel Descriptions
How to Connect Your Monitor
1. Connecting using HDA - Analogue HD Video.
Connect your video cable with a BNC connector to the HDA1/HDA2 connector on the
rear of the monitor, and the other end to your camera.
Connect power to the monitor and video source, and switch on. Using the SOURCE
button, press repeatedly until either ‘HDA1/HDA2’ (depending on the connection
used) is on the display at the top of the monitor's screen.
2. Connecting using HDMI
Connect one end of a HDMI cable to the HDMI connector on the rear of the monitor,
and the other to the HDMI out connector on the PC/DVR. This connection will support
video transmission. Connect power to the monitor and video source, and switch on.
Using the SOURCE button, press repeatedly until ‘HDMI’ is on the display at the top
of the monitor's screen.
* Ensure all cable connections are secure - tighten all cable screws. Movement and
vibration may dislodge cables that are improperly connected. Route all wiring and
cabling away from any heat sources and sharp metal edges to avoid damage.
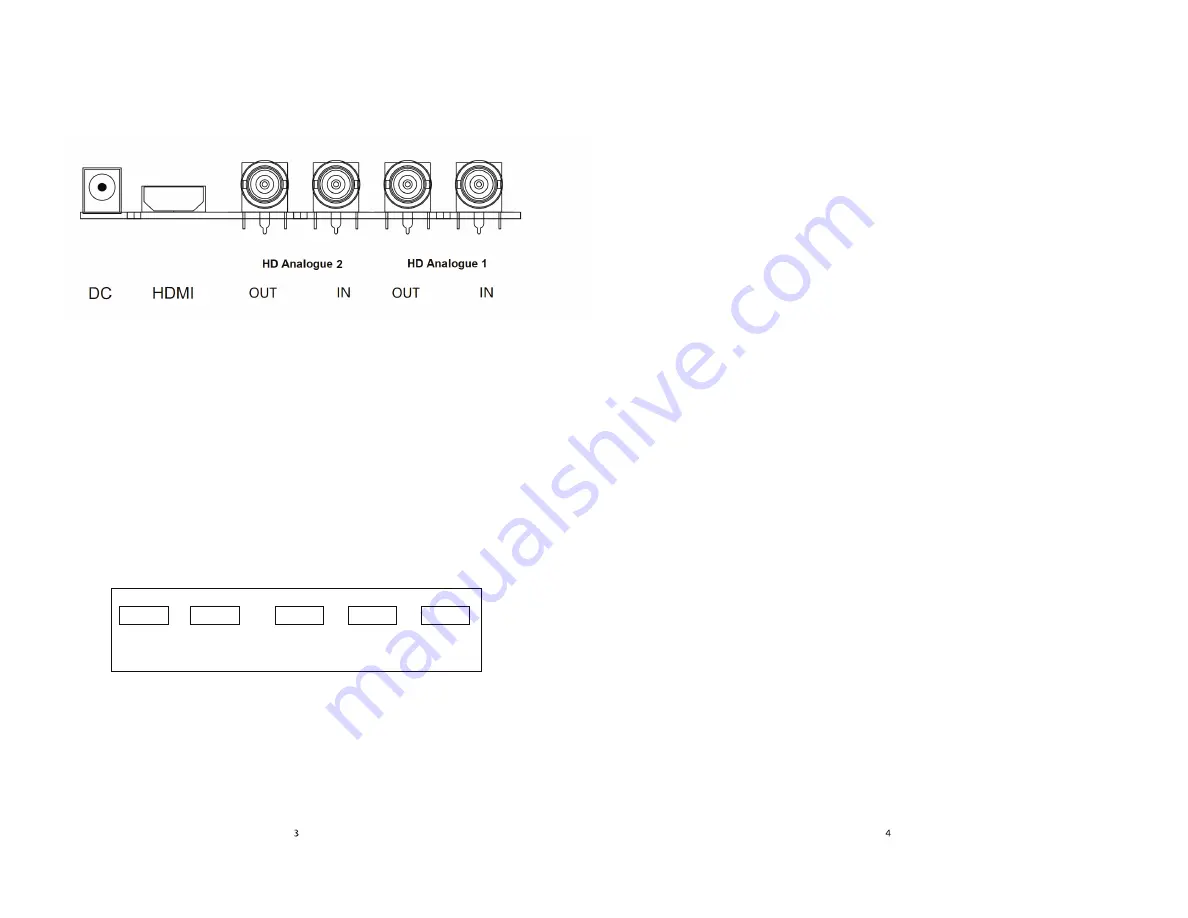
Rear Interface
DC:
Only use the 12v DC power supply included with the monitor.
HDMI:
High-Definition Multimedia Interface connections.
HD Analogue 1 IN:
BNC connections support CVBS/CVI/TVI/AHD.
HD Analogue 1 OUT:
Video loop though output.
HDA1 Does not support coaxial control protocol.
HD Analogue 2 IN:
BNC connections support CVBS/CVI/TVI/AHD.
HD Analogue 2 OUT:
Video loop though output.
HDA2 Support for coaxial control protocol.
Control Layout
The control buttons are located on the right hand rear side of the monitor.
SOURCE MENU - + POWER
SOURCE:
Select input mode – HDA1,HDA2, HDMI.
MENU:
Access the On Screen Display (OSD) menu.
+
and
−
:
Controls left/right, Change the size of the value.
POWER:
Turns the monitor on or off.
Basic On-Screen Display Setup
1. To access the OSD Menu press ‘MENU’.
2. Use the ‘SOURCE’ buttons to select the required menu item, then press the
‘
+
’ or ‘
−
’button to select the Sub menu.
3. Continue to use the ‘SOURCE’ button to highlight the required field, then press
‘
+
’ or ‘
−
’ to adjust the setting
4. Press the ‘MENU’ button to return to previous menu.
5. Press the ‘MENU’ button again to exit the OSD Menu completely.


