background image

AUX INPUT  

A 3.5mm stereo AUX IN socket is located at the back of the unit, analogue audio sound signals from other sources 
can be input to the system through this socket.
1.      Use a cable with 3.5mm jack to connect the input to other analogue audio source.
2.      Press the 

AUX

 button to select the AUX input function, the display will show “AUX”. Also the clock will be 

displayed.

3.      Adjust the volume control for your desired sound output level. 

TIMER FUNCTION


You can set the timer to switch on the system at your desired time, listening mode and volume level. 
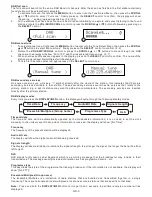
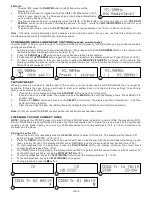
1.          Press  the 

TIMER

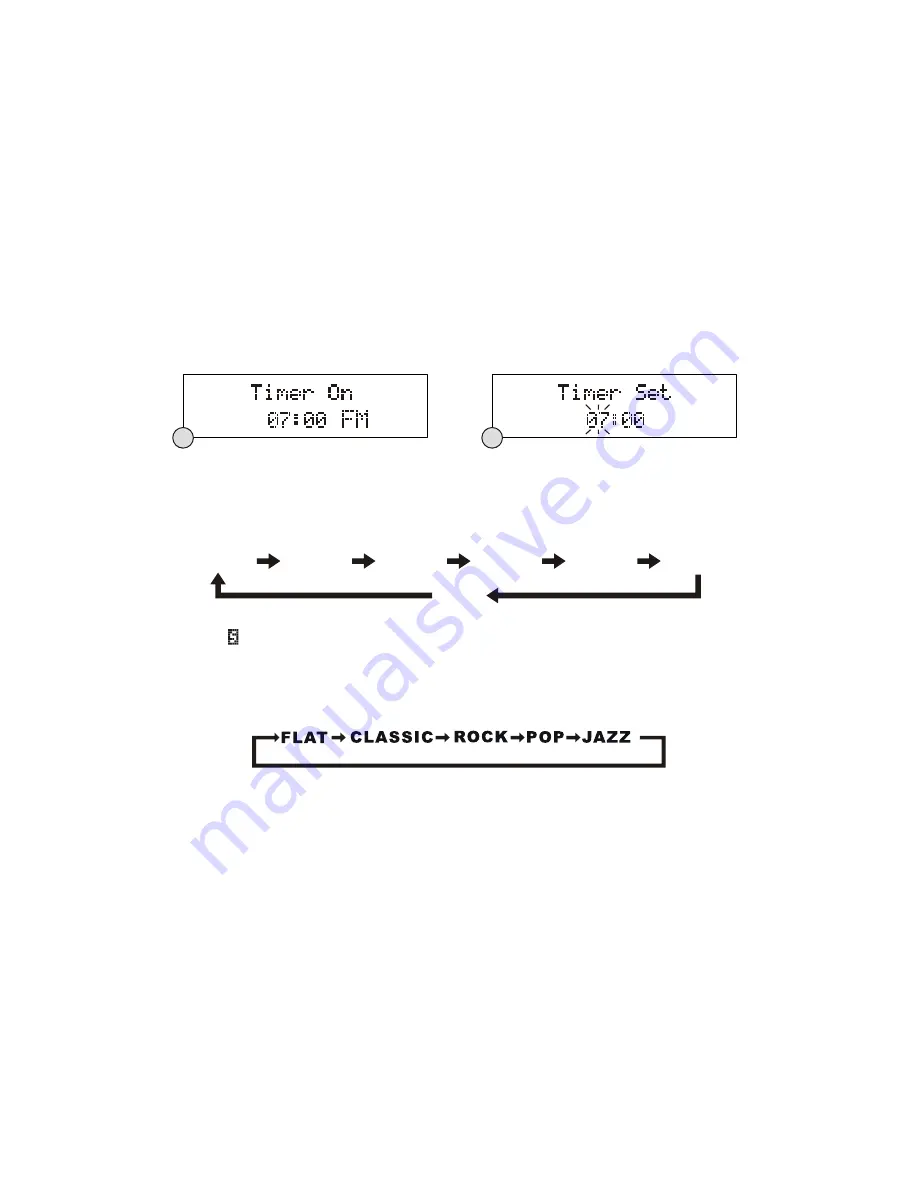
  button  to  toggle  the  timer  function  between  “On”  and  “Off”,  the  display  will  show  the  timer 

on/off status, the timer on mode and the time.(F.22)

2.

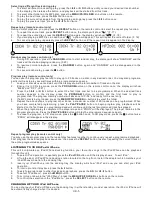
To set the timer, ensure the unit is in standby mode, press and hold the 

TIMER

 button until the display shows 

“Timer Set” and the “hour” digit of the timer clock in the display will flash. (F.23) 

3.

Press the 

 or 

 buttons to set the time and press the 

TIMER

 button to confirm, first set the hour and then the 

minute.

4.

When the time to switch on the system is set, you will continue to go for the timer on mode selection, press the 

 or 

 buttons to select the mode - FM/DAB/CD/iPod, then press the 

TIMER 

button to confirm and the timer 

on mode is set.

5.

The display will show the volume level and flash, press the 

 or 

 buttons to select the timer on volume level, 

then press the 

TIMER 

button to confirm and the timer setting is now completed.

SLEEP FUNCTION

This function allows you to program the system to switch off itself after a set period of time.  
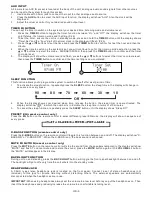
1.      To activate the sleep function, repeatedly press the 

SLEEP

 button, the sleep time in the display will change in 

sequence on every press:  

2.        When  the  display  shows  your  desired  sleep  time,  release  the  button,  the  sleep  timer  is  now  activated.  The 

display will show “     # ” in which the number is to indicate the sleep time in terms of x10 minutes. 

3.

To cancel the sleep function, repeatedly press the 

SLEEP

 button until the display shows “Sleep Off”.


PRESET EQ (remote control only)

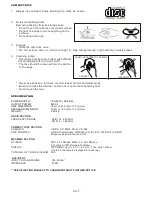
Press the 

EQ

 button on the remote control to select different preset EQ mode, the display will show in sequence of 

every press:

X-BASS FUNCTION (remote control only)

Press the 

X-BASS

 button on the remote control will toggle this function between on and off. The display will show “X-

BASS ON” or “X-BASS OFF”. When the X-BASS is on, the bass sound is enhanced. 

MUTE FUNCTION (remote control only)

Press the 

MUTE

 button on the remote control will stop the sound from the speakers temporarily,


the display will show 

“MUTE” and flash. To cancel mute and restore the sound, press the 

MUTE

 button again or the

 /-

 button, 

the “MUTE” will disappear in the display. 
 

BACKLIGHT FUNCTION


During unit on and standby, press the 

BACKLIGHT

 button will toggle the front panel backlight between on and off. 

The backlight will go to off every time the unit enters into the standby mode.

HEADPHONE JACK

A  3.5mm  type  stereo  headphone  jack  is  located  on  the  front  panel.  Connect  a  set  of  stereo  headphones  (not 
included)  to  this  jack  for  private  listening  without  disturbing  others.  The  external  speakers  are  automatically 
disconnected when the headphones are in use.

IMPORTANT:

 When using headphones always set the volume to a low level before you put the headphones on. Then 

insert the headphones and gradually increase the volume to a comfortable listening level.

UK-6

90   

80   

70   

60   

30   

10  

Off

F22

F23

Summary of Contents for NE-3277

Page 1: ...User Manual NE 3277 Integrated DAB DAB FM CD MP3 Micro System w Universal iPod iPhone Docking Station NE 3277 Integrated DAB DAB FM CD MP3 Micro System w Universal iPod iPhone Docking Station ...

Page 2: ... contact the help line before you return this product back to the place of purchase Contact our Toll Free Warranty Support Help Line 1300 366 144 Email warrantyhelp awa com au Visit our web site for FAQ s or request for service www awa com au ...

Page 3: ...efer all servicing to qualified service personnel TO REDUCE THE RISK OF ELECTRIC SHOCK DO NOT REMOVE COVER OR BACK NO USER SERVICEABLE PARTS INSIDE REFER SERVICING TO QUALIFIED SERVICE PERSONNEL Conductor dangerous voltage that may be of sufficient magnitude to constitute a risk of electric shock to persons is present within this product s enclosure The owner s manual contains important operating ...

Page 4: ...nchronise to the current local time you must leave it one DAB station for a short period Manual clock setting is not PUTTING THE BATTERY INTO THE REMOTE CONTROL UNIT UK 2 11 AUX BUTTON 12 SCROLL BUTTON 13 PLAY PAUSE BUTTON 14 MENU PS FOLDER BUTTON 15 STOP MENU BUTTON 16 RANDOM BUTTON 17 BACKLIGHT BUTTON 18 DISPLAY INFO BUTTON 19 EQ BUTTON 20 VOLUME BUTTON I FEATURES AND CONTROLS 1 2 Place the batt...

Page 5: ...ary services contain extra services that relate to the primary station E g a sports station may want to add extra commentaries The secondary services are inserted directly after the primary station DAB display modes Every time you press the DISPLAY INFO button the display will cycle through the following display modes Time and date The time and date will be automatically updated by the broadcasted...

Page 6: ...m back to its original factory settings to perform a factory reset please do the following 1 Connect the unit to mains and press the STANDBY button once to turn the unit on 2 Ensure the unit is in DAB mode then press and hold the MENU button until the display shows Press SELECT to confirm reset 3 Release the MENU button and press on the SELECT control once the display will show Restarting and then...

Page 7: ...s programmed The program memory number will advance to P 02 and ready for the next entry 4 If a MP3 disc is being loaded press the MENU PS FOLDER buttons to select the folder 5 Repeat the above steps to program other tracks a maximum number of 20 tracks can be programmed When you have completed programming press the PLAY PAUSE button to begin program play playback will be started on the first trac...

Page 8: ...y press the SLEEP button the sleep time in the display will change in sequence on every press 2 When the display shows your desired sleep time release the button the sleep timer is now activated The display will show in which the number is to indicate the sleep time in terms of x10 minutes 3 To cancel the sleep function repeatedly press the SLEEP button until the display shows Sleep Off PRESET EQ ...

Page 9: ...OF TRACKS ALBUM 999 AUX INPUT INPUT VOLTAGE RANGE 350 500mV IMPEDANCE 47KΩ 1 Always use compact discs bearing the mark as shown 2 Notes on handling discs Removing the disc from its storage case Do not touch the reflective recorded surface Do not stick paper or write anything on the surface Do not bend the disc 3 Storage Store the disc in its case Do not expose discs to direct sunlight or high temp...

Page 10: ...e in respect of service outside the authorised AWA Service Centre nor pick up and delivery cost incurred Service calls arising from failure to correctly operate the product or to observe noted instructions or repair which reveals the product is in normal working order Cabinet parts user replacement batteries or leads unless the defective items are reported at the time of purchase C Service calls o...

Reviews: