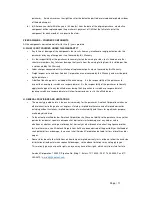
Page | 13
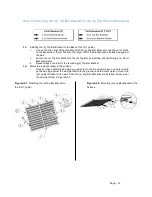
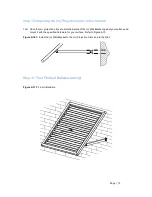
Step 8: Attaching the (m) Projection Arms to the (d1/d2) Left/Right Frame
8a)
Attaching the (m) Projection Arms to the (d1) Left Frame, (d2) Right Frame, and (e2) Center
Middle Support
i.
Flip the awning back over to view the backside of the awning (Refer to Figure A1.1)
ii.
Line up the four holes on the plate of the (n) Frame/Wall Bracket, to the four holes on the
back of the (d1) Left Frame, (d2) Right Frame, and (e2) Center Middle Support.
iii.
Tighten the (x) Short Bracket Screws into each hole to fasten the (n) Frame/Wall Brackets.
iv.
Attach one side of the (m) Projection Arms to the larger holes on the installed (n)
Frame/Wall Bracket. Feed the (r) Bolt through the holes and tighten it with the (t) nut.
8b)
Repeat steps i) through iv) for the other (m) Projection arms.
i.
Install the last two (n) Frame/Wall Brackets to the ends of the (m) Projection Arms
ii.
Line up the hole at the end of 1-(m) Projection arm with the holes of 1-(n) Frame/Wall
Bracket and thread 1-(r) Bolt through. Tighten with 1-(t) Nut.
iii.
Repeat this step for the other projection arms.
Figure A8.1:
Attaching (m) Projection Arms to the
(
d1) Left Frame, (d2) Right Frame, and (e2) Center
Middle Support
Summary of Contents for BAHAMA
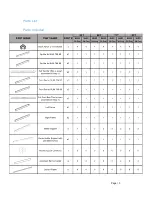
Page 3: ...Page 3 Parts List Parts Included ...
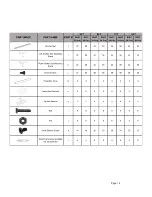
Page 4: ...Page 4 ...


