Page | 14
Step 9: Attaching the (q) Top Bar Bracket to the (b) Top Bar and Mounting
9a)
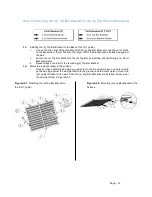
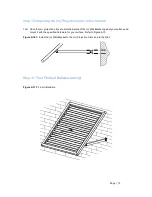
Installing the (q) Top Bar Bracket to the Back of the (b) Top Bar
i.
Line up the two holes of the smaller half of the (q) Top Bar Bracket to one the set of holes
on the back side of the (b) Top Bar. The larger half of the bracket will be installed up against
the wall.
ii.
Secure the (q) Top Bar Bracket to the (b) Top Bar by inserting and tightening 2-(x) Short
Bracket Screws.
iii.
Repeat steps a) and b) for the remaining (q) Top Bar Bracket
9b)
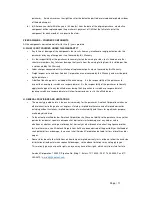
Mount the top bar bracket to the surface
i.
Once you have determined where you want to mount the awning, have one person hold
up the awning against the wall (parallel with the ground) and the other person mount the
(q) Top Bar Bracket to the wall. Once the (q) Top Bar Brackets are installed, slowly lower
the awning. (Refer to Figure A9.1)
Figure A9.1:
Attaching the (q) Top Bar Bracket to
the (b3) Top Bar
Figure A9.2:
Mounting (q) Top Bar Bracket to the
Surface
Summary of Contents for BAHAMA
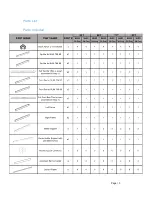
Page 3: ...Page 3 Parts List Parts Included ...
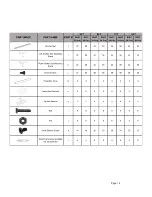
Page 4: ...Page 4 ...


