AWS Storage Gateway User Guide
Using Your Tape Gateway
Topics
•
Configuring Quest NetVault Backup to Work with VTL Devices (p. 113)
•
Backing Up Data to a Tape in the Quest NetVault Backup (p. 114)
•
Archiving a Tape by Using the Quest NetVault Backup (p. 114)
•
Restoring Data from a Tape Archived in Quest NetVault Backup (p. 115)
Configuring Quest NetVault Backup to Work with VTL Devices
After you have connected the virtual tape library (VTL) devices to the Windows client, you configure
Quest NetVault Backup to recognize your devices. For information about how to connect VTL devices to
the Windows client, see
Connecting Your VTL Devices (p. 84)
.
The Quest NetVault Backup application doesn't automatically recognize tape gateway devices. You must
manually add the devices to expose them to the Quest NetVault Backup application and then discover
the VTL devices.
Adding VTL Devices
To add the VTL devices
1. In Quest NetVault Backup, choose
Manage Devices
in the
Configuration
tab.
2. On the Manage Devices page, choose
Add Devices
.
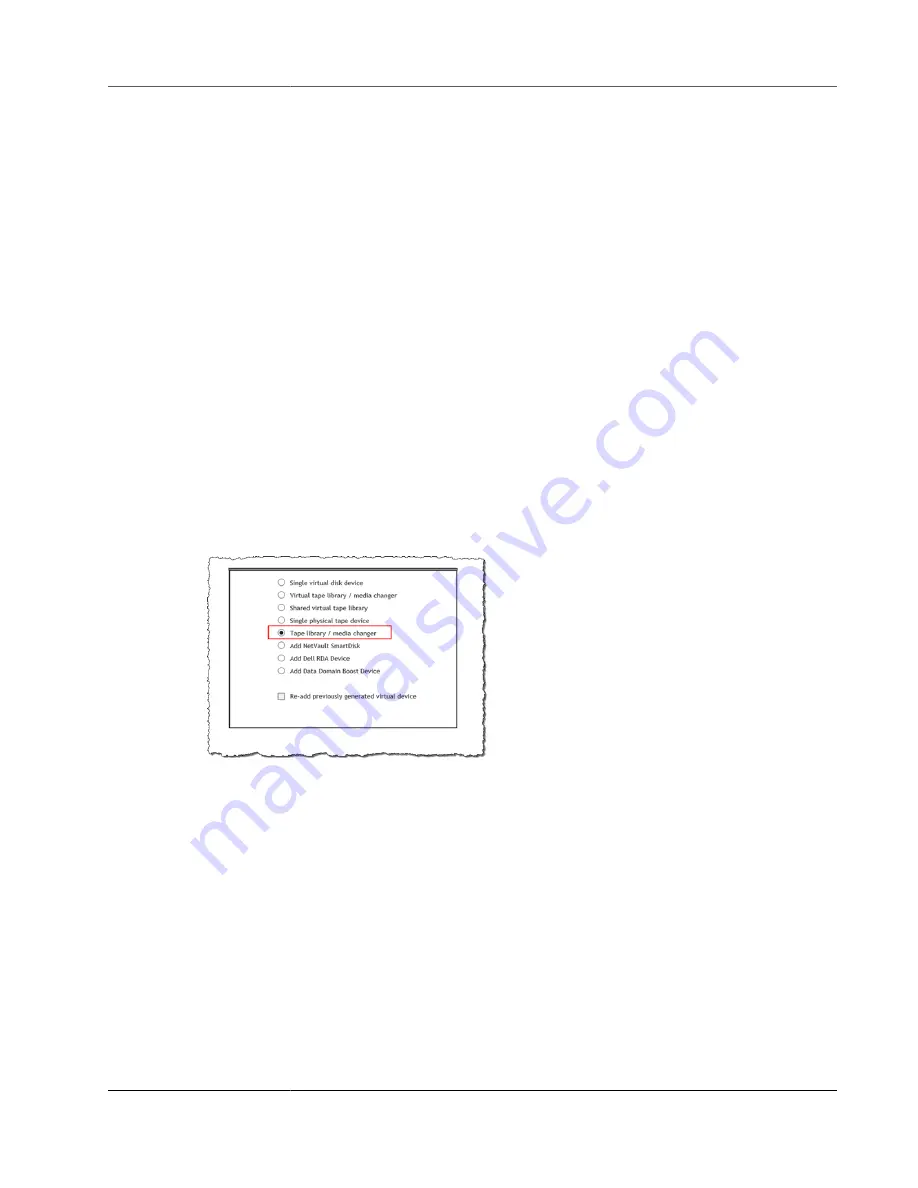
3. In the Add Storage Wizard, choose
Tape library / media changer
, and then choose
Next
.
4. On the next page, choose the client machine that is physically attached to the library and choose
Next
to scan for devices.
5. If devices are found, they are displayed. In this case, your medium changer is displayed in the device
box.
6. Choose your medium changer and choose
Next
. Detailed information about the device is displayed
in the wizard.
7. On the Add Tapes to Bays page, choose
Scan For Devices
, choose your client machine, and then
choose
Next
.
All your drives are displayed on the page. Quest NetVault Backup displays the 10 bays to which you
can add your drives. The bays are displayed one at a time.
API Version 2013-06-30
113


