background image

Installation 


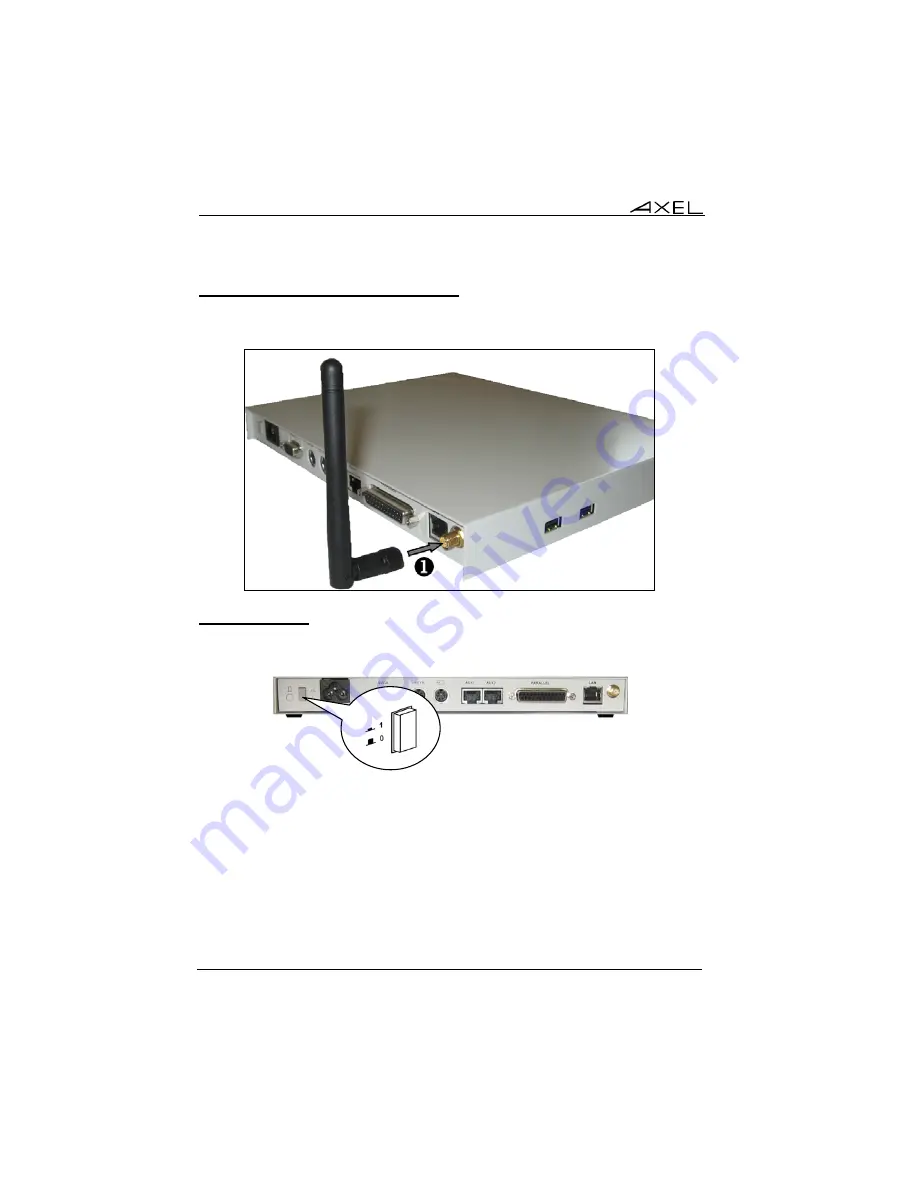
2.2.5 - Installing the Antenna (optional) 

If the 802.11 interface is to be used, screw the antenna on the rear panel 


2.2.6 - Power On 

Connect the AX3000 and the VGA power cords to earthed main power sockets. 


The green LED on the front of the terminal should light, and a single audible 
beep should be heard, to indicate that the AX3000 terminal is powered up and 
operating correctly. 

To indicate correct keyboard initialization after power-up, the keyboard indicator 
lights 'Num lock', 'Caps lock' and 'Scroll lock' should flash twice. 

The green LED of the RJ45 connector on the back panel remains lit, to indicate 
a satisfactory Ethernet connection. 

Installation Guide - Models 85 

Summary of Contents for AX3000/M85

Page 1: ...AX3000 Platine Terminal Ethernet TCP IP Model 85 Installation Guide January 2012 Ref I85E0922 2 Model AX3000 M85...

Page 2: ...962 Courtab uf cedex FRANCE Tel 33 1 69 28 27 27 Fax 33 1 69 28 82 04 Email info axel com The information in this document is subject to change without notice AXEL assumes no responsibility for any er...

Page 3: ...11 KIT 8 2 3 1 Kit Contents 8 2 3 2 Opening the Terminal Case 8 2 3 3 Installing the 802 11 Kit 9 2 3 4 Closing the Terminal Case 10 3 QUICK INSTALLATION 11 2 1 QUICK SET UP 11 2 2 AUTO CONFIGURATION...

Page 4: ...odular concept The AX3000 is designed and manufactured by Axel The terminal s electronics is contained within a slim base unit which provides connections for a VGA or SVGA monitor keyboard system prin...

Page 5: ...lier installation manuals The internal sub miniature fuse link of the power supply must be replaced only with the same type fuse specifications SCHURTER Type MSF250 1A 250V Quick acting low breaking c...

Page 6: ...orrect the interference by one or more of the following measures Reorient or relocate the receiving antenna Increase the separation between the equipment and receiver Connect the equipment into an out...

Page 7: ...IP port RJ45 LAN 802 11 port optional If this port is not present it can be ordered as an upgrade from Axel See Chapter 2 3 Two USB ports are located on the left side of the terminal case 11 12 1 2 3...

Page 8: ...keyboard a The Monitor Plug in the VGA monitor cable to the SVGA connector on the terminal rear panel Note when the terminal is installed in a cabinet or rack it is essential to maintain air circulat...

Page 9: ...ed 10Mb when the light is off and 100 Mb when the light is on 2 2 3 Auxiliary Ports AX3000 Models 85 have three auxiliary ports as a standard feature AUX1 bi directional serial port RJ45 connector AUX...

Page 10: ...ont of the terminal should light and a single audible beep should be heard to indicate that the AX3000 terminal is powered up and operating correctly To indicate correct keyboard initialization after...

Page 11: ...ribed above for example if it emits a continuous tone sound or two beeps or if an error message is displayed on the screen refer to chapter 5 If the terminal still does not operate properly call your...

Page 12: ...ry or installed by a qualified technician in the field 2 3 1 Kit Contents The 802 11 kit is composed by An 802 11 card A antenna cable about 25cm A puck A nut An antenna 2 3 2 Opening the Terminal Cas...

Page 13: ...ongly A click must be sounded Insert the 802 11 card in the mini PCI socket of the AX3000 circuit board The 802 11 card must be first inclined at 45 then pushed horizontally The 802 11 card should aut...

Page 14: ...nd insert the end with the screw in the terminal case hole Insert the puck and screw the nut 2 3 4 Closing the Terminal Case Re fit the terminal case take care to match USB holes with USB connectors a...

Page 15: ...minal to automatically receive new firmware and or a configuration At any time pressing Ctrl Alt Esc will enter Terminal Set Up For more information about set up please read the AX3000 User s Manual 2...

Page 16: ...Quick Installation The dialog box structure referred to as a Wizard is shown below After exiting the set up the terminal is automatically restarted and ready to be used 12 Installation Guide Models 85...

Page 17: ...www axel com For more information on AxRM s action in the auto configuration process see the manual Axel Remote Management Version 3 The auto configuration process is automatically initiated when powe...

Page 18: ...hielded twisted pair cable UTP category 3 or 5 1 2 3 4 5 6 7 8 RJ45 connector Models 85 rear panel Note the maximum length of a 10 100BaseT cable is 100 meters 330 feet Pin Signal Name Direction 1 TX...

Page 19: ...the other pair 4 2 SERIAL PORTS AUX1 AND AUX2 RJ45 These serial ports are bi directional ports for printers bar code readers touch screens etc 1 2 3 4 5 6 7 8 AUX1 and AUX2 connectors Models 85 rear...

Page 20: ...SG DTR SG RD TD CTS TD RD 2 3 6 5 2 20 Adaptor DTE female 25 pin AX3000 RJ45 4 5 7 3 DTR DTR SG CTS 4 2 2 Peripheral RJ45 cables Pin assignment for a direct connection of a peripheral to the AX3000 R...

Page 21: ...ector use a DIN to Mini DIN adaptor Pin Signal name 1 Data 2 3 Ground 4 5 V DC 5 Clock 6 1 2 3 4 5 6 Keyboard connector Models 85 rear panel 4 4 MOUSE INTERFACE The AX3000 mouse interface is a Mini DI...

Page 22: ...5 4 3 2 1 10 9 8 7 6 15 14 13 12 11 VGA SVGA connector Models 85 rear panel Pin Signal name 1 Red 2 Green 3 Blue 4 Not Connected 5 Ground 6 Ground 7 Ground 8 Ground 9 Not Connected 10 Ground 11 Not C...

Page 23: ...16 15 14 Parallel connector Models 85 rear panel Pin Signal Name 1 Strobe 2 Data 0 3 Data 1 4 Data 2 5 Data 3 6 Data 4 7 Data 5 8 Data 6 9 Data 7 10 ACK Acknowledge 11 Busy 12 PE Paper End 13 SLCT Se...

Page 24: ...n the left side of the terminal case Technical specifications Technical specifications Supported speeds Low speed 1 5 Mbits Full speed 12 Mbits High speed 480 Mbits Maximal consumption 500 mA for the...

Page 25: ...LOST Care must be taken with the VGA monitor The default VGA frequency used by the AX3000 is 72 Hertz If the VGA monitor does not support this frequency the vertical sync will be lost To fix this pro...

Page 26: ...orrectly despite this double beep signal As a quick test of keyboard operation enter set up mode by pressing the Ctrl Alt Esc keys simultaneously If set up mode is working you can ignore the double be...

Page 27: ...wrong IP address INCORRECT APPEARANCE OF SOFTWARE DISPLAYED ON THE AX3000 Check the values of parameters set using Terminal Set Up Check that the correct terminal emulation has been chosen Check that...

Page 28: ...14 Avenue du Qu bec B t K2 EVOLIC BP 728 91962 Courtab uf cedex FRANCE Tel 33 1 69 28 27 27 Fax 33 1 69 28 82 04 Email info axel com...

Reviews: