1:
E
le
me
nt
w
ith
S
tu
dio
En
gin
e:
S
et
up
&
C
on
ne
ct
io
ns
•
9
©2016 Axia Audio- Rev 1.8.1
word. The default user name is “user”. Leave the
password field blank.
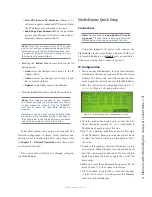
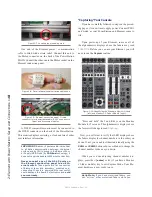
3. You’ll see the screen shown in Figure 1-15, This
screen allows you to set channel numbers for all of
the audio outputs generated by Element; program
and record busses, monitor feeds, and talkback desti-
nations. Work down the list, assign each one a unique
channel number and record them in your channel
number log.
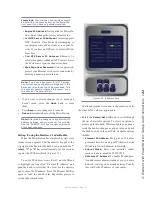
4. Find the column entitled
Mode
. Each Studio Engine
is shipped with the most common streams enabled
with
Live Stereo
mode. Make sure all of your de-
sired streams are enabled.
5. Choose
Apply
.
A word about stream types: There are sev-
eral different types of streams available in the
Mode drop-down box: Live Stereo and Stan-
dard Stereo.
Live Stereo was previously referred to as
Livestreams. Use Live Stereo streams when-
ever you need the lowest latency for on-air
feeds, mic-to-headphone paths, etc.
Standard Stereo
is intended to provide the best
compatibility with older PC systems, but the
trade-off is that these streams have a higher
amount of latency.
Set Your Console Type
Note: Manual setting of console type is only
necessary on Element consoles running soft-
ware versions prior to v2.0. In Elements running
v2.0 or higher, this setting will auto-detect.
Axia StudioEngines will work with different types of
consoles, so you need to tell it which type you’re pairing
it with.
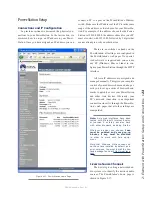
1. Navigate to the “Engine ID” menu and find the “Ap-
plication Interface Options” section. Be sure that
Element
is checked for the “Console Type”.
2. Click
Apply
.
Advanced Settings
You’ve no doubt noticed that there are many more
options for your Element and StudioEngine than we’ve
covered here. That’s because Chapter One was meant to
get you up and running as quickly as possible. For an in-
depth explanation of the other available settings,
please
refer to Chapter 8: Advanced Element Controls and
Chapter 9: StudioEngine Controls.
What’s Next
Take a break! You’re done with initial set-up of your
Element and StudioEngine.
When you’re ready, you may skip Chapter 2 (Power-
Station setup) and jump to Chapter 3: Working with
Sources for a walk through one of the most important
Element concepts: Source Profiles.

