2: C
on
fig
ur
at
io
n •
9
© 2016 Axia Audio - Rev 2.0
Once the xNode has been assigned an ID value, the device has an IP address that can be used to access its HTML
configuration interface. Each input has been assigned a unique Livewire channel number. The next configuration
steps are to enter in descriptive names to the inputs and outputs and to assign Livewire sources to the destinations.
The Simple Setup page is covered later in the chapter and details of each xNode are available in following chapters.
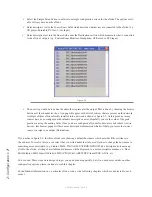
Figure 2-4
iProbe configuration
When an xNode boots and it has no configuration, it will broadcast a bootp request within 4 seconds. The broad-
casts will continue with an increasing delay between messages and randomization until a configuration is set. iProbe
includes a bootp function which will observe the request and provide an option to respond or ignore.
A counter at the bootstrap configuration button will appear when a bootp request is received by iProbe (version 1.2).
Clicking on the
button will open the Device Bootstrap and Configuration window.
From the window view, select the device that has issued a bootp request. The configuration options will appear al-
lowing you to push a New IP address, New subnet mask, and a Configuration. If you have no backup configuration
to send, then apply an IP address and proceed to log into the device through the iProbe interface, and configure it per
the “web interface configuration”.
Web interface configuration (“Simple setup”)
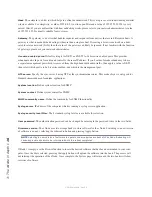
Initially accessing the user interface of the xNode will require authentication. The default authentication is:
Username: user
Password: (none)
The initial page is the Home page. Select the “Simple setup” button.
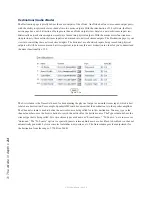
The setup page will vary based on what xNode you are configuring. If it is an audio xNode, there will be a section
for Sources and a section for Destinations. If GPIO (General Purpose Input/Output) functionality is on the xNode,
there will be section for GPIO.

