2: U
si
ng x
S
el
ec
to
r •
1
2
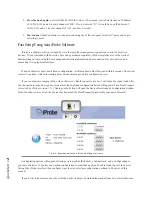
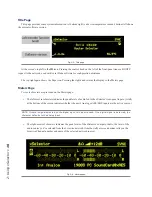
The OLED display works with the adjacent knob. By default, the display shows the meters for input and output.
Rotating the knob changes the display, showing sources available for selection.
To select a source to route to xSelector’s outputs, rotate the knob to highlight the desired source, then press the
knob to “take” that source. That’s it!
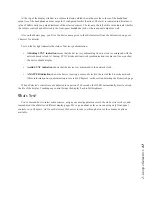
Streams can be displayed in order by their Livewire channel number, or by their name. To change the sort
criteria, rotate the knob clockwise until you reach the end of the source list. You can now highlight and select from
the following options:
• Unassigned (clear preset):
This option provides the ability to clear the source assigned to any of the six
front-panel Preset keys. To do this, highlight the option and
press and hold
the selection knob.
While hold-
ing
,
press and hold
the preset button you wish to clear. When the button turns yellow, its preset has been
cleared.
• Go to RAVENNA sources…:
Selecting this option filters the list to display only RAVENNA sources
advertised on the network. At the bottom of the Ravenna listing is an option to
Go to Livewire sources…
which
returns you to a listing of Livewire sources.
• Sort by channel name…:
By default, xSelector shows sources in order of their Livewire channel number.
Selecting this option organizes the source listing by name instead. The channel number will still be shown,
but the order of sources is now based on the alphabetical order of names.
NOTE: At the top of the list, you’ll see “(no audio)” . Highlight and select this in order to clear your selection
and mute the outputs.
While in the Source Selection screen, you’ll find a “Return” icon to the bottom left (as shown in Figure 2.1).
This informs you of the function assigned to the left-most front-panel control knob (the Headphone Volume Control
knob). While in the Source Selection view, pressing this knob will return the screen to the meter view. (The screen
will also return automatically to the meter view if you do nothing for 30 seconds.)
Programming And Using the Fast Selection keys
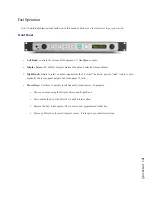
The xSelector has six preset buttons on the front panel for frequently-used sources. To program:
• Selecting the source
as outlined above.
• Press and hold
the key you want to assign the source to, until it illuminates yellow.
• Release the key
. The key’s illumination turns from yellow to green, indicating that the key is programmed
and the source is selected.
To instantly recall a stream assigned to a key, just press that key. It will illuminate green and the audio will be
routed to the unit’s outputs.
You can label these keys for easy reference, if you like, by laser-printing on standard transparency films and
inserting the cut squares behind the keycaps (pry gently to remove), or by using an adhesive-film labeler such as a
P-Touch or other label-strip printing device.
Summary of Contents for xSelector
Page 6: ......
Page 8: ...CAT 6 small and light yet sound and data pour forth What magic is this...
Page 18: ...Do digital streams dream of electric DJs Just Bradbury knows...
Page 26: ...To and fro bits flow Audio anywhere now Fingertips decide...
Page 52: ...Elvis Costello was a true visionary Kesha not so much...


