background image

TPOSS001 Printer Set-up guide

page 

1 / 5

Reference: FDE-3104057 Issue C

CONTENTS

YOUR PRINTER................................................................................ 2

Package ............................................................................................................. 2

General description.......................................................................................... 2

Printer location ................................................................................................. 2

PLUGGING & CONNECTING YOUR PRINTER ............................... 3

Connecting the power supply......................................................................... 3

Connecting the printer..................................................................................... 3

LOADING PAPER ............................................................................. 4

TROUBLESHOOTING....................................................................... 5

Light indicator................................................................................................... 5

Problems & Solutions ...................................................................................... 5

CLEANING YOUR PRINTER ............................................................ 5

Summary of Contents for TPOSS001

Page 1: ...AXIOHM 1 rue d Arcueil BP 820 92542 MONTROUGE CEDEX FRANCE Tel 33 1 58 07 17 17 Fax 33 1 58 07 17 18 THERMAL PRINTING SOLUTIONS TPOSS001 PRINTER SET UP GUIDE Reference 3104057 Issue C ...

Page 2: ...ue C CONTENTS YOUR PRINTER 2 Package 2 General description 2 Printer location 2 PLUGGING CONNECTING YOUR PRINTER 3 Connecting the power supply 3 Connecting the printer 3 LOADING PAPER 4 TROUBLESHOOTING 5 Light indicator 5 Problems Solutions 5 CLEANING YOUR PRINTER 5 ...

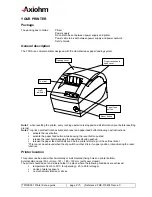
Page 3: ... activate both reset and paper feed button following next instructions activate the reset button activate the paper feed button while keeping the reset button pushed release the reset button keeping the paper feed button pushed release the paper feed button as soon as the printer starts to print the self test ticket This cannot be achieved when the dip switch number 8 is in its upper position di s...

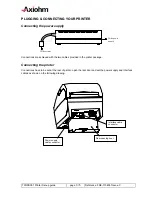
Page 4: ...r To the power network Connections are achieved with the two cables provided in the printer package Connecting the printer Connections have to be set at the rear of printer open the rear door and set the power supply and interface cables as shown on the following drawing Interface cable connector Rear opening door Power supply cable connector ...

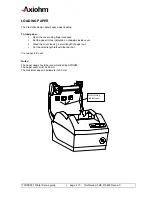
Page 5: ... cover using finger recesses Set the paper roll as indicated on drawings inside cover Close the cover leaving a small length of paper out Cut the small length left with the tear bar Your paper roll is set Notes The paper used should be recommended by AXIOHM The paper width must be 58 mm The maximum paper roll diameter is 90 mm Roll setting indications ...

Page 6: ...e chapter Loading paper Open the cover and check there is no paper jam if there is some unwind the paper until no wrinkle appears close the cover with wrinkled part out and cut it with the tear bar Printing quality is deteriorating The print head may be getting dirty see next chapter CLEANING YOUR PRINTER Depending on the environment in which the printer is used it can accumulate dust Therefore it...

Reviews: