15 |
A x i o m T o o l G r o u p
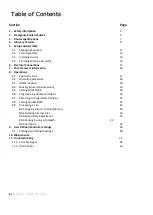
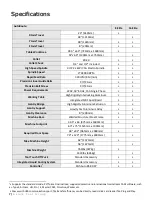
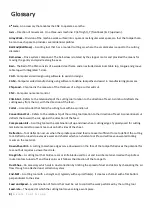
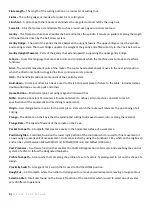
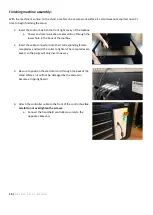
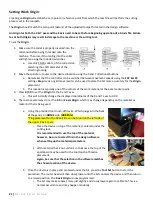
Finishing machine assembly:
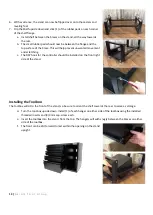
With the machine mounted on the stand, or safely on a secure work surface if a stand was not acquired, now it’s
time to begin finishing the setup.
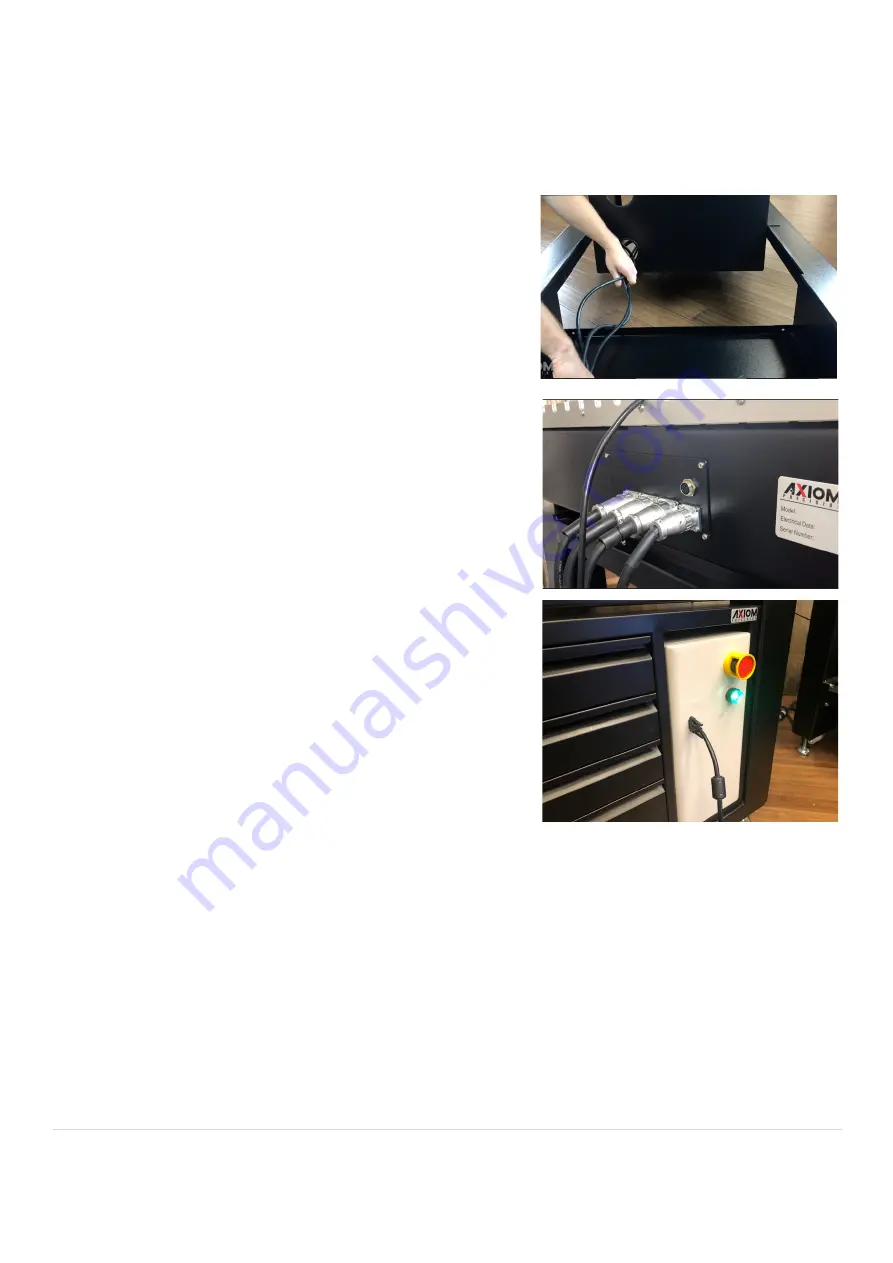
1-
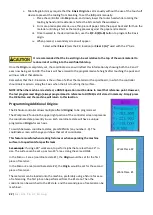
Insert the control box into the front right cavity of the toolbox.
a.
Power and communication cables will run through the
lower hole in the back of the toolbox.
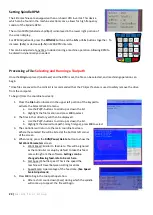
2-
Insert the cable connectors into their corresponding female
receptacles and twist the collar to tighten. The receptacles are
keyed, so the plugs will only insert one way.
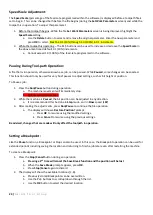
3-
Be sure to position the electrical cord through the back of the
stand safely, so it will not be damaged by the castors or
become a tripping hazard.
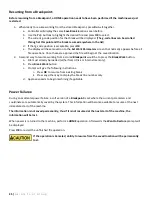
4-
Attach the controller cable to the front of the control box.
Be
careful to not overtighten the screws.
a.
Connect the hand-held controller securely to the
opposite cable end.
Summary of Contents for AR16 ELITE
Page 1: ...AR8 16 ELITE MANUAL Axiom Tool Group Inc All rights reserved Rev 1 2 2020 ...
Page 46: ...46 A x i o m T o o l G r o u p AR8 Elite Part List ...
Page 47: ...47 A x i o m T o o l G r o u p ...
Page 48: ...48 A x i o m T o o l G r o u p ...
Page 49: ...49 A x i o m T o o l G r o u p ...
Page 50: ...50 A x i o m T o o l G r o u p ...
Page 51: ...51 A x i o m T o o l G r o u p ...
Page 52: ...52 A x i o m T o o l G r o u p ...
Page 53: ...53 A x i o m T o o l G r o u p ...
Page 54: ...54 A x i o m T o o l G r o u p ...
Page 55: ...55 A x i o m T o o l G r o u p AR16 Elite Part List ...
Page 56: ...56 A x i o m T o o l G r o u p ...
Page 57: ...57 A x i o m T o o l G r o u p ...
Page 58: ...58 A x i o m T o o l G r o u p ...
Page 59: ...59 A x i o m T o o l G r o u p ...
Page 60: ...60 A x i o m T o o l G r o u p ...
Page 61: ...61 A x i o m T o o l G r o u p ...
Page 62: ...62 A x i o m T o o l G r o u p ...
Page 63: ...63 A x i o m T o o l G r o u p ...
Page 64: ...64 A x i o m T o o l G r o u p ...


