

©Copyright 2019 Axiomtek Co., Ltd.
Version A1 May 2019
Printed in Taiwan
9416K671020E
2
I/O Outlets
The following figures show I/O outlets on the eBOX671-521-FL.
Front View
Rear View
1
1 x Reset button
7
1 x AT/ATX quick switch
2
1 x Power button
8
System LEDs
3
2 x Swappable HDD tray
9
1 x Remote power switch
4
1 x HDMI 1.4
10
1 x DisplayPort 1.2
5
4 x Antenna opening
11
2 x GbE
6
2 x USB 3.1 (Gen1)
12
4 x PoE
13 4 x USB 3.1 (Gen2)
17
24VDC power input
14 2 x DisplayPort via MXM
18
COM2 (RS232/422/485)
15 1 x DVI-I
19
COM1 (RS232/422/485)
16 Flexible I/O Window
©
Copyright 2019 Axiomtek Co., Ltd.
Version A1 May 2019
Printed in Taiwan
9416K671020E
3
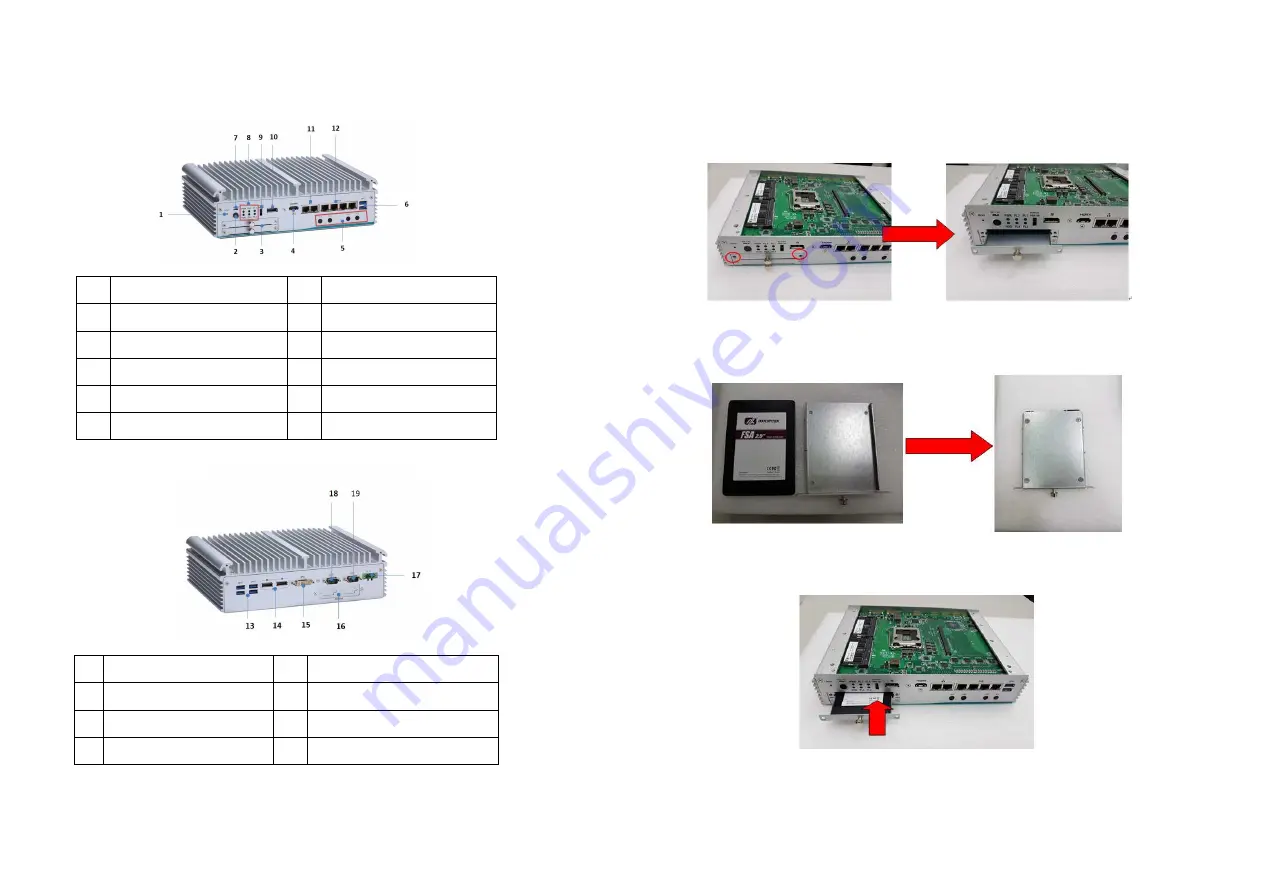
Installation of Hard Disk Drive
Step 1 Turn off the system, and unplug the power adaptor.
Step 2 Loosen two of the SATA drive tray’s screws and extract the
SATA HDD drive bay.
Step 3 Turn the SATA drive tray upside down to install SSD/HDD and
then fasten the four HDD screws to secure the SATA drive tray.
Step 4 Slide the SATA drive tray back into the system and fasten the
screws firmly to complete the installation.


