background image

PANEL1080-845 

All-in-One 

8.4” Super Slim 

PANEL PC 

User’s Manual 

Summary of Contents for PANEL1080-845

Page 1: ...PANEL1080 845 All in One 8 4 Super Slim PANEL PC User s Manual ...

Page 2: ...t AXIOMTEK makes no commitment to update or to keep current the information contained in this manual AXIOMTEK reserves the right to make improvements to this document and or product at any time and without notice No part of this document may be reproduced stored in a retrieval system or transmitted in any form or by any means electronic mechanical photocopying recording or otherwise without the pr...

Page 3: ...ever there is no guarantee that interference will not occur in a particular installation If this equipment does cause harmful interference to radio or television reception which can be determined by turning the equipment off and on the user is encouraged to try to correct the interference by one or more of the following measurers 1 Reorient or relocate the receiving antenna 2 Increase the separati...

Page 4: ...PANEL1080 845 is properly grounded 4 The brightness of the flat panel display decreases with usage However hours of use vary depending on the application environment 5 Turn OFF the system power before cleaning Clean the system using a cloth only Do not spray any liquid cleaner directly onto the screen The PANEL1080 845 may come with or w o a touchscreen Although the touchscreen is chemical resista...

Page 5: ...lectricity on your body When handling boards and components wear a wrist grounding strap available from most electronic component stores Trademarks Acknowledgments AXIOMTEK is a trademark of AXIOMTEK Co Ltd IBM PC AT PS 2 VGA are trademarks of International Business Machines Corporation Intel and Pentium are trademarks of Intel Corporation MS DOS Microsoft C and QuickBASIC are trademarks of Micros...

Page 6: ...vi This page does not contain any information ...

Page 7: ...6 Chapter 2 System Configuration 7 2 1 System Configuration 7 2 1 1 Front View 7 2 2 Panel Mount 8 Chapter 3 System Installation 9 3 1 CompactFlashTM and DRAM Installation 10 3 2 HDD Installation 11 3 3 3 x Serial Ports 13 3 4 Parallel Port 13 3 5 VGA 14 3 6 Ethernet 14 3 7 Digital I Os 15 3 8 Keyboard and PS 2 Mouse Connector 15 3 9 External FDD 16 3 10 CompactFlash Socket U25 17 3 11 System O S ...

Page 8: ...viii This page does not contain any information ...

Page 9: ... enough Ruggedly designed the PANEL1080 845 is 100 IBM PC AT compatible and it integrates super I Os VGA 8 4 TFT touchscreen Ethernet and packs special industrial features like watchdog timer CMOS double backup all in a single system The full PC functionality coupled with its industrial grade construction easily tailors the system for any embedded applications and allows the system to endure conti...

Page 10: ... SODIMM Max 128MB SDRAM Real Time Clock Integration in W83977AF with external Lithium Battery Watchdog Timer System reset software programmable timer interval 64 levels 0 5 8 5 80 50 800 100 1600 seconds 1 2 2 I O System Standard I O 4 x serial ports with power 3 x RS 232 1 x RS 232 422 485 jumper selectable 1 x parallel port SPP EPP ECP 1 x External FDD Interface 1 x HDD Interface 1 x PS 2 Type M...

Page 11: ...5530A south bridge integrated support CRT TFT display via UMA Max to 4MB sharing memory Resolution Non interlaced CRT and TFT monitor up to 1024 x 768 64K color On Board SSD CompactFlash socket Extension One 16 bit PC 104 connector 1 2 3 Built in Peripherals Standard 70W power supply 2 5 hard disk 8 4 anti glare analog resistive touchscreen with RS 232 controller sharing COM3 ...

Page 12: ...e option External FDD interface Heat dispensing design PC 104 expansion Bus Net weight 3 3 Kgs Dimension main body size 1080 845 271 x 212 x 89 9 mm Operating Temperature Range 0oC 40oC Relative Humidity 5 95 non condensing NOTE For more detailed information on the system engine board used in your PANEL PC refer to the system board User s Manual that came with the system packaging ...

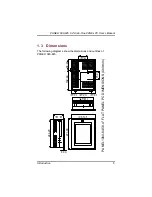
Page 13: ...s Manual Introduction 5 1 3 Dimensions The following diagrams show the dimensions and outlines of PANEL1080 845 PANEL1080 845 8 4 FLAT PANEL PC DIMENSIONS Unit mm 244 20 81 90 8 00 271 00 212 00 185 20 38 40 135 20 38 40 182 60 75 00 88 40 75 00 ...

Page 14: ...of the chassis contains most of the connectors 01 Power Switch 02 DIO 4 channel Digital Inputs Outputs 03 EXT IDE 04 COM2 05 COM3 4 06 PRN Parallel Port 07 PCMCIA 08 LINE IN 09 MIC 10 LIN OUT 11 AC Inlet 12 EXT FDD 13 COM1 14 USB 15 Keyboard Mouse 16 LAN Ethernet Port 17 VGA 1 5 Utilities Supported Watchdog Utility Ethernet Utility VGA Drivers Touchscreen Utility ...

Page 15: ... r 2 System Configuration This chapter details the system parts and components with figures Sections include System Major Parts Panel Mount 2 1 System Configuration 2 1 1 Front View The figure below shows the features and controls on the PANEL1080 845 front panel 01 Power LED 02 HDD LED ...

Page 16: ...nual System Configuration 8 2 2 Panel Mount The PANEL1080 845 is mainly designed for panel mount application To mount the PANEL1080 845 the standard set of mounting kit included in the system packaging is needed Please refer to the following figure ...

Page 17: ...oftware Installation The PANEL1080 845 has a Pentium II little board It already builds in a Pentium II CPU relevant DRAM and a 2 5 HDD These are all standard and the system is ready to play System performance can be increased by upgrading to higher capacity DRAM modules and hard disk drive The user can use the I O ports located at the backside of the chassis to connect external peripheral devices ...

Page 18: ...e and CompactFlash TM card SBC84500 on the one hand provide one 144 pin SODIMM socket that supports system memory up to 128MB When upgrading the HDD or DRAM or CompactFlash card refer to the following illustration and instructions 1 To take off four screws as Fig 2 2 To open sub rear cover and put DRAM module or CompactFlashTM module on as Fig 4 DRAM Compact Flash Fig 1 Fig 2 Fig 4 Fig 3 ...

Page 19: ...lowing illustration and instructions 1 To take off eight screws as Fig 1 2 Then opening all rear cover as Fig 2 3 To take off three screws of HDD drive bay and take out HDD drive bay 4 To fix HDD on drive bay by 4 screws 5 Reverse step 3 6 Reverse step 1 Note If you want to install CD ROM the HDD must be set at Slave mode Fig 1 Fig 2 Fig 4 Fig 3 ...

Page 20: ...PANEL1080 845 8 4 All in One PANEL PC User s Manual System Installation 12 HDD Bracket HDD Fig 5 Fig 6 Fig 7 Fig 8 Fig 9 ...

Page 21: ...s To attach to any serial device just plug in the device connector to the 9 pin D SUB In terms of transmission distance the RS 422 485 will perform better than RS 232 In this case COM2 is suggested to be set to RS 422 485 and the related jumpers have to be set correctly first see the system board User s Manual The RS 422 485 pin assignment is listed as follows Signal Name Pin R2 422 RS 485 1 TX DA...

Page 22: ...provides an NE2000 compatible Ethernet RJ 45 interface For network connection just plug in one cable end of the PANEL1080 845 100 Base T Hub into the standard Ethernet phone jack The pin assignment of the RJ 45 is listed below LAN1 RJ 45 Connector Pin Assignment Pin Signal 1 2 3 6 other G O Tx Data transmission positive Tx Data transmission negative Rx Data reception positive Rx Data reception neg...

Page 23: ...can also be used for UPS control It comes with a 15 pin D SUB connector and its pin position and pin assignment is shown on the following page 6 7 8 9 10 11 12 13 14 15 1 2 3 4 5 Digital I O Pin Assignment P1 OUT 1 P9 GND P2 OUT 2 P10 GND P3 OUT 3 P11 IN1 P4 OUT4 P12 IN2 P5 GND P13 IN3 P6 GND P14 IN4 P7 GND P15 GND P8 GND 3 8 Keyboard and PS 2 Mouse Connector KBMS1 is a DIN connector for PS 2 keyb...

Page 24: ...positions and pin assignments are listed below NOTE An optional external FDD is available for the PANEL1080 845 system Consult your authorized dealers or sales representatives for more information 13 12 11 10 9 8 7 6 5 4 3 2 1 26 25 24 23 22 21 20 19 18 17 16 15 14 Centronic External FDD Pin Assignment P 1 SIDE1 P 14 WPT P 2 RDATA P 15 TRK0 P 3 GND P 16 GND P 4 GND P 17 WGATE P 5 GND P 18 GND P 6 ...

Page 25: ... is defaulted as the C or D disk drive in your PC system 3 11 System O S and Software Installation The PANEL1080 845 is not equipped with any operating system It builds in a 2 5 HDD and 1 5MB Solid State Disk as memory storage device As both devices are built in the system chassis to load any O S or application software into the computer an external device is needed to act as a bridge There are th...

Page 26: ...PANEL1080 845 8 4 All in One PANEL PC User s Manual System Installation 18 This Page does not contain any information ...

Page 27: ...ency 65W or 70W output Universal input 90 to 264 VAC Overvoltage protection Small size 3 X 5 footprint Continuous short circuit protection Conductive EMI meets FCC VDE class B Output Specifications Voltage Accuracy 5VDC primary output 5 Auxiliary output 5 Total output power Convection cooled 55W Forced air cooling 65W 20CFM 70W 20CFM Hold up time 16ms typ Overvoltage protection 5 VDC output only O...

Page 28: ...ir convection EMI filter Conducted meets FCC VDE class B International Standards Safety Standards Safety Standards Safety Standards Safety Standards Designed to meet the following standards UL 1950 CSA 22 2 NO 234 VDE EN 60 950 EMI Standards EMI Standards EMI Standards EMI Standards Designed to meet the following limits FCC docket 20780 curve B EN55022 B CE Standards CE Standards CE Standards CE S...

Page 29: ...n 60 rated load conditions the 5V output is set to between 4 95V and 5 05V and the other outputs are checked to be within the specified voltage accuracy range Ripple and Noise The peak to peak ripple and noise for 5V output is less than 50mV and less than 100mV for 12V outputs both at rated loads Measuring is done by 15MHz bandwidth limited oscilloscope and terminated each output with 0 47uF capac...

Page 30: ... to 7 0V The power supply will go into latch off mode against short circuit or over load conditions and have to turn OFF and then ON the DC input to restart the power supply Environmental Specifications Environmental Specifications Environmental Specifications Environmental Specifications Operating temp range 0 C to 50 C with forced air 20cfm Storage temperature range 40 C to 85 C International St...

Page 31: ...load conditions the 5V output is set to between 4 95V and 5 05V and the other outputs are checked to be within the specified voltage accuracy range Ripple and Noise The peak to peak ripple and noise for 5V output is less than 50mV and less than 100mV for 12V outputs Measuring is done by 15MHz bandwidth limited oscilloscope and terminated each output with 0 47uF capacitor Line Regulation The line r...

Page 32: ... to 7 0V The power supply will go into latch off mode against short circuit or over load conditions and have to turn OFF and then ON the DC input to restart the power supply Environmental Specifications Environmental Specifications Environmental Specifications Environmental Specifications Operating temp range 0 C to 50 C with forced air 20cfm Storage temperature range 40 C to 85 C International St...

Page 33: ... is set to between 4 95V and 5 05V and the other outputs are checked to be within the specified voltage accuracy range Ripple and Noise The peak to peak ripple and noise for 5V output is less than 60mV and less than 100mV for 12V outputs Measuring is done by 15MHz bandwidth limited oscilloscope and terminated each output with 0 47uF capacitor Line Regulation The line regulation for 5V output is le...

Page 34: ... to 7 0V The power supply will go into latch off mode against short circuit or over load conditions and have to turn OFF and then ON the DC input to restart the power supply Environmental Specifications Environmental Specifications Environmental Specifications Environmental Specifications Operating temp range 0 C to 50 C with forced air 20cfm Storage temperature range 40 C to 85 C International St...

Page 35: ...g the LCD panel of PANEL1080 845 The following are graphical descriptions of allowable and restricted cleaning materials Please remember to wipe off the surface of your LCD panel using a clean or damp cloth Both LCD panel and touchscreen incorporate components that are highly sensitive to water and strong solutions Do not use a soaked cloth when wiping off the dirt as this may cause electrical dam...

Page 36: ...PANEL1080 845 8 4 All in One PANEL PC User s Manual General Care Maintenance 28 This page does not contain any information ...

Reviews: