

14
AXIS 231D/232D installieren
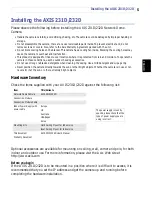
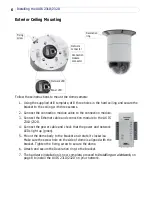
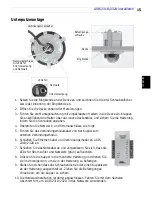
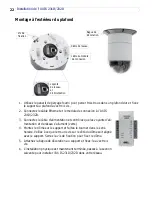
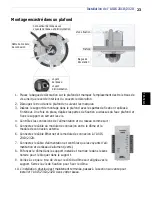
Aufputzmontage
1. Halten Sie die mitgelieferte Bohrschablone an und bohren Sie drei Löcher in die Wand.
Befestigen Sie die Halterung mit drei Schrauben.
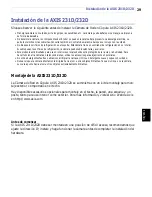
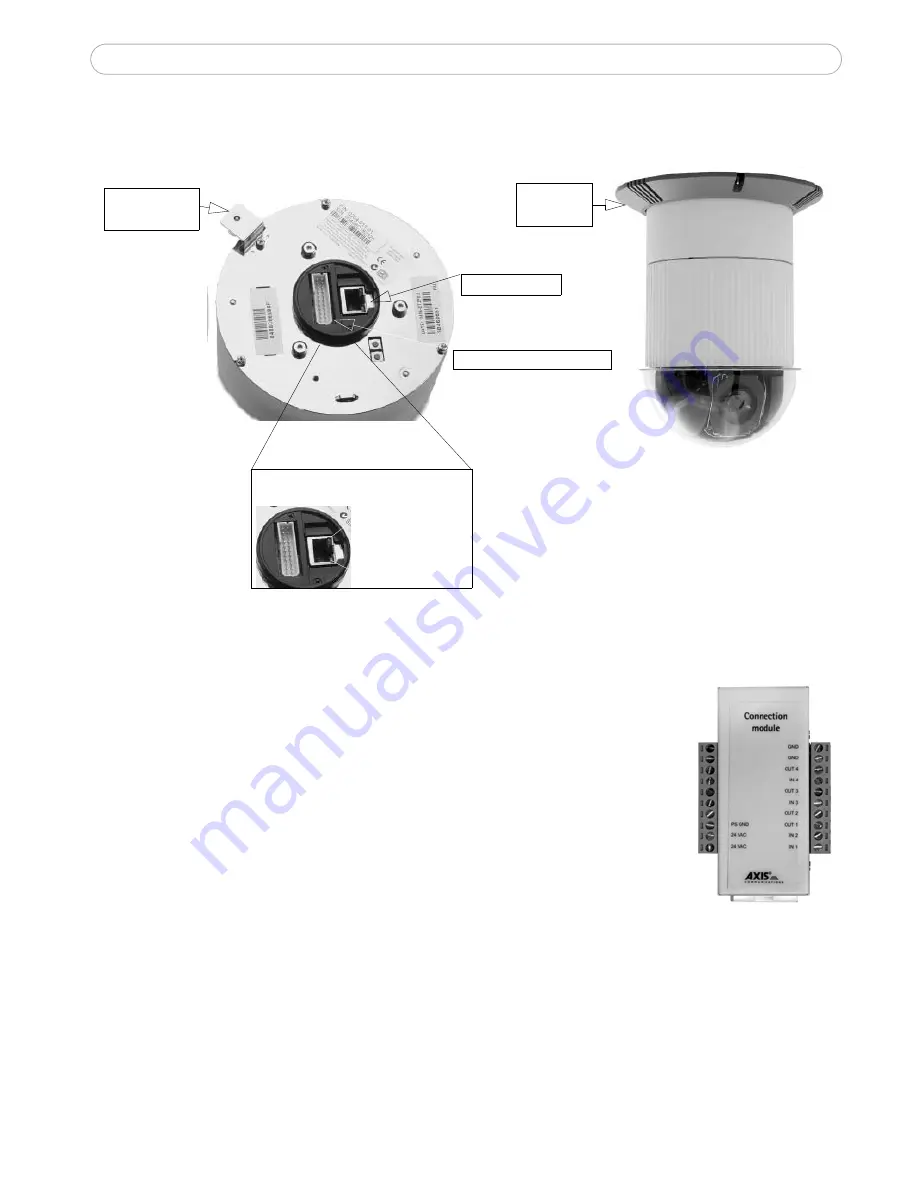
2. Schließen Sie das Verbindungsmodulkabel am Verbindungsmodul
an.
3. Schließen Sie Ethernet-Kabel und Verbindungsmodul an AXIS
231D/232D an.
4. Schließen Sie das Netzkabel an und vergewissern Sie sich, dass die
LEDs für Stromversorgung und Netzwerk (grün) aufleuchten.
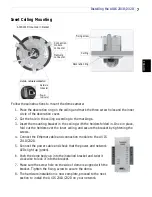
5. Setzen Sie die Kuppel in die Halterung ein und drehen Sie sie im
Uhrzeigersinn. Stellen Sie sicher, dass das Schraubenloch an der
einen Kuppelseite an der Halterung ausgerichtet ist. Ziehen Sie die
Befestigungsschraube an, um die Kuppel zu sichern.
6. Bringen Sie die Ringblende an der Halterung an und befestigen Sie sie mit drei
Schrauben.
7. Die Hardwareinstallation ist damit abgeschlossen. Fahren Sie mit dem nächsten
Abschnitt fort, um AXIS 231D/232D in das Netzwerk einzubinden.
Ring-
blende
Befestigungs-
schraube
Verbindungsmodulkabel
Netzwerkkabel
:
LEDs für:
Stromversorgung
Netzwerk
Summary of Contents for 231D
Page 45: ...Installazione di AXIS 231D 232D 45 ITALIANO ...
Page 46: ......