background image

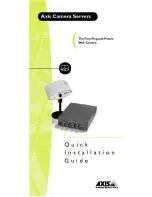
Quick Installation Guide

This guide covers the installation and basic setup procedures for your 
AXIS 240. Should you require more detailed instructions, please 
refer to the AXIS 240 User’s Manual that is available via the Axis 
WWW Home Page at 

http://www.axis.com/salessupport/manuals.html#camera

Installing the 

AXIS 240

Your AXIS 240 can service up to 4 coax/BNC cameras and one 
S-video camera.

Follow these instructions to install your AXIS 240:

1. Record the serial number of your AXIS 240. Please note that the 

serial number is identical to the Ethernet address of the unit.

2. Connect the camera(s) to the camera port(s) of the AXIS 240 

using the appropriate connectors. Optionally, you can connect a 
Pan/Tilt device to the RS232 serial output for automated 
adjustment of the camera orientation.

3. Connect your AXIS 240 to the network using an Ethernet 

10baseT connector.

4. Connect the external power supply (Axis type PS-D), to the 

AXIS 240 and check that the Power indicator is lit.

5. Acquire an unused Internet address for your AXIS 240.

6. Assign the Internet address to your AXIS 240 using the method 

applicable to your network environment:

Windows 95, Windows NT

Start a DOS window and type the following commands:

Example:

arp -s 192.168.3.191 00-40-8c-10-00-86
ping 192.168.3.191

arp -s <Internet address> <Ethernet address>
ping <Internet address>

In Windows 95, you cannot use ARP if you have an empty 
ARP table. Type 

arp -a

 to display the ARP table. If it is 

empty, you must ping an existing unit on your network before 
setting the Internet Address of your AXIS 240. 

Summary of Contents for AXIS 240

Page 1: ......

Page 2: ...lly you can connect a Pan Tilt device to the RS232 serial output for automated adjustment of the camera orientation 3 Connect your AXIS 240 to the network using an Ethernet 10baseT connector 4 Connect the external power supply Axis type PS D to the AXIS 240 and check that the Power indicator is lit 5 Acquire an unused Internet address for your AXIS 240 6 Assign the Internet address to your AXIS 24...

Page 3: ... to the URL of the AXIS 240 as detailed below Example http 192 168 3 191 fullsize jpg camera 1 Example Adding an HTML reference IMG SRC http 192 168 3 191 fullsize jpg camera 2 ALT A fullsize JPEG Image from Camera 2 Note arp s Internet address Ethernet address temp ping Internet address File name Description fullsize jpg Full size JPEG snapshot Generation time 0 5 sec halfsize jpg Half size JPEG ...

Page 4: ...ould be triggered to take a snapshot on each occasion the door opens and then for example send an e mail with the snapshot to an operator Refer to the AXIS 240 User s Manual for more information EyeGet the JPEG Script When using the AXIS 240 over the Internet we recommend that it is accessed over an assisting web server and not directly This is because the AXIS 240 has limited capacity for handlin...

Page 5: ...k the Hardware RTS CTS radio button Click OK to return to the Make new connection dialog 6 Enter the relevant phone number information for the remote modem connected to your AXIS 240 Click Next 7 Click Finish The system then proceeds to build the Driver information database and your connection dialog will then subsequently appear in the Dial Up Networking dialog Accessing the remote AXIS 240 Follo...

Page 6: ... 92 00 München Phone 49 89 95 93 96 0 Tokyo Phone 81 3 3545 8282 Singapore Phone 65 250 8077 Hong Kong Phone 852 2836 0813 Beijing Phone 86 10 6510 2705 Shanghai Phone 86 21 6445 4522 Taipei Phone 886 2 8780 5972 Seoul Phone 82 2 780 9636 AXIS 240 Quick Installation Guide Part No 15807 Revision 1 0 Date February 1998 Copyright Axis Communications AB 1996 1998 ...

Reviews: