background image

AXIS F41 Main Unit

Video and Audio

-

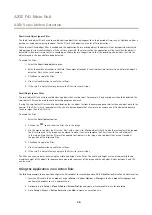
To scale the image automatically, select

Scale with resolution

. The image will be scaled down to fit the

resolution used by the Axis product.

5. Click

Save

.

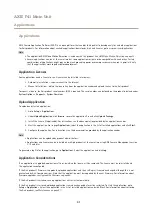
How to include an overlay image

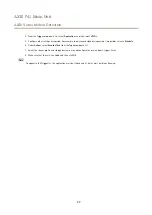
1. Go to

Video & Audio > Overlay Image

.

2. Select the image to use from the

Use overlay image

list and click

Save

.

3. Go to

Video & Audio > Video Stream

and select the

Image

tab.

4. Under

Overlay Settings

, select

Include overlay image at the coordinates

.

5. To control the image’s position, enter the X (horizontal) and Y (vertical) coordinates. The

X=0

and

Y=0

position is

the top left corner. If a part of the image is positioned outside the video image, the overlay image will be moved so
that the whole image is visible.

6. Click

Save

.

About privacy masks

A privacy mask is a user-defined area that covers parts of the monitored area. Privacy masks appear as blocks of solid color and are
applied on the video stream. Privacy masks cannot be bypassed using the VAPIX® application programming interface (API).

The

Privacy Mask List

(

Video & Audio

>

Privacy Mask

) shows all the masks that are currently configured in the Axis product and

indicates if they are enabled.

You can add a new mask, re-size the mask with the mouse, choose a color for the mask, and give the mask a name.

For more information, see the online help

Important

Adding many privacy masks may affect the product’s performance.

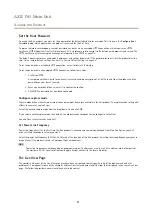
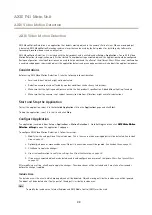
Set Up Audio

To change the product’s audio settings, go to

Video & Audio > Audio Settings

.

To include the audio stream in a video stream, go to

Video & Audio > Video Stream

. Under the

Audio

tab, select

Enable audio

.

Each stream profile is a separate video stream. To include the audio stream in all stream profiles, go to the audio tab in each stream
profile settings page and enable audio. For more information, see

About stream profiles on page 21

.

Audio Modes

The Axis product supports the following audio modes:

Full duplex –

Simultaneous two-way audio allowing the Axis product to transmit and receive audio at the same time.

There is no echo cancellation; if feedback loops appear, try moving the microphone or the speaker.

Half-duplex –

Audio can be transmitted to and from the Axis product but only in one direction at a time. To transmit

audio using the Live View page, use the

Talk

and

Listen

buttons, see

AMC Audio Controls on page 13

.

Simplex – Network Camera speaker only -

Audio is transmitted from a client to the Axis product and can be played by

a speaker connected to the product. To transmit audio using the Live View page, the

Talk

and

Microphone on

buttons

must both be active, see

AMC Audio Controls on page 13

.

25

Summary of Contents for F44

Page 1: ...AXIS F41 Main Unit User Manual ...

Page 2: ...D microSD miniSDHC microSDHC microSDXC are all trademarks or registered trademarks of SD 3C LLC in the United States other countries or both Regulatory Information Europe This product complies with the applicable CE marking directives and harmonized standards Electromagnetic Compatibility EMC Directive 2014 30 EU See Electromagnetic Compatibility EMC on page 2 Low Voltage LVD Directive 2014 35 EU ...

Page 3: ...lties may be applicable for incorrect disposal of this waste Europe This symbol means that the product shall not be disposed of together with household or commercial waste Directive 2012 19 EU on waste electrical and electronic equipment WEEE is applicable in the European Union member states To prevent potential harm to human health and the environment the product must be disposed of in an approve...

Page 4: ... 23 About privacy masks 25 Set Up Audio 25 Audio Clips 27 Configure the Live View Page 28 Detectors 30 About camera tampering 30 Audio Detection 30 Applications 31 Application Licenses 31 Upload Application 31 Application Considerations 31 AXIS Video Motion Detection 33 Considerations 33 Start and Stop the Application 33 Configure Application 33 Using the Application in an Action Rule 36 Events 38...

Page 5: ...ions 60 Technical Specifications 64 Technical Specifications for AXIS F1004 Sensor Unit 65 AXIS F1005 E Sensor Unit 66 66 AXIS F1015 Sensor Unit 67 67 AXIS F1025 Sensor Unit 68 68 AXIS F1035 E Sensor Unit 69 69 AXIS F4005 Dome Sensor Unit 70 70 AXIS F4005 E Dome Sensor Unit 71 71 Connectors 72 Performance Considerations 74 5 ...

Page 6: ...n about regulatory requirements see Electromagnetic Compatibility EMC on page 2 I O Connector Use with external devices in combination with for example tampering alarms motion detection event triggering and alarm notifications In addition to the 0 V DC reference point and power DC output the I O connector provides the interface to Digital output For connecting external devices such as relays and L...

Page 7: ...r connecting the sensor unit to the main unit For information on how to shorten the sensor unit cable see Shorten Sensor Unit Cable on page 8 SD card slot NO NO NOTICE TICE TICE Risk of damage to SD card Do not use sharp tools metal objects or excessive force when inserting or removing the SD card Use your fingers to insert and remove the card Risk of data loss and corrupted recordings Do not remo...

Page 8: ... s network Flashes for network activity Amber Steady for connection to a 10 Mbit s network Flashes for network activity Unlit No network connection Power LED Indication Green Normal operation Amber Flashes green amber during firmware upgrade Shorten Sensor Unit Cable Note The sensor unit cable cannot be extended or split When routing the sensor unit cable the minimum bending radius is 40 mm The se...

Page 9: ...ardware Overview NO NO NOTICE TICE TICE Make sure that the wires stay in the correct order and that the cable shield makes good contact with the connector shield 6 Use a crimping tool to fasten the connector to the cable 9 ...

Page 10: ...to discover and assign an IP address see the document Assign an IP Address and Access the Video Stream on Axis Support web at www axis com techsup Note To show Bonjour as a browser bookmark go to Safari Preferences 3 Enter your user name and password If this is the first time the product is accessed the root password must first be configured For instructions see Set the Root Password on page 11 4 ...

Page 11: ...ing 3 Click OK The password has now been configured Configure capture mode Capture mode defines the maximum resolution and maximum frame rate available in the Axis product The capture mode setting also affects the camera s angle of view Select the desired capture mode from the drop down list and click OK If you select another capture mode than default the product needs to reboot for the changes to...

Page 12: ...n action rule from the Live View page For information about how to configure and enable the button see Manual Trigger on page 12 Click Snapshot to save a snapshot of the video image This button is primarily intended for use when the AXIS Media Control viewer toolbar is not available Enable this button from Live View Config Action Buttons The Audio clip drop down list allows you to play an audio cl...

Page 13: ...s AMC audio buttons control the speakers and microphone connected to the client computer The buttons are only visible when audio is enabled For information about how to configure audio see Set Up Audio on page 25 Speaker button Click to turn the speakers on or off Microphone button Click to mute or unmute the microphone In Simplex speaker only mode the Microphone and Talk buttons must both be acti...

Page 14: ...s no video traffic on the network until a client connects and requests the stream Note that there are a maximum of 20 simultaneous unicast connections Multicast RTP This method RTP over UDP should be used for live multicast video The video stream is always up to date even if some frames are dropped Multicasting provides the most efficient usage of bandwidth when there are large numbers of clients ...

Page 15: ...ins an open HTTP connection to the browser and sends data as and when required for as long as required Windows Media Player This requires AXIS Media Control and the H 264 decoder to be installed The following paths can be used QuickTimeTM The following paths can be used Note ip IP address The Axis product supports QuickTime 6 5 1 and later QuickTime may add latency to the video stream It may be po...

Page 16: ...edia media amp Unicast via RTSP tunneled via HTTP axrtsphttp ip axis media media amp Multicast axrtpm ip axis media media amp QuickTimeTM supports G 711 and AAC audio encoding The following paths can be used rtsp ip axis media media amp rtsp ip axis media media 3gp 16 ...

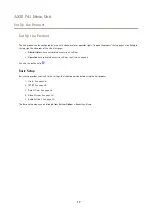
Page 17: ...trators have unrestricted access to all settings Operators have restricted access to settings see Users on page 46 See also the online help Basic Setup Basic Setup provides shortcuts to the settings that should be made before using the Axis product 1 Users See page 46 2 TCP IP See page 49 3 Date Time See page 48 4 Video Stream See page 18 5 Audio Settings See page 25 The Basic Setup menu can be di...

Page 18: ...ounter is useful in situations where there is a specific size requirement for example in face recognition The pixel counter can be used When setting up a video stream see Set Up Video Streams on page 18 Under Preview click Open and select the Show pixel counter option to enable the rectangle in the image Use the mouse to move and resize the rectangle or enter the number of pixels in the Width and ...

Page 19: ...n with maintained video quality It requires a larger amount of processing power to decode than the Baseline profile High The High profile provides a higher compression than both Main and Baseline profiles but requires more processing power to decode High profile supports 8x8 blocks which reduces the bitrate further compared to the Main profile About bitrate control Bitrate control is useful to mak...

Page 20: ... of bitrate reduction Zipstream offers a number of bitrate reduction presets from Low to Extreme Low bitrate reduction is enabled by default and is safe to use in all applications while still reducing the bitrate For cloud connected cameras or cameras using edge storage that need to limit the bitrate for increased storage time it is recommended to select the Extreme bitrate reduction This setting ...

Page 21: ...g profile go to Setup Video Audio Stream Profiles To select a default stream profile for the Live View page go to Setup Live View Config About ONVIF media profiles An ONVIF media profile consists of a set of configurations that can be used to change media stream settings ONVIF media profiles can be used by a client to configure media stream properties The ONVIF Media Profiles page lists all precon...

Page 22: ... window properties Select Automatic to use the default settings for the Automatic and Automatic outdoor options in the White balance drop down list Select Custom to manually set a reference window for white balance in the view area Wide Dynamic Range Wide dynamic range WDR Forensic Capture provides balanced images in scenes when there is a considerable contrast between light and dark areas in the ...

Page 23: ...rease shutter speed as brightness decreases When the shutter speed reaches 1 30 s the camera product increases gain until the set maximum gain for normal light is reached Low light priority 2 Use the slider to set the Priority between Low motion blur and Low noise When prioritizing low motion blur slider all the way to the right the camera automatically increases gain as brightness decreases When ...

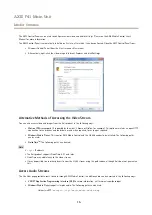
Page 24: ...perimposed over the video stream The image for example a company logo is first uploaded to the Axis product and then used to provide extra information or to mask a part of the image Image specifications The uploaded image should be a Windows 24 bit BMP image with maximum 250 colors The image width and height in pixels must be exactly divisible by four The image cannot be larger than the maximum im...

Page 25: ... mask with the mouse choose a color for the mask and give the mask a name For more information see the online help Important Adding many privacy masks may affect the product s performance Set Up Audio To change the product s audio settings go to Video Audio Audio Settings To include the audio stream in a video stream go to Video Audio Video Stream Under the Audio tab select Enable audio Each strea...

Page 26: ...ered microphone To use a professional microphone requiring 48V phantom power you need an external power supply and a balanced unbalanced converter audio transformer in between Use the Input gain to control the volume of the audio input If the sound is too low choose a higher dB value to amplify the sound If the sound is too high choose a lower dB value The Level bar gives a visual representation o...

Page 27: ...o high choose a lower dB value Audio Clips An audio clip is a sound file that can be played when events occur or directly from the Live View page The audio clip must first be uploaded to the Axis product or recorded by a microphone connected to the product To add download modify or remove audio clips go to Video Audio Audio Clips For more information see the online help To configure the Axis produ...

Page 28: ...s only Click the Refresh button in your browser to view a new image For more information please see the online help Viewer Settings To configure options for the viewer go to Live View Config Viewer Settings Select Show viewer toolbar to display the AXIS Media Control AMC or the QuickTime viewer toolbar under the video image in your browser H 264 decoder installation The administrator can disable i...

Page 29: ... Setup Live View Config 2 Under Output Buttons select the type of control to use Pulse activates the output for a defined period of time The pulse time can be set from 1 100 second to 60 seconds Active Inactive displays two buttons one or each action To configure the active and inactive states go to System Options Ports Devices I O Ports and set the port s Normal state For more information about I...

Page 30: ...ampering from the list of detectors 6 Optionally select a schedule and set additional conditions 7 Select the action Example To send an email select Send Notification and select a Recipient from the list of defined recipients Note The While the rule is active option under Duration cannot be used with camera tampering since camera tampering does not have a duration and once it has been triggered it...

Page 31: ...load Package 3 Install the license if applicable For instructions see the documentation provided by the application vendor 4 Start the application Go to page Applications select the application in the list of installed applications and click Start 5 Configure the application For instructions see the documentation provided by the application vendor Note Applications can be uploaded by product admin...

Page 32: ...ain Unit Applications If the Axis product is reset to factory default uploaded applications and their settings are removed For information about factory default see Reset to Factory Default Settings on page 58 32 ...

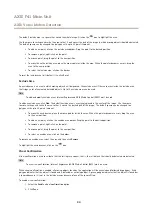
Page 33: ...alse detections Start and Stop the Application To start the application select it in the Installed Applications list on the Applications page and click Start To stop the application select it in the list and click Stop Configure Application The application is available from Setup Applications Motion Detection 3 Go to Settings and then click AXIS AXIS AXIS Video Video Video Motion Motion Motion Det...

Page 34: ...tangle placed in the center of the image Use the mouse to move reshape and resize the area so that it covers the desired part of the image The default square can be changed to a polygon with up to 20 points corners To move the exclude area place the mouse pointer inside the area When the pointer becomes a cross drag the area to the new position To add a new point click on the exclude area border D...

Page 35: ... large ponds or large trees use exclude areas instead of the filter The filter will be applied to all moving objects in scene and if set to a value too large important objects might not be detected When the swaying object filter is enabled and the application finds a moving object the object will not be reported as detected red polygon in visual confirmation until it has travelled a distance large...

Page 36: ...era appears smaller than an object close to the camera If the filter is set to ignore objects the size of a person people that are close to be camera can still be detected because they are larger than the filter size To enable the filter 1 Select the Small objects option 2 Click on the icon to show the filter size in the image 3 Use the mouse to adjust the filter size Start with a small size Movin...

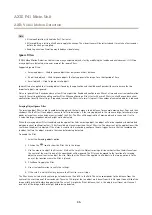
Page 37: ...ecord video during certain time periods select a Schedule 6 Under Actions select Record Video from the Type drop down list 7 Select the stream profile and storage device to use and configure the pre and post trigger times 8 Make sure that the rule is enabled and then click OK Note To appear in the Trigger list the application must be started and its status must be Idle or Running 37 ...

Page 38: ... the Trigger drop down list and then select VMD3 4 Optionally select a Schedule and Additional conditions See below 5 Under Actions select Record Video from the Type drop down list 6 Select a Stream profile and configure the Duration settings as described below 7 Select Network Share from the Storage drop down list To use more than one trigger for the action rule select Additional conditions and c...

Page 39: ...if the storage device is unavailable removed full locked or if other read or write problems occur This can for example be used to send maintenance notifications Recording Triggers the rule when the Axis product records to the storage device The recording status trigger can be used to notify the operator for example by flashing LED lights if the product has started or stopped to record to the stora...

Page 40: ...d click Add 2 Enter a descriptive name 3 Select a recipient Type 4 Enter the information needed for the recipient type 5 Click Test to test the connection to the recipient 6 Click OK Recipient Types The following recipients are available Recipient Use with action Notes Email Send Images Send Notification Send Video Clip An email recipient can contain multiple email addresses FTP Send Images Send V...

Page 41: ...Recipients and click Add 2 Enter a Name and select Email from the Type list 3 Enter the email addresses to send emails to in the To field Use commas to separate multiple addresses 4 Select the email provider from the Provider list 5 Enter the user ID and password for the email account 6 Click Test to send a test email To set up an email recipient using for example a corporate email server follow t...

Page 42: ...ts Recurrences and click Add 2 Enter a descriptive name and recurrence pattern 3 Click OK To use the recurrence in an action rule first select Time from the Trigger drop down list in the Action Rule Setup page and then select the recurrence from the second drop down list To modify or remove recurrences select the recurrence in the Recurrences List and click Modify or Remove 42 ...

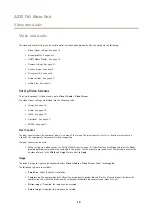
Page 43: ... under System Options Date Time see Date Time on page 48 To find a recording follow these steps 1 Go to Recordings List 2 To reduce the number of recordings displayed select the desired options under Filter Recording time List recordings that started between the From and To times Event List recordings that were triggered by a specific event Select continuous to list continuous recordings Storage L...

Page 44: ...log opens 4 By default the complete recording is selected To export a part of the recording modify the start and stop times 5 Optionally enter a file name for the recording 6 Click Export Note Recordings can also be exported from the playback window Continuous Recording The Axis product can be configured to continuously save video to a storage device For information about storage devices see Stora...

Page 45: ...e product to factory default settings will erase any uploaded language files and reset the product language to English Clicking the Restore button on the Maintenance page will not affect the language A firmware upgrade will not affect the language used However if you have uploaded a new language to the product and later upgrade the firmware it may happen that the translation no longer matches the ...

Page 46: ... access to the Live View page Deselect the Enable Basic Setup option to hide the Basic Setup menu Basic Setup provides quick access to settings that should be made before using the Axis product ONVIF ONVIF Open Network Video Interface Forum is a global interface standard that makes it easier for end users integrators consultants and manufacturers to take advantage of the possibilities offered by n...

Page 47: ...ovided by a Certification Authority CA You need a CA certificate to authenticate the authentication server a CA signed client certificate to authenticate the Axis product To create and install certificates go to System Options Security Certificates See About certificates on page 47 To allow the product to access a network protected by IEEE 802 1X 1 Go to System Options Security IEEE 802 1X 2 Selec...

Page 48: ...to allow clients to retrieve audio streams from the Axis product For information on how to configure audio settings see Set Up Audio on page 25 Note Deselecting this option will disable audio globally in the Axis product for configured events and profiles with audio as well Date Time The Axis product s date and time settings are configured under System Options Date Time Current Server Time display...

Page 49: ...e 58 and then perform the installation again To use a static IP address check Use the following IP address and specify the IP address subnet mask and default router IPv6 Address Configuration If IPv6 IP version 6 is enabled the Axis product will receive an IP address according to the configuration in the network router To enable IPv6 go to System Options Network TCP IP Basic Other settings for IPv...

Page 50: ...ny location For more information and help to find a local AVHS Service Provider go to www axis com hosting The AVHS settings are configured under System Options Network TCP IP Basic The possibility to connect to an AVHS service is enabled by default To disable clear the Enable AVHS box One click enabled Press and hold the product s control button see Hardware Overview on page 6 for about 3 seconds...

Page 51: ... and enter the host name or IP address of the NTP server Host Name Configuration The Axis product can be accessed using a host name instead of an IP address The host name is usually the same as the assigned DNS name The host name is configured under System Options Network TCP IP Advanced Select Obtain host name via IPv4 DHCP to use host name provided by the DHCP server running on IPv4 Select Use t...

Page 52: ...cted Alternative HTTP port Select this option to manually define an external HTTP port Enter a port in the range 1024 65535 If the port field is empty or contains the default setting which is 0 a port number is automatically selected when enabling NAT traversal Note An alternative HTTP port can be used or be active even if NAT traversal is disabled This is useful if your NAT router does not suppor...

Page 53: ...xis product to send messages to a management system on important events and status changes Check Enable traps and enter the IP address where the trap message should be sent and the Trap community that should receive the message Note If HTTPS is enabled SNMP v1 and SNMP v2c should be disabled Traps for SNMP v1 v2 are used by the Axis product to send messages to a management system on important even...

Page 54: ...tored on the card from the Windows operating system a third party ext4 driver or application is required vFAT supported by most operating systems for personal computers The SD card is managed on the System Options Storage page Click SD Card to open Storage Management If the card s status shows as failed click Check disk to see if the problem can be found and then try Repair This option is only ava...

Page 55: ...e systems To manually format the SD card follow these steps 1 Insert the SD card in the SD card slot 2 Open the Axis product s webpages and go to Setup System Options Storage 3 Click SD Card 4 Click Format and select the desired file system 5 Click OK to start formatting the card Encrypt SD Card Data To prevent unauthorized individuals and systems from accessing recorded video the SD card content ...

Page 56: ...ll recordings and data from the Axis product s folder on the designated share click Clear under Storage Tools To avoid filling the share it is recommended to remove recordings continuously Under Recording Settings select Remove recordings older than and select the number of days or weeks To stop writing to the share and protect recordings from being removed select Lock under Recording Settings Por...

Page 57: ...or identifying the product among other products installed in the same location For information about firmware upgrade see Upgrade the Firmware on page 60 Support Support Overview The System Options Support Support Overview page provides information on troubleshooting and contact information should you require technical assistance See also Troubleshooting on page 60 System Overview To get an overvi...

Page 58: ...ystem Options Advanced File Upload Uploaded files are accessed through http ip address local user file name where user is the selected user group viewer operator or administrator for the uploaded file Plain Config Plain Config is for advanced users with experience of Axis product configuration Most parameters can be set and modified from this page To open Plain Config go to System Options Advanced...

Page 59: ...nstallation and management software tools assign an IP address set the password and access the video stream It is also possible to reset parameters to factory default via the web interface Go to Setup System Options Maintenance and click Default 59 ...

Page 60: ...h new release before upgrading the firmware To upgrade the product s firmware 1 Download the latest firmware file to your computer available free of charge at www axis com techsup 2 Go to Setup System Options Maintenance in the product s webpages 3 Under Upgrade Server click Browse and locate the file on your computer 4 Click Upgrade 5 Wait approximately 10 minutes while the product is being upgra...

Page 61: ...ress and Access the Video Stream on Axis Support web at www axis com techsup Certificate error when using IEEE 802 1X For authentication to work properly the date and time settings in the Axis product should be synchronized with an NTP server See Date Time on page 48 The product is accessible locally but not externally Router configuration To configure your router to allow incoming data traffic to...

Page 62: ...and Network indicator LEDs are flashing red rapidly Hardware failure Contact your Axis reseller Product does not start up Product does not start up If the product does not start up keep the network cable connected and re insert the power cable to the midspan Video and image problems general Image unsatisfactory Check the video stream and camera settings under Setup Video Audio Video Stream and Set...

Page 63: ...m Log under System Options Support Logs Reports Depending on the problem it might be necessary to re mount the storage device For information on how to set up a storage disruption alarm see Events on page 38 Video cannot be recorded Check that the SD card is not write protected that is read only SD card cannot be mounted Reformat the SD card and then click Mount NO NO NOTICE TICE TICE Formatting t...

Page 64: ... 64 kbit s G 726 ADPCM 8 kHz 32 kbit s or 24 kbit s Configurable bit rate AAC LC 8 16 32 kHz 8 128 kbit s Audio input output External microphone input or line input Line output Network Security Password protection IP address filtering HTTPSc encryption IEEE 802 1Xc network access control Digest authentication User access log Centralized certificate management Supported protocols IPv4 v6 HTTP HTTPS...

Page 65: ...EN 55024 EN 61000 6 1 EN 61000 6 2 EN 61000 3 2 EN 61000 3 3 EN 55022 Class B FCC Part 15 Subpart B Class B ICES 003 Class B VCCI Class B C tick AS NZS CISPR 22 Class B KCC KN22 Class B KN24 Dimensions 51 x 121 x 121 mm 2 1 16 x 4 12 16 x 4 12 16 in Weight 532 g 1 17 lb Optional accessories AXIS F8001 Surface Mount with Strain Relief AXIS F8002 DIN Rail Clip AXIS T8120 15 W Midspan 1 port AXIS T83...

Page 66: ... KN24 Dimensions 60 x 60 x 89 mm 2 3 8 x 2 3 8 x 3 1 2 in Weight 55 g 0 12 lb Required hardware AXIS F Main Unit Included accessories Installation Guide Optional accessories AXIS F7315 Cable White 15 m Warranty Axis 3 year warranty see www axis com warranty AXIS F1005 E Sensor Unit Models AXIS F1005 E 3 m 10 ft cable Standard IP66 IP67 rated AXIS F1005 E 12 m 39 ft cable Standard IP66 IP67 rated C...

Page 67: ...n shock IEC EN UL 60950 22 NEMA 250 Type 4X Dimensions 62 mm 2 7 16 in ø 30 mm 1 3 16 in Weight 3 m 10 ft cable 116 g 0 26 lb 12 m 39 ft cable 366 g 0 81 lb Required hardware AXIS F34 F41 F44 Main Unit Included accessories Installation Guide AXIS F8201 Vari angle Mounting Bracket Optional accessories AXIS F8203 Fixed Mount Bracket AXIS F8204 Mounting Band AXIS F8205 Bullet Accessory AXIS F8212 Tri...

Page 68: ... NZS CISPR 22 Class B KCC KN22 Class B KN24 EN 50581 IEC 60068 2 6 IEC 60068 2 27 Dimensions 69 mm 2 3 4 in ø 30 mm 1 3 16 in Weight 3 m 10 ft cable 120 g 0 26 lb 12 m 39 ft cable 370 g 0 82 lb Required hardware AXIS F34 F41 F44 Main Unit Included accessories Installation Guide AXIS F8201 Vari angle Mounting Bracket Optional accessories AXIS F8203 Fixed Mount Bracket AXIS F8215 Varifocal Bullet Ac...

Page 69: ... EN 50581 IEC 60068 2 6 IEC 60068 2 27 Dimensions 45 mm 1 3 4 in ø 20 mm 13 16 in Weight 3 m 1 ft cable 78 g 0 17 lb 12 m 39 ft cable 328 g 0 72 lb Required hardware AXIS F34 F41 F44 Main Unit Included accessories Installation Guide AXIS F8202 Straight Mounting Bracket Optional accessories AXIS F8204 Mounting Band AXIS F8212 Trim Ring AXIS F8225 Pinhole Accessory AXIS F9201 Black Silver Height Str...

Page 70: ...lass B KCC KN22 Class B KN24 EN 50581 IEC 60068 2 60 IEC 60529 IP66 IP67 IEC 60721 3 5 5M3 vibration shock IEC EN UL 60950 22 NEMA 250 Type 4X Dimensions 62 mm 2 7 16 in ø 30 mm 1 3 16 in Weight 3 m 10 ft cable 96 g 0 21 lb 12 m 39 ft cable 346 g 0 76 lb Required hardware AXIS F34 F41 F44 Main Unit Included accessories Installation Guide AXIS F8201 Vari angle Mounting Bracket Optional accessories ...

Page 71: ...ass B C tick AS NZS CISPR 22 Class B KCC KN22 Class B KN24 EN 50581 IEC 60068 2 60 IEC 60721 3 5 5M3 vibration shock Dimensions Depth 38 mm 1 1 2 in ø 112 mm 1 6 in 12 m 39 ft cable Weight 530 g 1 1 lb Required hardware AXIS F34 F41 F44 Main Unit Included accessories Installation Guide Rotation tool Warranty Axis 3 year warranty see www axis com warranty AXIS F4005 E Dome Sensor Unit Camera Image ...

Page 72: ... EN UL 60950 22 Dimensions Depth 38 mm 1 1 2 in ø 112 mm 1 6 in 12 m 39 ft cable Weight 590 g 1 3 lb Required hardware AXIS F34 F41 F44 Main Unit Included accessories Installation Guide Rotation tool Warranty Axis 3 year warranty see www axis com warranty Environmental responsibility www axis com environmental responsibility Connectors I O Connector Function Pin Notes Specifications 0 V DC 1 0 V D...

Page 73: ...udio Input Microphone Line in Balanced Hot signal Microphone Line in Unbalanced Microphone Line in Balanced Cold signal Microphone Line in Unbalanced Unused Ground Audio Output Line out mono stereo connector compatible Line out mono stereo connector compatible Ground The internal microphone is used by default the external microphone is used when connected It is possible to disable the internal mic...

Page 74: ...ntaining more data Bandwidth affected Access by large numbers of Motion JPEG and or unicast H 264 clients Bandwidth affected Simultaneous viewing of different streams resolution compression by different clients Effect on frame rate and bandwidth Accessing Motion JPEG and H 264 video streams simultaneously Frame rate and bandwidth affected Heavy usage of event settings affect the product s CPU load...

Page 75: ...User Manual Ver M11 7 AXIS F41 Main Unit Date July 2016 Axis Communications AB 2015 2016 Part No 1503541 ...

Reviews: