background image

AXIS Q6035 PTZ Dome Network Camera

Accessing the Product

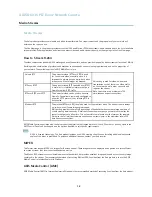
Access from the Internet

Once connected, the Axis product is accessible on your local network (LAN). To access the product from the Internet you must

con

fi

gure your network router to allow incoming data traf

fi

c to the product. To do this, enable the NAT-traversal feature, which

will attempt to automatically con

fi

gure the router to allow access to the product. This is enabled from

Setup > System Options >

Network > TCP/IP Advanced.

For more information, please see

NAT traversal (port mapping) for IPv4, on page 44

. See also AXIS Internet Dynamic DNS Service at

www.axiscam.net For Technical notes on this and other topics, visit the Axis Support web at www.axis.com/techsup

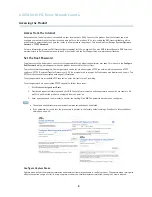
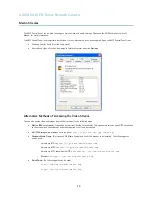
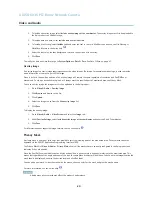
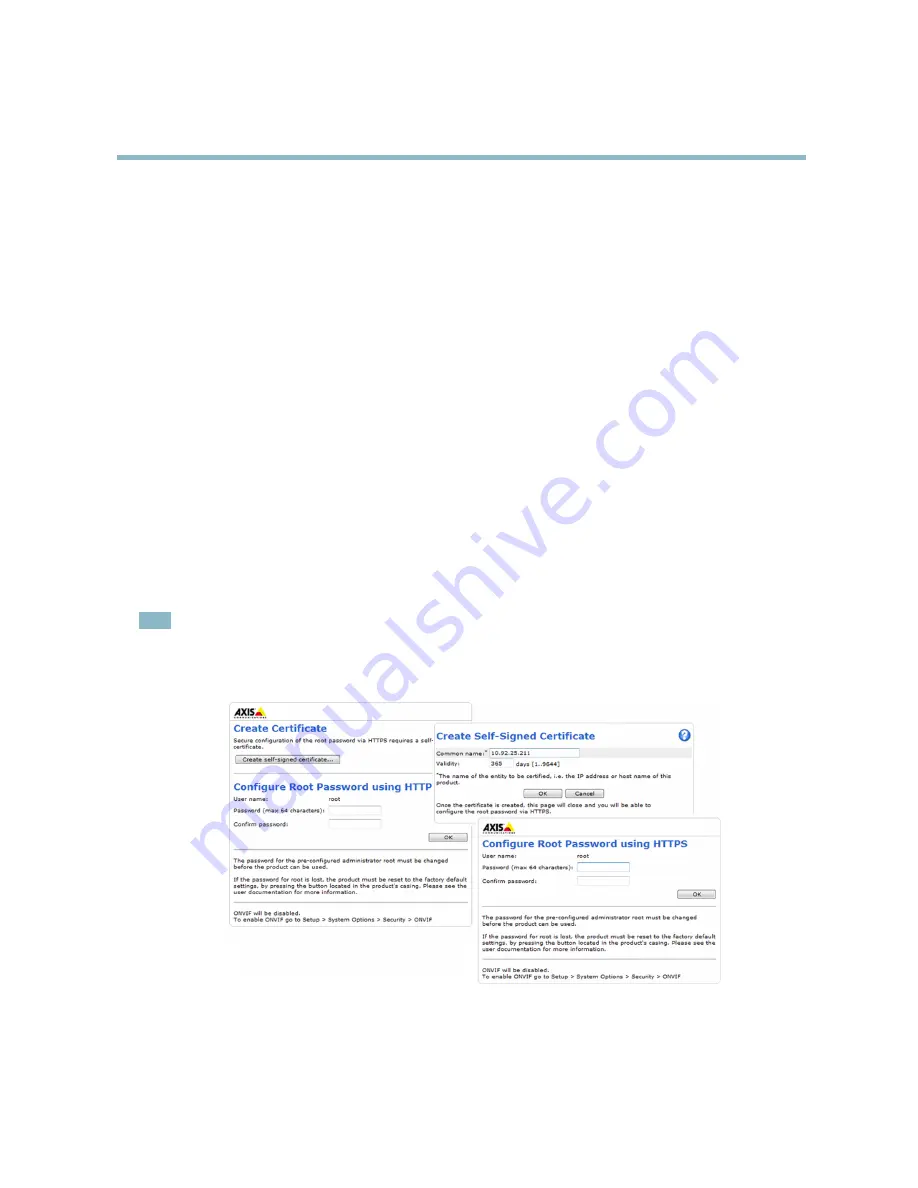
Set the Root Password

To gain access to the Axis product, you must set the password for the default administrator user

root

. This is done in the

Con

fi

gure

Root Password

dialog, which appears when the product is accessed for the

fi

rst time.

To prevent network eavesdropping, the root password can be set via an encrypted HTTPS connection, which requires an HTTPS

certi

fi

cate. HTTPS (Hypertext Transfer Protocol over SSL) is a protocol used to encrypt traf

fi

c between web browsers and servers. The

HTTPS certi

fi

cate ensures encrypted exchange of information.

To set the password via a standard HTTP connection, enter it directly in the

fi

rst dialog.

To set the password via an encrypted HTTPS connection, follow these steps:

1. Click

Create self-signed certi

fi

cate

.

2. Provide the requested information and click

OK

. The certi

fi

cate is created and the password can now be set securely. All

traf

fi

c to and from the product is encrypted from this point on.

3. Enter a password and then re-enter to con

fi

rm the spelling. Click

OK

. The password has now been con

fi

gured.

Note

• The default administrator user name

root

is permanent and cannot be deleted.

• If the password for root is lost, the product must be reset to the factory default settings. See

Reset to Factory Default

Settings, on page 49

.

Con

fi

gure Capture Mode

Capture mode de

fi

nes the maximum resolution and maximum frame rate available in the Axis product. The capture mode setting also

affects the camera’s angle of view; if using a capture mode with a smaller maximum resolution, the angle of view is reduced.

8

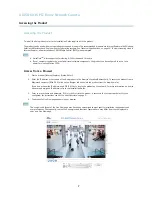
Summary of Contents for Q6035

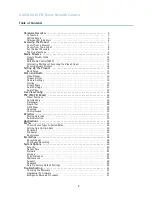
Page 1: ...USER MANUAL AXIS Q6035 PTZ Dome Network Camera ...

Page 2: ...when installed according to the instructions and used in its intended environment Immunity to electrical and electromagnetic phenomena when installed according to the instructions and used in its intended environment USA This equipment has been tested using a shielded network cable STP and found to comply with the limits for a Class B digital device pursuant to part 15 of the FCC Rules These limit...

Page 3: ...18 Overlay 19 Privacy Mask 20 Audio Settings 21 Audio Clips 22 Live View Config 23 PTZ Pan Tilt Zoom 26 Preset Positions 26 Autotracking 26 Gatekeeper 28 Guard Tour 28 OSDI Zones 29 Advanced 29 Control Queue 30 Detectors 31 Motion Detection 31 Audio Detection 32 Applications 33 Events 34 Convert Event Types to Action Rules 35 Setting Up an Action Rule 35 Recipients 36 Schedules 36 Recurrences 37 R...

Page 4: ...AXIS Q6035 PTZ Dome Network Camera Table of Contents Symptoms Possible Causes and Remedial Actions 52 Technical Specifications 56 Multi Connector Cable sold separately 58 Performance Considerations 60 4 ...

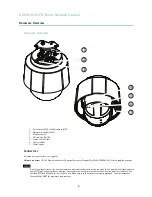
Page 5: ...5 Ethernet connector Supports Power over Ethernet Plus PoE IEEE 802 3at Use the supplied midspan NOTICE Due to local regulations or the environmental and electrical conditions in which the product is to be used a shielded network cable STP may be appropriate or required Any network cables that are routed in outdoor environments or similar shall be shielded STP and intended for their specific use M...

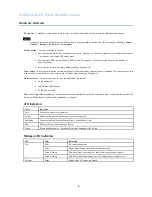
Page 6: ...trol button to reset the camera to factory default settings See page 49 Multi connector Terminal connector for connecting external equipment Audio equipment Input Output I O devices AC DC power supply When connecting external equipment a multi connector cable available from Axis is required in order to maintain the product s IP rating see Multi Connector Cable sold separately on page 58 LED Indica...

Page 7: ...owser Internet Explorer Firefox Safari 2 Enter the IP address or host name of the Axis product in the browser s Location Address field To access the product from a Macintosh computer Mac OS X click on the Bonjour tab and select the product from the drop down list If you do not know the IP address use AXIS IP Utility to locate the product on the network For more information on how to discover and a...

Page 8: ...ypted HTTPS connection which requires an HTTPS certificate HTTPS Hypertext Transfer Protocol over SSL is a protocol used to encrypt traffic between web browsers and servers The HTTPS certificate ensures encrypted exchange of information To set the password via a standard HTTP connection enter it directly in the first dialog To set the password via an encrypted HTTPS connection follow these steps 1...

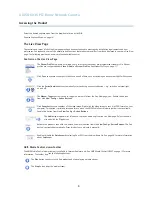
Page 9: ...on is used to trigger an action rule from the Live View page see Enable this button from Live View Config Action Buttons Click Snapshot to save a snapshot of the video image Right click the video image to save it in JPEG format on your computer This button is primarily intended for use when the AXIS Media Control viewer toolbar is not available Enable this button from Live View Config Action Butto...

Page 10: ...ing and listening Simplex speaker only mode To send audio the Talk and Microphone buttons must both be active Click either button to stop audio transmission PTZ Controls The Live View page also displays Pan Tilt Zoom PTZ controls The administrator can enable disable controls for specified users under System Options Security Users With the PTZ Control Queue enabled the time each user is in control ...

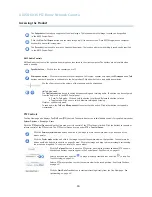
Page 11: ...era or click on a position on the bar to set the focus position Using the focus bar will disable the product s autofocus To re enable use the PTZ control panel which is opened by clicking the Ctrl panel button see above Iris bar Click on a position on the iris bar to change the degree to which the iris is opened This will disable the product s auto iris To re enable use the PTZ control panel which...

Page 12: ...maximum of 20 simultaneous unicast connections Multicast RTP This method RTP over UDP should be used for live multicast video The video stream is always up to date even if some images are dropped Multicasting provides the most efficient usage of bandwidth when there are large numbers of clients viewing simultaneously A multicast cannot however pass a network router unless the router is configured ...

Page 13: ...the Axis product in the following ways Motion JPEG server push if supported by the client Firefox for example This option maintains an open HTTP connection to the browser and sends data as and when required for as long as required Still JPEG images in a browser Enter the path http ip axis cgi jpg image cgi Windows Media Player This requires AXIS Media Control and the H 264 decoder to be installed ...

Page 14: ...accessed in the following ways VAPIX Application Programming Interface API For more information visit www axis com developer Windows Media Player supports simplex audio The following paths can be used Unicast via RTP axrtpu ip axis media media amp Unicast via RTSP axrtsp ip axis media media amp Unicast via RTSP tunneled via HTTP axrtsphttp ip axis media media amp Multicast axrtpm ip axis media med...

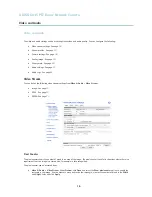
Page 15: ...ew page Administrators have unrestricted access to all settings Operators have access to all settings except System Options See also the online help Basic Setup Basic Setup provides shortcuts to the settings that should be made before using the Axis product 1 Users See page 40 2 TCP IP See page 42 3 Date Time See page 41 4 Video Stream See page 16 5 Audio Settings See page 21 The Basic Setup menu ...

Page 16: ...eo stream settings from Video Audio Video Stream Image See page 17 H 264 See page 17 MJPEG See page 17 Pixel Counter The pixel counter shows the number of pixels in an area of the image The pixel counter is useful in situations where there is a requirement that the image is a certain size for example in face recognition The pixel counter can be accessed from Video Audio Video Stream Under Preview ...

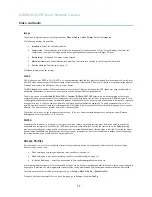
Page 17: ... image quality are affected negatively To partly compensate for this it is possible to prioritize either frame rate or image quality Not setting a priority means that frame rate and image quality are equally affected You must save your settings before they can take effect The current bit rate can be set to appear as text overlay To do this select the Include text check box option under Overlay Set...

Page 18: ...mode 3 Click Save 4 Review and reconfigure all settings for example Stream profiles PTZ settings including preset positions and guard tours Gatekeeper Motion detection windows Privacy masks Image overlays Exposure zones Action rules Settings in uploaded applications Image Appearance Increasing the Color level increases the color saturation The value 100 gives maximum color saturation The value 0 g...

Page 19: ...w light situations A high gain will also increase the amount of image noise Day Night The IR cut filter prevents infrared IR light from reaching the image sensor In poor lighting conditions for example at night or when using an IR lamp set the IR cut filter to Off This increases light sensitivity and allows the product to see infrared light The image is shown in black and white when the IR cut fil...

Page 20: ... Audio Overlay Image 2 Click Browse and browse to the file 3 Click Upload 4 Select the image to use from the Use overlay image list 5 Click Save To display the overlay image 1 Go to Video Audio Video Stream and select the Image tab 2 Under Overlay Settings select Include overlay image at the coordinates and enter the X and Y coordinates 3 Click Save For information about supported image formats se...

Page 21: ...ector Configure the audio input settings under Video Audio Audio Settings Note A multi connector cable available from Axis Multi Connector Cable sold separately is required when connecting external audio equipment to the Axis product Source Select Microphone for an external microphone or Line for a Line in device e g an audio mixer for multiple microphones or a microphone with a built in amplifier...

Page 22: ...o Settings Note A multi connector cable available from Axis Multi Connector Cable sold separately is required when connecting external audio equipment to the Axis product Output gain Control the volume dB Full Scale of the line audio output If the sound is too low choose a higher dB If the sound is too high choose a lower dB Audio Clips An audio clip is a sound file that can be played when events ...

Page 23: ...ettings See page 24 Action Buttons These are the buttons described in Controls on the Live View Page on page 9 User Defined Links See page 24 Output Buttons See page 24 Default Viewer for Browsers From Live View Config Default Viewer select the default method for viewing video images in your browser The product attempts to show the video images in the selected video format and viewer If this is no...

Page 24: ...rom your Axis reseller Select Show crosshair in PTZ joystick mode to enable a cross that will indicate the center of the image in PTZ joystick mode Select Use PTZ joystick mode as default to enable joystick mode The mode can be changed temporarily from the PTZ control panel Select Enable recording button to enable recording from the Live View page This button is available when using the AMC viewer...

Page 25: ... and inactive states go to System Options Ports Devices I O Ports and set the port s Normal state For more information about I O ports see I O Ports on page 47 Note A multi connector cable available from Axis is required when connecting external I O devices to the Axis product See Multi Connector Cable sold separately on page 58 25 ...

Page 26: ...n the Preset Positions setup window To set a customized home position select Use current position as Home when adding a preset position The user defined home position will have H added for example Entrance H The default Home position called Home will still be available The product can be configured to return to the Home position when the PTZ functionality has been inactive for a specified length o...

Page 27: ...reas Exclude areas are areas where movement is to be ignored Note Movement in an area blocked by a privacy mask is always ignored 1 Click Add area to create an exclude area 2 Resize and move the area the blue rectangle to the desired position 3 Enter a descriptive name and click Save To remove an area click the name of the area and click Remove To enable or disable an area click the name of the ar...

Page 28: ...ions one by one in a predetermined order or at random and for configurable time periods The enabled guard tour will keep running after the user has logged off or closed the browser The guard tour function in this Axis product also includes tour recording see Tour Recording on page 29 To add a guard tour 1 Go to PTZ Guard Tour and click Add 2 Select Create a preset tour and click OK 3 Enter a descr...

Page 29: ... Each OSDI zone is set up with coordinates and a descriptive name OSDI zones are set up under PTZ OSDI Zones The Axis product uses the coordinates of the center of the view to set the lower left and upper right zone areas First navigate to where you would like the lowermost left point of the OSDI zone to be located Click Get to set the coordinates Proceed to where the upper right point of zone sho...

Page 30: ... appear in the Live View page offering one viewer exclusive control for a limited period of time Other users will be placed in queue A user who belongs to a group see Users on page 40 with a higher PTZ priority can go before other users in the queue and take control of the product The order of priority is as follows 1 Administrator An administrator takes over PTZ control regardless of who is first...

Page 31: ... and start recording For more information see Setting Up an Action Rule on page 35 Note Using the motion detection feature may decrease the product s overall performance Set Up Motion Detection Windows To set up a motion detection Include Window follow these instructions 1 Go to Detectors Motion Detection 2 Select the Configure Included Windows option and click New Select the new window in the lis...

Page 32: ...ments use several small motion detection windows rather than one large window and select a low object size To avoid triggering on small objects select a high object size If no objects should appear in the Include Window select a high history level This will cause motion detection to trigger as long as the object is present in the window To only detect flashing light select a low sensitivity In oth...

Page 33: ...e License menu option If the product is connected to the Internet Automatic Installation appears in the web page If the product is not connected to the Internet go to www axis com applications to acquire a License key You will need a license code and the product s serial number found on the label and under System Options Support System Overview to receive a license key Installed Applications lists...

Page 34: ...validate actions during product installation and configuration PTZ Autotracking trigger the rule when autotracking starts or stops see Autotracking on page 26 Moving trigger the rule when the camera view moves due to a PTZ operation This can for example be used as an additional condition to prevent an action rule triggered by motion detection to record video while the camera view moves due to a PT...

Page 35: ...ing a VMS based on the old Event Management System Setting Up an Action Rule An action rule defines the conditions that must be met for the product to perform an action for example record video or send email notifications If multiple conditions are defined all must be met to trigger the action The following example describes how to set up an action rule to record video to a network share if there ...

Page 36: ...ient Use with action Email Send Images Send Notification FTP Send Images HTTP Send Images Send Notification Network Share Send Images TCP Send Notification Note A network share can also be used as a storage device for recorded video Go to System Options Storage to configure a network share before setting up a continuous recording or an action rule to record video See Storage on page 46 for more in...

Page 37: ...every 5 minutes or every hour To set up a recurrence 1 Go to Events Recurrences and click Add 2 Enter a descriptive name and recurrence pattern 3 Click OK To use the recurrence in an Action Rule first select Time from the Trigger drop down list in the Action Rule Setup page and then select the recurrence from the second drop down list To modify or remove recurrences select the recurrence in the Re...

Page 38: ...lick Download The downloaded file is a zip file containing a minimum of three files of which the Matroska mkv files are the actual recordings The recordings are time stamped with the date and time they were downloaded that is not the date the recordings were made Note To play recordings in Windows Media Player AXIS Matroska File Splitter must be installed AXIS Matroska File Splitter can be downloa...

Page 39: ...a recording is ongoing the recording will be stopped and saved in the recording list and a new recording with the new stream profile will start All previous continuous recordings will remain in the recording list until they are removed manually or through automatic removal of old recordings 39 ...

Page 40: ...vantage of the possibilities offered by network video technology ONVIF enables interoperablity between different vendor products increased flexibility reduced cost and future proof systems By creating a user you automatically enable ONVIF communication Use the user name and password with all ONVIF communication with the product For more information see www onvif org IP Address Filter IP address fi...

Page 41: ...the box to enable IEEE 802 1X and click Save Certificates CA Certificate The CA certificate is used to validate the identity of the authentication server Enter the path to the certificate directly or locate the file using the Browse button Then click Upload To remove a certificate click Remove Client certificate Client private key The client certificate and private key are used to authenticate the...

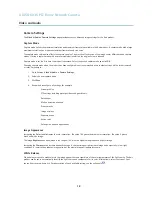
Page 42: ...s set to use IPv4 IP version 4 and to obtain the IP address automatically via DHCP The IPv4 settings are configured under System Options Network TCP IP Basic DHCP Dynamic Host Configuration Protocol allows network administrators to centrally manage and automate the assignment of IP addresses DHCP should only be enabled if using dynamic IP address notification or if the DHCP can update a DNS server...

Page 43: ...in Name Service provides the translation of host names to IP addresses The DNS settings are configured under System Options Network TCP IP Advanced Select Obtain DNS server address via DHCP to use the DNS settings provided by the DHCP server To make manual settings select Use the following DNS server address and specify the following Domain name Enter the domain s to search for the host name used ...

Page 44: ... in the NAT router is forwarded to the product NAT traversal is configured under System Options Network TCP IP Advanced Note For NAT traversal to work this must be supported by the router The router must also support UPnPTM The router has many different names NAT router Network router Internet Gateway Broadband router Broadband sharing device or Home firewall but the essential purpose of the devic...

Page 45: ... video live audio event alarm traffic and management traffic Note Live audio DSCP will be equal to live video DSCP if H 264 over RTSP is used SMTP email To send email messages from the Axis product via SMTP Simple Mail Transfer Protocol an SMTP mail server must be set up This is done under System Options Network SMTP email Enter the host names or IP addresses and port numbers for the primary and s...

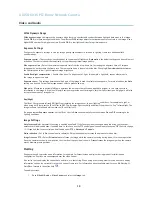
Page 46: ...video audio ports are automatically selected For multicast streams only certain IP addresses and port numbers should be used Select Always Multicast Video and or Always Multicast Audio to start multicast streaming without opening an RTSP session Bonjour The Axis product includes support for Bonjour Bonjour is enabled by default and the product is automatically detected by operating systems and cli...

Page 47: ...rage such as a NAS Network Attached Storage or any server that uses CIFS Common Internet File System and use them for storage of recordings To add a network share 1 Go to System Options Storage 2 Click Network Share 3 Enter the IP address DNS or Bonjour name to the host server in the Host field 4 Enter the name of the share in the Share field 5 If required select The share requires login and enter...

Page 48: ...be reset to factory default using the control button see Reset to Factory Default Settings on page 49 To test the product s PTZ mechanics click Test under PTZ Status For information about firmware upgrade see Upgrading the Firmware on page 51 Support Support Overview The System Options Support Support Overview page provides information on troubleshooting and contact information should you require ...

Page 49: ...tomized scripts To open the Script Editor go to System Options Advanced Scripting It is recommended to create a backup file before customizing the scripts If a script causes problems reset the product to its factory default settings see page 49 For more information see www axis com developer File Upload Files for example web pages and images can be uploaded to the Axis product and used as custom s...

Page 50: ... is now complete the product has been reset to the factory default settings The default IP address is 192 168 0 90 5 Re assign the IP address It is also possible to reset parameters to factory default via the web interface Go to Setup System Options Maintenance 50 ...

Page 51: ...is website at www axis com techsup 2 Go to Setup System Options Maintenance in the products web pages 3 Under Upgrade Server click Browse and locate the file on your computer Click Upgrade After starting the upgrade process always wait at least 5 10 minutes before restarting the product even if you suspect the upgrade has failed AXIS Camera Management can be used for multiple upgrades See www axis...

Page 52: ...dress intended for the product and the IP address of the computer used to access the product are located on different subnets you will not be able to set the IP address Contact your network administrator to obtain an IP address The IP address is being used by another device Disconnect the Axis product from the network Run the Ping command in a Command DOS window type ping and the IP address of the...

Page 53: ...enabled in the AMC Control Panel streaming tab See AXIS Media Control AMC on page 12 In the AMC Control Panel select the H 264 tab and click Set to default H 264 decoder Check that RTSP is enabled under System Options Network TCP IP Advanced No multicast H 264 displayed in the client Check with your network administrator that the multicast addresses used by the Axis product are valid for your netw...

Page 54: ...orer Go to Setup Live View Config and select Java applet under Default viewer Video and image problems general Image too dark or too light Check the video stream and camera settings under Setup Video Audio Video Stream and Setup Video Audio Camera Settings Missing images in uploads This can occur when trying to use a larger image buffer than is actually available Try lowering the frame rate or the...

Page 55: ... audio or very poor audio quality Check that Enable audio support is selected under Setup System Options Security Audio Support Check that the correct Audio Input source is selected under Setup Video Audio Audio Settings Poor audio quality CPU overloaded Reduce the number of listeners and viewers Decrease image resolution and compression Unsynchronized audio and video Synchronize the product s dat...

Page 56: ...EG Resolutions HDTV 1080p 1920x1080 to 320x180 HDTV 720p 1280x720 to 320x180 Frame rate H 264 Up to 30 25 fps 60 50 Hz in HDTV 1080p Up to 60 50 fps 60 50 Hz in HDTV 720p Frame rate Motion JPEG Up to 30 25 fps 60 50 Hz in HDTV 1080p Up to 60 50 fps 60 50 Hz in HDTV 720p Video streaming Multiple individually configurable streams in H 264 and Motion JPEG Controllable frame rate and bandwidth VBR CBR...

Page 57: ...share and email Notification email HTTP and TCP External output PTZ preset guard tour play audio clip video recording to edge storage autotracking day night mode Pre and post alarm video buffering Installation aid Pixel counter Video access from web browser Camera live view Video recording to file ASF Customizable HTML pages Windows 7 Windows Vista Windows XP Windows Server 2008 Windows Server 200...

Page 58: ... connector cable can be purchased from your Axis reseller Connect the multi connector cable to the product s multi connector see page 5 The cable provides the following connectors Note See page 56 for technical specifications Power connector 3 pin terminal block used for power input See image below Audio in pink 3 5 mm input for a mono microphone or a line in mono signal left channel is used from ...

Page 59: ... Max load 250 mA Digital input Connect to GND to activate or leave floating unconnected to deactivate 0 to 40 V DC Configurable Input or Output 3 6 Digital output Internal connection to ground when activated floating unconnected when deactivated If used with an external relay a diode must be connected in parallel with the load for protection against voltage transients Max load 100 mA Max voltage 4...

Page 60: ...he CPU reaches its maximum this will also affect the frame rate The following factors are among the most important to consider High image resolution and or lower compression levels result in images containing more data Bandwidth affected Access by large numbers of Motion JPEG and or unicast H 264 clients Bandwidth affected Simultaneous viewing of different streams resolution compression by differe...

Page 61: ...AXIS Q6035 PTZ Dome Network Camera Technical Specifications Viewing on poorly performing client computers lowers perceived performance Frame rate affected 61 ...

Page 62: ...User Manual Ver M1 8 AXIS Q6035 PTZ Dome Network Camera Date June 2012 Axis Communications AB 2011 2012 Part No 46631 ...

Reviews: