StorPoint NAS
100 User’s Manual
Section 8: RAID 1 (Mirroring)
61
One of the disks will remain intact and be available under the volume
name used for the mirrored pair. The other disk will be formatted and
available under its default name.
Replacing a Failed
Hard Disk
In case a hard disk fails during operation, this will be registered in the
event log and an e-mail will be sent to the administrator - if the
StorPoint NAS has been set up to do this.
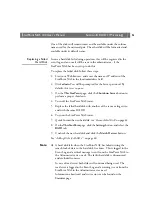
To replace the failed disk, follow these steps:
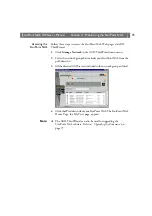
1. Start your Web browser, and enter the name or IP address of the
StorPoint NAS in the location/address field.
2. Click
admin
. You will be prompted for the Server password. By
default, this is set to
pass
.
3. On the
This StorPoint
page, click the
Shutdown Server
button to
perform a proper shutdown.
4. Turn off the StorPoint NAS tower.
5. Replace the failed hard disk with another of the same or larger size,
and with the same SCSI ID.
6. Turn on the StorPoint NAS tower.
7. Quick Format the new hard disk, see “
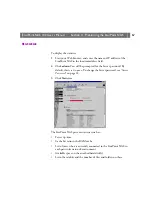
8. On the
This StorPoint
page, click the
Settings
button, and select the
RAID
tab.
9. Uncheck the new hard disk and click the
Match Devices
button.
See “
Note:
❏
A hard disk fails when the StorPoint NAS has failed writing the
same block of data to the hard disk five times. This is logged in the
Event Log and a critical message is sent from the StorPoint NAS to
the Administrator via e-mail. The faulty hard disk is dismounted
and excluded from use.
In case of read errors both disks will continued being used. The
read error is logged in the Event Log and a warning is sent from the
StorPoint NAS to the Administrator via e-mail.
Information about read and write errors can be found on the
Statistics
page.


