StorPoint NAS
100 User’s Manual
Section 2: Basic Installation
25
Date & Time
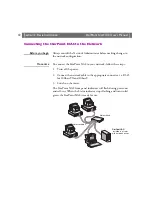
1. On the
This StorPoint
page, click
Settings
to open the
Server
Settings
dialog box.
2. Select the
Date &Time
tab.
3. Specify the time zone in which the StorPoint NAS operates.
4. To set the time using a time synchronization source, choose
Automatically and specify the time source:
• Network Time Protocol (NTP) - for TCP/IP networks
• Novell Directory Services (NDS) - for NetWare
Note:
❏
NTP is not natively supported by Windows NT servers. You will
need third party software.
To set the time manually, choose Manually and specify the date in
yy-mm-dd
format, and time in
hh:mm:ss
format using the 24 hour
clock.
5. Click
Save
.
6. Click
Close
.
TCP/IP
The installation wizard is a convenient way to specify the Internet-
related settings for your StorPoint NAS.
1. Click
Network
Settings
.
2. Click
Wizard
. The
Network Settings Wizard
dialog appears.
3. Choose
TCP/IP.
Click
Start
to proceed with the installation.
4. Follow the instructions on the screen. When finished, click
Close
.
5. Click
Detailed View
. The
Protocols
dialog box appears.
6. Select the
TCP/IP
tab and verify the settings.


