AXIS T99A11 Positioning Unit 24 V AC/DC
1
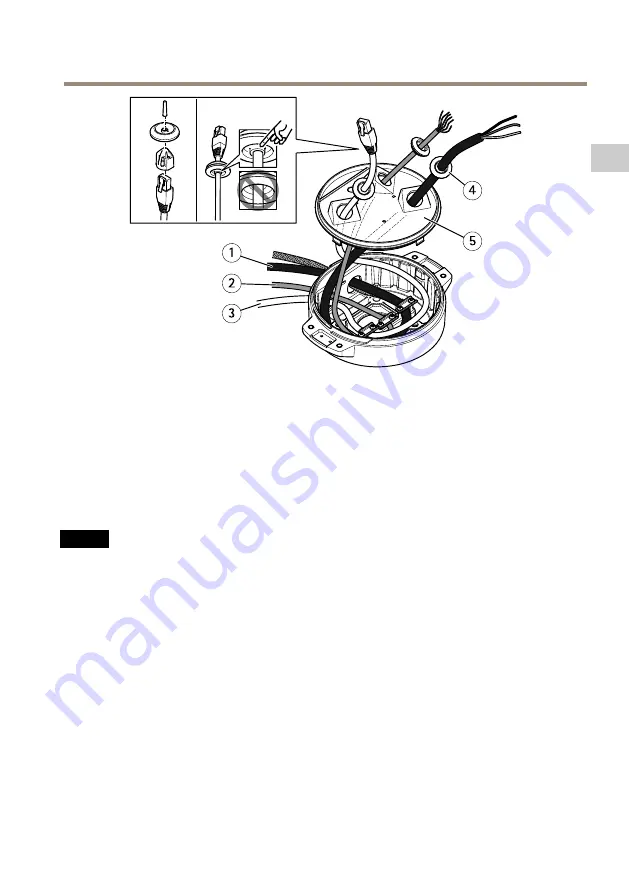
Power cable (not included)
2
I/O cable (optional, not included)
3
Network cable (not included)
4
Cable gasket
5
Transparent base unit cover
8. Fit cable gaskets on the cables. See
9. Insert the power, I/O and network cables including the cable gaskets through the holes in
the transparent base unit cover and arrange the cables as shown in the illustration above.
NO
NO
NOTICE
TICE
TICE
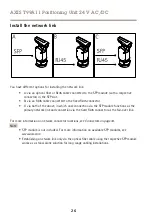
If you use both an optical fibre cable and an RJ45 cable for network connectivity, route the
optical fibre cable through the same cable gasket as the I/O cable. Apply a sealant between
the cables and the cable gasket to prevent leakage. For more information on different
network connectivity options, see
Install the network link on page 26
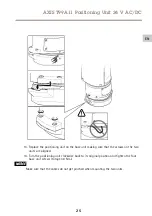
10. Replace the transparent base unit cover on the base unit and fit the cable gaskets inside
the holes.
23
EN
Summary of Contents for T99A11
Page 1: ...AXIS T99A11 Positioning Unit 24 V AC DC Installation Guide ...
Page 2: ......
Page 14: ...14 ...
Page 42: ...42 ...
Page 68: ...68 ...
Page 72: ...72 ...
Page 98: ...98 ...
Page 102: ...102 ...
Page 128: ...128 ...
Page 132: ...132 ...
Page 160: ...160 ...
Page 211: ...211 ...


