background image

AC150BG Code 105242

AC200BG Code 105243

Original  Instructions

AC150BG, AC200BG
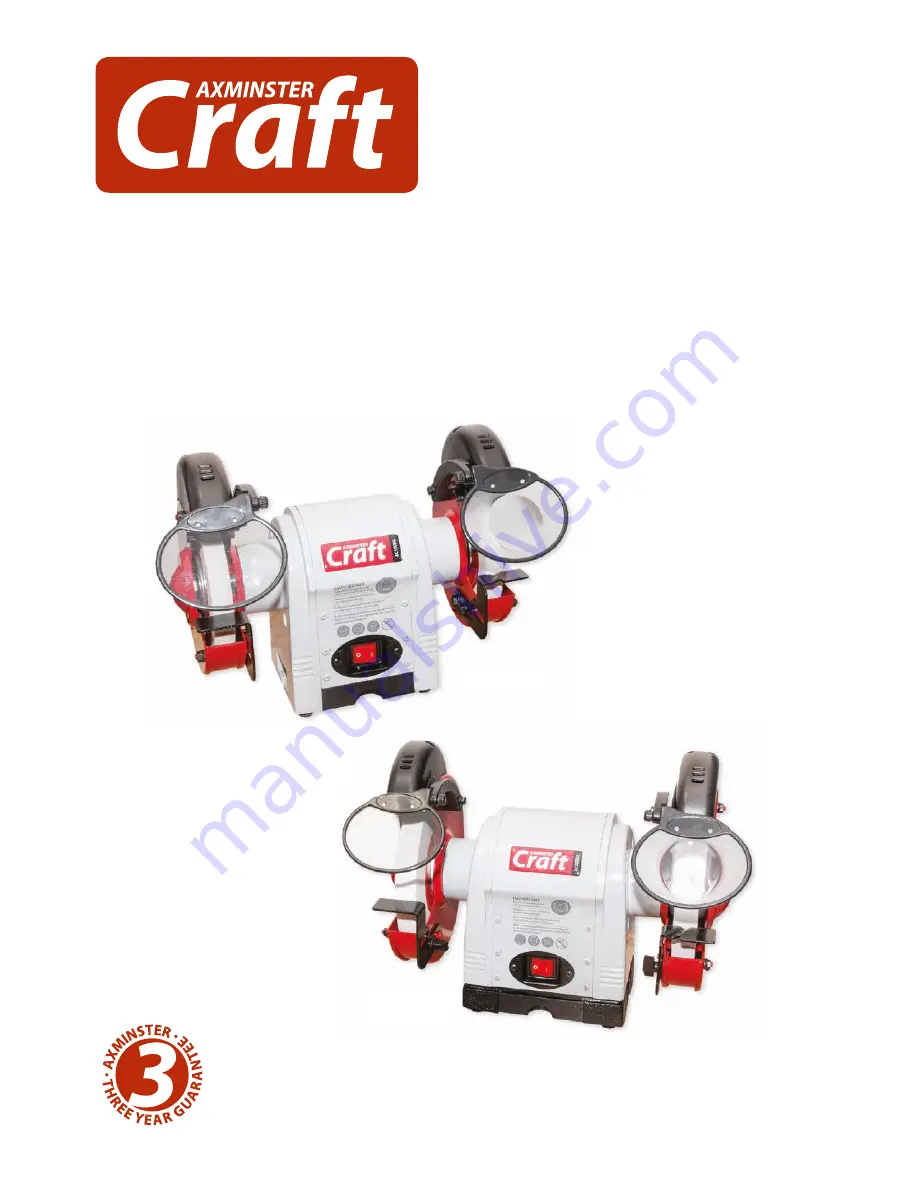
Bench Grinders

AT&M: 02/04/2019

BOOK REF : 105787

AC150BG

AC200BG

Summary of Contents for 105242

Page 1: ...AC150BG Code 105242 AC200BG Code 105243 Original Instructions AC150BG AC200BG Bench Grinders AT M 02 04 2019 BOOK REF 105787 AC150BG AC200BG ...

Page 2: ...deng Allwin Motors Manufacturing Co Ltd at No 15 Sichan Road Wendeng 264400 Shandong China and complies with the relevant essential health and safety requirements 2006 42EC EN61029 1 2009 A11 2010 EN61029 2 4 2011 declares that the machinery described This machine complies with the following directives EU Declaration of Conformity Signed Andrew Parkhouse Operations Director Date 24 10 2013 EU Decl...

Page 3: ...antity Item Part Model Number AC200BG 1 200mm Grinder B A B Quantity Item Part 4 Bolts washers for AC150BG C 2 Tool rest brackets D 2 Butterfly knobs washers for AC200BG E 2 Eye shields F 2 Eye shield arms with long bolts washers G 1 Instruction manual Magnifying glass D C E G F ...

Page 4: ...as where there may be volatile gases Check cutters are correct type and size are undamaged and are kept clean and sharp this will maintain their operating performance and lessen the loading on the machine OBSERVE make sure you know what is happening around you and USE YOUR COMMON SENSE WARNING KEEPTOOLS AND EQUIPMENT OUT OF REACH OF YOUNG CHILDREN KEEPWORK AREA AS UNCLUTTERED AS IS PRACTICAL UNDER...

Page 5: ...achine 16 Avoid awkward hand positions where a sudden slip could cause the hands to come into contact with a grinding wheel wire brush etc 17 If the wheel requires dressing dress only the front of the wheel do not dress the sides 18 Do not use any attachments that causes the machine to vibrate If after changing grinding wheels or adding attachments the machine does vibrate remove the recently repl...

Page 6: ...G and mess the two gears together Replace the clamping knobs A to secure A A F G Gears Step 4 Locate the two long bolts G place a spring washer over the bolts Insert the bolts through the holes in the shield arms G and secure each arm to the inside face of the stone guard assembly Threaded hole G ...

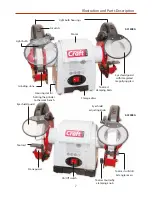
Page 7: ...shield guard Storage draw Housing slot for bolting the grinder to the work bench Eye shield adjusting knob Eye shield guard with integrated magnifying glass Tool rest On Off switch Tool rest butterfly clamping knob Tool rest clamping bolts Stone guard Tool rest will drill bit angle recess AC150BG AC200BG ...

Page 8: ...0mm Wheel Width 25mm Bore 15 88mm Overall L x W x H 410 x 341 x 315mm Weight 17 5kg Setting Up the Grinder Place the grinder on a flat level surface There are two machined slots to either side of the grinder housing to bolt the machine onto a work bench if required see fig 01 Adjust the two tool rests leaving a gap of approximately 1 5mm clearance between the grinding stone and the tool rest see f...

Page 9: ...and if you need it Start the machine wait until it reaches full speed Check it runs smoothly no knocking or scraping noises for example If all ok switch of the grinder and wait until it comes to a complete stop Disconnect the machine from the mains supply Changing the Grinding Stone Step 1 Using a spanner remove the three nuts and washers from the stone guard cover and place to one side Step 2 Rem...

Page 10: ...nd disconnect from the main supply Remove the guard cover and check stone and plate flange is fitted correctly Check again if the grinder is still vibrating the stone s may need dressing Dress the new stone lightly to ensure a good face and good concentricity Switch on the grinder wait until it reaches full speed and leave the machine running for at least one minute before carrying out any work Ap...

Page 11: ...oved and the edges of the stone are nice and sharp see fig 05 Diamond Dressing Block useful for dressing across the width of the grinding wheels or to produce flatter surfaces than single point dressers Code 410057 Fig 05 Changing the Light Bulb To replace a blown light bulb follow the instruction below Step 1 Remove the two Phillips screws from the light bulb housing cover and remove Step 2 Press...

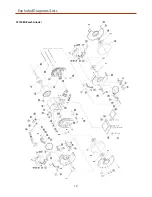
Page 12: ...Exploded Diagrams Lists 12 AC150BG Bench Grinder ...

Page 13: ...k rest 1 29 Flat washer D8 4 30 Hex bolt M8 x 10 4 31 Phillips screw washer M4 x 16 4 32 End cap 2 2 33 Wave spring washer D35 1 34 Ball bearing 6202 2 35 Cord clip 3 36 Wire with plug 1 37 Cord clip plate 1 38 Phillips screw spring washer flat washer M4 x 8 2 39 Hex nut M4 4 40 Switch board 1 41 Switch HY12 1 42 Phillips screw M4 x 8 4 43 External teeth lock washer D4 1 44 Motor housing 1 45 Wire...

Page 14: ...Exploded Diagrams Lists 14 AC2000BG Bench Grinder ...

Page 15: ...lips screw M5 x 45 4 32 End cap 2 33 Wave spring washer D40 1 34 Ball bearing 6203 RZ 2 35 Cord clip 2 36 Plug and cord 1 37 Cord clip plate 1 38 Spring washer D4 2 39 Hex nut M4 4 40 Switch plate 1 41 Switch 1 42 Flat washer D4 2 43 Tooth lock wash D4 1 44 Motor housing 1 45 Cord sleeve 1 46 Stator 1 47 Rotor 1 48 Flat washer D5 6 49 Phillips screw M5 x 155 4 50 Magnifier mount rod 1 51 Magnifier...

Page 16: ...together with household waste material By law they must be collected and recycled separately EU Countries Only The Axminster guarantee is available on Craft Trade Engineer AirTools CNCTechnology Series machines Buy with confidence from Axminster So sure are we of the quality we cover all parts and labour free of charge for three years For more information visit axminster co uk 3years ...

Reviews: