background image

Illustration and Parts Description

9

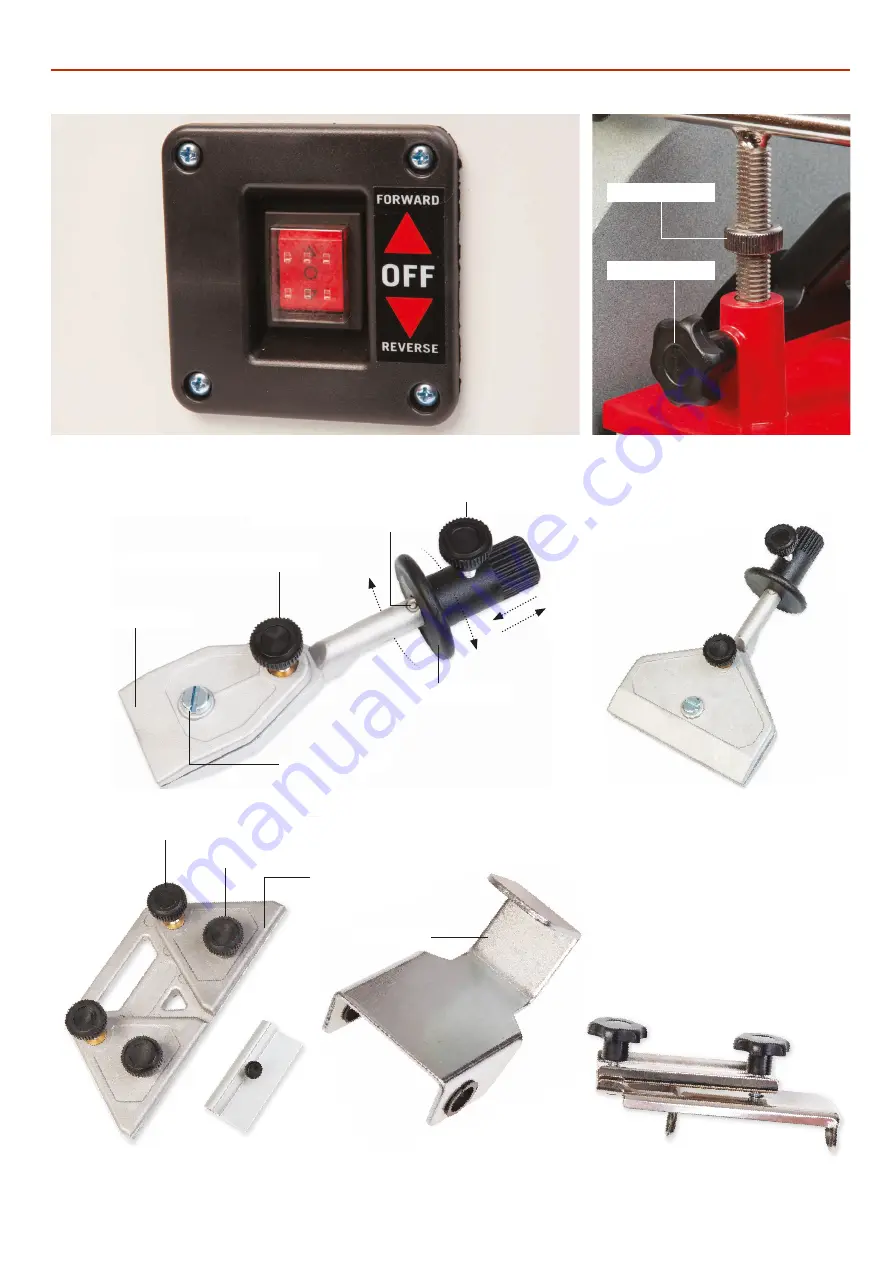
Two way forward/reverse NVR switch

Universal support bar locking 

knob and micro adjuster

Code 105864

Knife Jig

Code 105855
Long Knife Jig

Code 105865

Axe Jig

Square Edge Jig

Code 105860

Scissor Jig and Support Plate

Micro adjuster

Locking knob

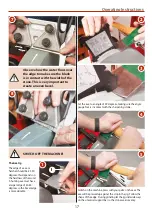
Adjustable clamp

Adjustable clamp

Adjustable stop

Axe stop

Adjustable stop clamping knob

Clamping screw

Clamping knob

Knife thickness adjusting knob

Scissor thickness adjusting knob

 Adjustable stop zero marker

Summary of Contents for AC250WBS 250/40

Page 1: ...AC250WBS 250 40 Wetstone Bench Sharpener Code 105248 Original Instructions AT M 18 06 2019 BOOK REF 105791 ...

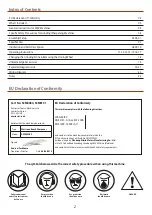
Page 2: ... 264400 China Mainland and complies with the relevant essential health and safety requirements 2006 42 EC 06 42 EC Annex I 05 2006 EN 61029 1 2009 A11 declares that the machinery described This machine complies with the following directives EU Declaration of Conformity Signed Andrew Parkhouse Operations Director Date 08 06 2015 EU Declaration of Conformity 02 What s Included 03 General Instruction...

Page 3: ...B 1 Honing Compound C 1 Water Trough D 1 Long Knife Jig E Code 105855 1 Knife Jig F Code 105864 1 Scissor Jig G Code 105860 1 Square Edge Jig H 1 Axe Jig I Code 105865 1 Angle Gauge J 1 Universal Support Bar K 1 Scissor Jig Support Plate L 4 Support Bar Locking Knobs M 1 Instruction Manual A B C I D E F G K H L J M ...

Page 4: ...intain their operating performance and lessen the loading on the machine OBSERVE make sure you know what is happening around you and USE YOUR COMMON SENSE KEEPWORK AREA AS UNCLUTTERED AS IS PRACTICAL UNDER NO CIRCUMSTANCES SHOULD CHILDREN BE ALLOWED INWORK AREAS Specific Safety Precautions for Grinding Sharpening Machines 1 Do not operate your machine until it is completely assembled and installed...

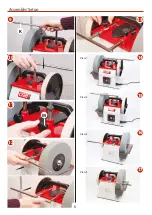
Page 5: ...Assembly Setup 5 1 5 8 7 6 4 2 3 Water trough mounting slots B D ...

Page 6: ...Assembly Setup 6 14 15 16 17 13 12 11 10 9 K M View 1 View 2 View 3 View 4 ...

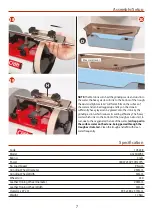
Page 7: ...e water the heavy waste will sink to the bottom of the trough the dust and light material will form a film on the surface of the water and can be dragged up and lay on the stone A sufficiently heavy layer can be glazed onto the stone by the grinding action which reduces its cutting efficiency The heavy waste which sinks to the bottom of the trough can also start to rust due to the oxygenated natur...

Page 8: ...0mm Honing wheel Honing wheel locking knob Square edge jig Clamping knobs Power cable Rubber Feet Rubber Foot 250mm Wetstone Water trough Main body Universal support bar locking knob Two way forward reverse switch RearView FrontView Micro adjuster Carrying handle ...

Page 9: ...Jig Code 105855 Long Knife Jig Code 105865 Axe Jig Square Edge Jig Code 105860 Scissor Jig and Support Plate Micro adjuster Locking knob Adjustable clamp Adjustable clamp Adjustable stop Axe stop Adjustable stop clamping knob Clamping screw Clamping knob Knife thickness adjusting knob Scissor thickness adjusting knob Adjustable stop zero marker ...

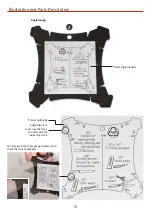
Page 10: ...rts Description 10 Angle Gauge The grooves in the angle gauge enables you to check the tool s angle edge Preset angle edge Angle edge foot make sure the foot is in contact with the sharpening stone Preset angle diagram J ...

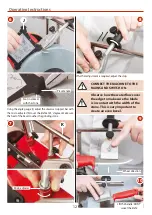
Page 11: ...e from the mains supply Clean the water trough NOTE DO NOT leave the stone submerged in water if the grinder is not in use This will prevent the stone from swelling and cracking NOTE Store and use at room temperature 1 3 2 A The Knife Jig Slide the knife between the clamp making sure the knife cutting edge is perpendiular with the clamp Tighten the clamping screw to secure the knife Mark the bevel...

Page 12: ...es the grinding stone If further adjustment is required adjust the stop J Foot in contact with the stone Preset angle Micro adjuster K Observe how the water flows over the edge to make sure the blade is in contact with the width of the stone This is very Important to create an even bevel CONNECT THE MACHINE TO THE MAINS AND SWITCH ON Wheel direction Lift the handle DONT swivel the knife ...

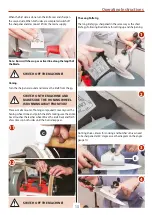
Page 13: ...en both sides are completed switch off the sharpener and disconnect it from the mains supply Note Burrs will show up as a silver line along the length of the blade Place a small amount of honing compound C evenly over the honing wheel Hone and polish the knife making sure the entire bevel touches the leather wheel Move the knife back and forth a few times on both sides until the burrs disappear Tu...

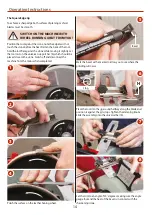
Page 14: ...in contact with the sharpening stone Polish the surface on the leather honing wheel To achieve a sharp edge both surfaces of planing or chisel blades must be smooth Position the tool against the stone note the edge must not touch the stone before the heel Flatten the back of the tool hold the tool flat against the stone while moving it slightly Let the tool rest on the universal support bar K whic...

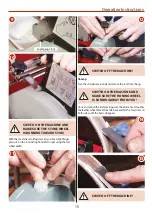
Page 15: ...nd forth a few times on both sides until the burrs disappear Turn the sharpener around and remove the tool from the jig 14 15 With the machine revolving towards you keep light finger pressure on the tool sliding from left to right using the full wheel width SWITCH ON THE MACHINE AND MAKE SURE THE HONING WHEEL IS RUNNING AWAY FROM YOU SWITCH ON THE MACHINE AND MAKE SURE THE STONE WHEEL IS RUNNING T...

Page 16: ...mping knob to prevent it from moving Set the support plate L to an angle of 60 degrees making sure the angle gauge foot is in contact with the sharpening stone L Mark the bevel with a marker to allow you to see were the grinding will occur Slide the scissor between the clamp making sure the blade is perpendiular with the clamp Tighten Perpendicular line Bevel SWITCH ON THE MACHINE AND MAKE SURE TH...

Page 17: ...depends on the hardness of the wood A hunting axe must have a larger edge of 30 40 degrees so the bevel edge is more durable 2 3 4 5 Set the axe to an angle of 25 degrees making sure the angle gauge foot is in contact with the sharpening stone Switch on the machine press with your palm on the axe The axe will be pressed up against the stop in the jig Follow the shape of the edge During grinding le...

Page 18: ...9mm spanner to loosen the nut Remove the stone and place to one side Inspect the new stone for cracks and damage to the front face or the edges before fitting Carefully slide the stone onto the shaft replace the washer nut and tighten DO NOT OVERTIGHTEN DISCONNECT THE MACHINE FROM THE MAINS 250mm Grinding Stone 200mm HoningWheel Honing wheel Clamping knob Flat washer Clean the drive shaft and roll...

Page 19: ...d secondary bevels can be achieved if required The whole jig is manufactured from stainless steel and has a simple setting screw to control the width The LH jaw is reversible and has twin jaws one curved so that chisels that do not have perfectly parallel sides such as Japanese and old hand forged chisels can be clamped the other jaw being parallel The jaws are dovetailed so securely clamp the too...

Page 20: ...Exploded Diagrams Lists 20 ...

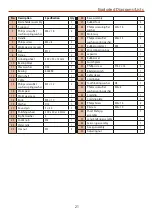
Page 21: ...el 200 x 30 x 12 5mm 1 22 Big flat washer 8 1 23 Lock knob M8 1 24 Water tank 1 25 Hex nut M5 4 26 Base assembly 1 27 Rubber foot 4 28 Philips screw big flat washer M5 16 4 29 Motor assy 1 30 Philips screw flat washer spring washer M8 35 2 31 Rubber grommet 6P4 3 32 Wire connection box 1 33 capacitor 1 34 Rubber mat 1 35 Switch plate 1 36 Phillips screw ST4 2 16 4 37 Bilateral switch 1 38 Cable sl...

Page 22: ...Wiring Diagram 22 ...

Page 23: ...Notes 23 ...

Page 24: ...together with household waste material By law they must be collected and recycled separately EU Countries Only The Axminster guarantee is available on Craft Trade Engineer AirTools CNCTechnology Series machines Buy with confidence from Axminster So sure are we of the quality we cover all parts and labour free of charge for three years For more information visit axminster co uk 3years ...

Reviews: