ASSEMBLY
12
107712-107713 Basic Saw
104931 Optional Floor Stand for AW216TS
106804 Optional Floor Stand for AW254TS
AW216TS Table Saw assembled for work bench set up
Step 1
Step 5
Step 6
Step 4
Step 3
Step 2
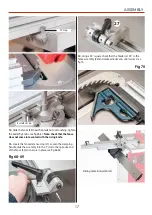
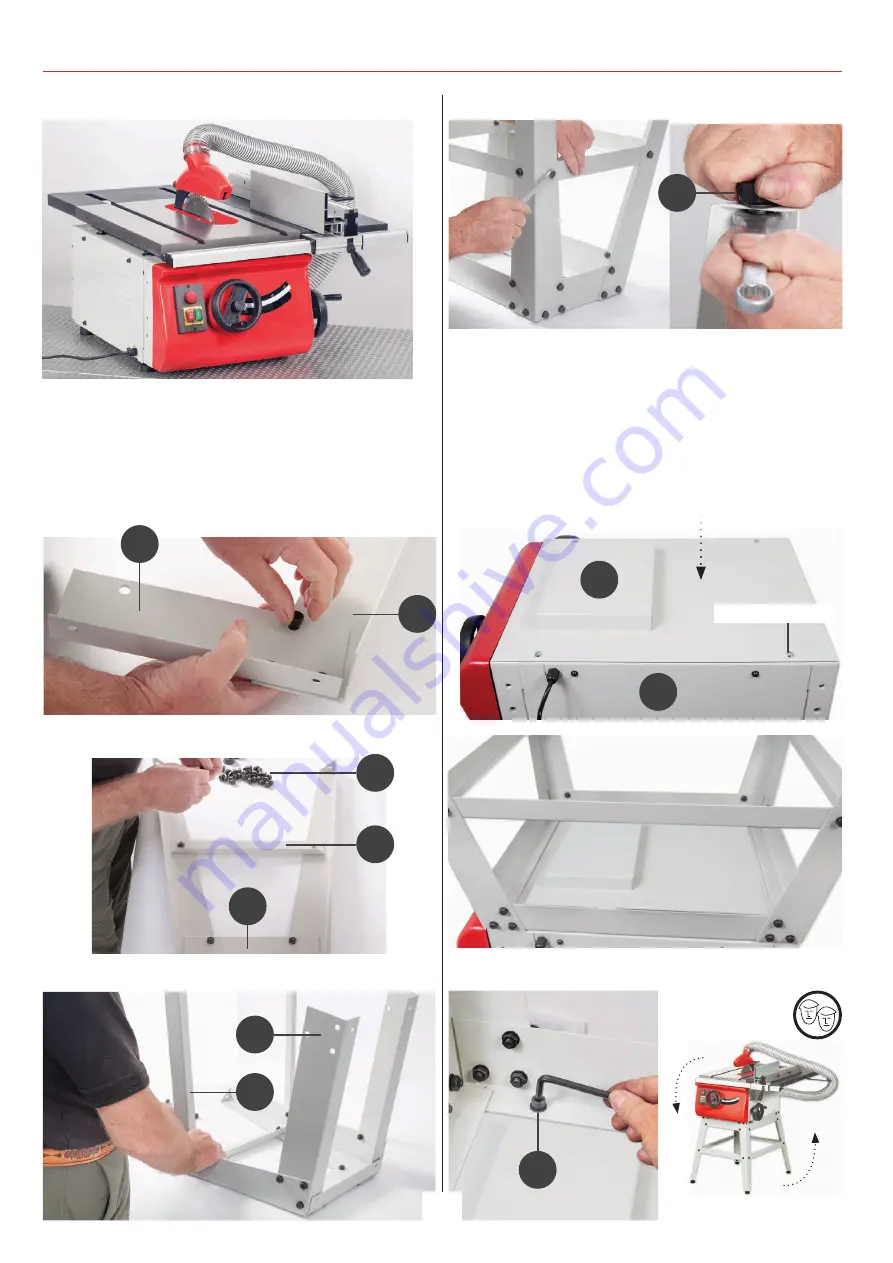
Locate all the components on page 04 and assemble as follows.
3
1
7
5
3
2
4
6
19
W
Line up the holes
A
Mounting the Stand to the Saw
Remove the rip fence, crown guard and hose and lower saw
blade below the table. With assistance turn the saw assembly
(A) over & remove the four rubber feet (T). Place the base plate
(W) on top and align the holes as shown in step 5. Lower the
stand on top of the saw, line up the holes and secure using the
caphead bolts & washers (19). Place the assembly upright on
the floor, see step 6.
Summary of Contents for 107712
Page 29: ...EXPLODED DIAGRAMS LISTS 29 107712 AW216TS BasicTable Saw Diagram A Continues over ...
Page 31: ...EXPLODED DIAGRAMS LISTS 31 104930 AW216TS Optional SlidingTable Kit Diagram B Continues over ...
Page 34: ...EXPLODED DIAGRAMS LISTS 34 107713 AW254TS BasicTable Saw Diagram A ...
Page 36: ...EXPLODED DIAGRAMS LISTS 36 106805 AW254TS Optional SlidingTable Kit Diagram B ...
Page 39: ...WIRING DIAGRAM 39 ...


