background image

Check of adhesive 
feed

Adjust the air pressure

to 4 bars.

** Max 7 bars

Summary of Contents for TEC 7300

Page 1: ...Index Introduction List of operations in this instruction Generic guidelines Opr 1 Check of gun settings Opr 2 Check of adhesive feed Opr 3 Spray of hot melt...

Page 2: ...gun Prevent contamination of the adhesive slugs Particles in or on the adhesive slugs can block the nozzle of the spray gun Always follow current guidelines for adhesive dosage Over dosage can cause...

Page 3: ...Check settings of TEC 7300 Step 1 0 Remove the rubber cap surrounding the nozzle WARNING Make sure to wear heat resistant gloves if removing the rubber cap while the gun is turned on...

Page 4: ...e type is mounted in the gun The nozzle type can be identified by the color Red narrow spray fan recommended nozzle type Yellow Medium spray fan Blue Wide spray fan Don t forget that there is also the...

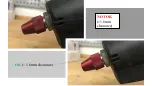
Page 5: ...OK 1 6mm clearance NOT OK 1 6mm clearance...

Page 6: ...un is still hot WARNING Always wear heat resistant gloves since both the nozzle cover and the nozzle is hot NOTE Put the spray gun on a piece of masking paper while repositioning the nozzle Hot adhesi...

Page 7: ...s and firmly press the nozzle into the spray gun NOTE The gun MUST be hot when repositioning the nozzle Remount the nozzle cover with the pliers NOTE Make sure to check that nozzle cover clearance fro...

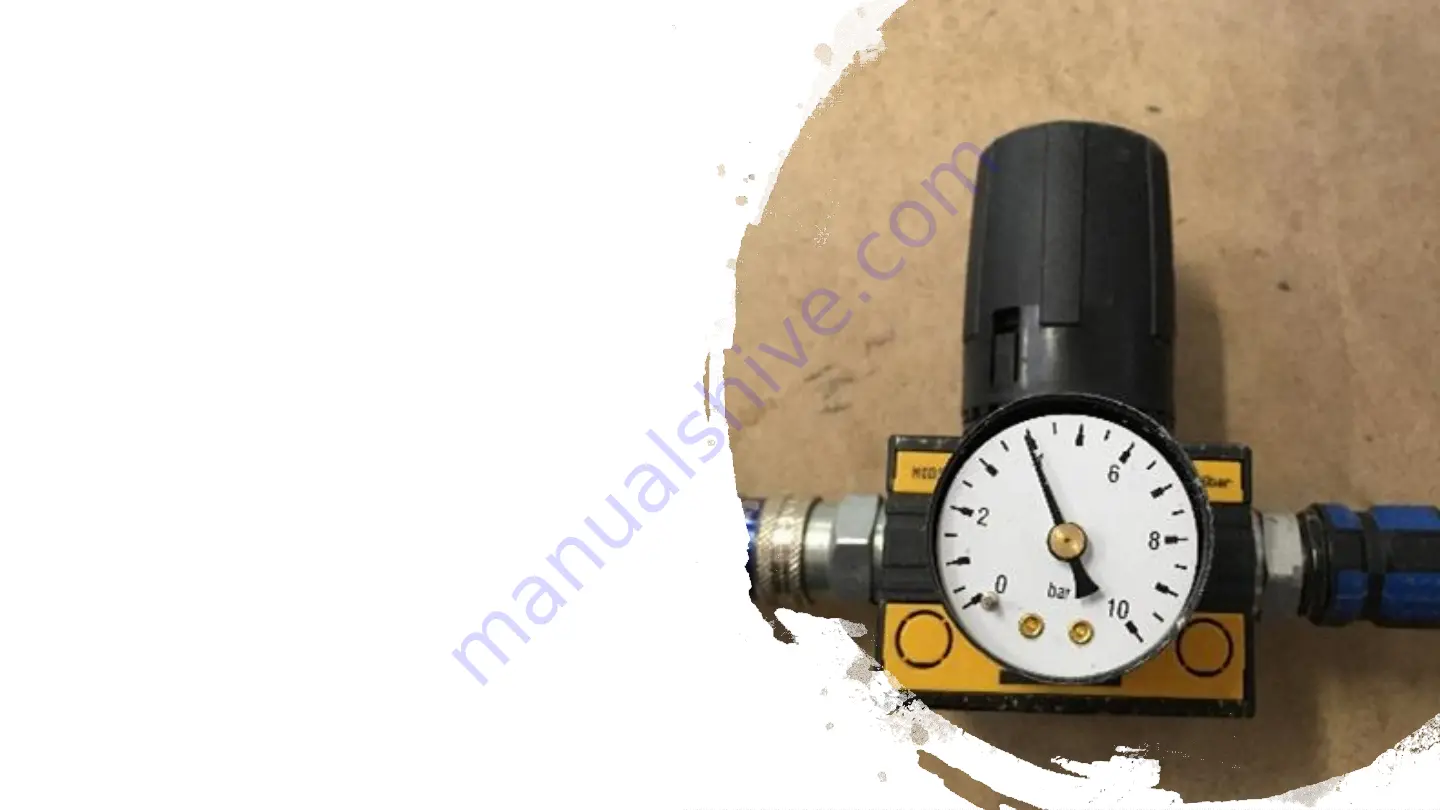
Page 8: ...Check of adhesive feed Adjust the air pressure to 4 bars Max 7 bars...

Page 9: ...The TEC 7300 Spray gun must be turned on for minimum 5 minutes before use...

Page 10: ...roving material Adjust the adhesive dosage to 20 50 g min by turning the screw on the back of the spray gun NOTE The accurate adhesive feed is dependent on the desired movement speed of the gun Recom...

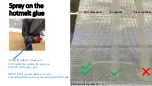
Page 11: ...Spray on the hotmelt glue Example CSM roving Recommended Acceptable Not acceptable...

Page 12: ......

Reviews: