

5
REV. 1/23/2020 INSTAXDIS-TY1
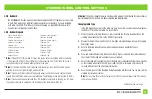
L.E.D. feedback
The (18)
Red
L.E.D. flashes represent what brand radio the AXDIS-TY1 believes it is connected
to. Each flash represents a different radio manufacturer. For example, if you are installing
a JVC radio, the AXDIS-TY1 will flash (5) times. Following is a legend that dictates which
manufacturer corresponds to which flash.
L.E.D. feedback legend
* Note:
If the AXDIS-TY1 flashes Red (7) times, and you do not have an Alpine radio connected to
it, that means the AXDIS-TY1 does not detect a radio connected it. Verify that the 3.5mm jack is
connected to the correct steering wheel jack/wire in the radio.
** Note:
Part number AXSWCH-PAR is required (sold separately). Also, the Parrot radio must be
updated to rev. 2.1.4 or higher through www.parrot.com.
† Note:
If you have a Clarion radio and the steering wheel controls do not work, change the radio
type to the other Clarion radio type; same for Eclipse. The following section explains how to do this.
‡ Note:
If you have a Kenwood radio and the L.E.D. feedback comes back as showing as a JVC radio,
change the radio type to a Kenwood. The following section explains how to do this.
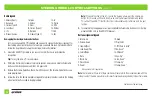
1 flash - Eclipse (Type 1) †
2 flashes - Kenwood ‡
3 flashes - Clarion (Type 1) †
4 flashes - Sony / Dual
5 flashes - JVC
6 flashes - Pioneer / Jensen
7 flashes - Alpine *
8 flashes - Visteon
9 flashes - Valor
10 flashes - Clarion (Type 2) †
11 flashes - Metra OE
12 flashes - Eclipse (Type 2) †
13 flashes - LG
14 flashes - Parrot **
15 flashes - XITE
16 flashes - Philips
17 flashes - TBD
18 flashes - JBL
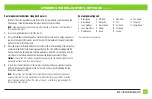
Changing radio type
If the LED flashes do not match the radio you have connected, you must manually program
the AXDIS-TY1 to tell it what radio it is connected to.
1.
After (3) seconds of turning the key on, press and hold the Volume-Down button on the
steering wheel until the L.E.D. in the AXDIS-TY1 goes solid.
2.
Release the Volume-Down button; the L.E.D. will go out indicating we are now in Changing
Radio Type mode.
3.
Refer to the Radio Legend to know which radio number you would like to have
programmed.
4.
Press and hold the Volume-Up button until the L.E.D. goes solid, and then release. Repeat
this step for the desired radio number you have selected.
5.
Once the desired radio number has been selected, press and hold the Volume-Down button
on the steering wheel until the L.E.D. goes solid. The L.E.D. will remain on for about (3)
seconds while it stores the new radio information.
6.
Once the L.E.D. goes off, the Changing Radio Type mode will then end. You can now test the
steering control wheel controls.
Note:
If at any time the user fails to press any button for a period longer than (10) seconds,
this process will abort.
Attention:
The Axxess Updater App can also be used to program the following (3) sub-sections as
well, pending that the interface has been initialized and programmed.
STEERING WHEEL CONTROL SETTINGS
Continued on the next page


