

6
Continued on the next page
STEERING WHEEL CONTROL SETTINGS
(CONT)
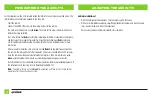
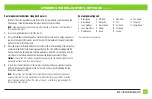
Radio legend
1. Eclipse (Type 1)
2. Kenwood
3. Clarion (Type 1)
4. Sony/Dual
5. JVC
6. Pioneer/Jensen
7. Alpine
8. Visteon
9. Valor
10. Clarion (Type 2)
11. Metra OE
12. Eclipse (Type 2)
13. LG
14. Parrot
15. XITE
16. Philips
17. TBD
18. JBL
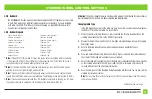
Remapping the steering wheel control buttons
Let’s say you have AXDIS-TY1 initialized and you want to change the button assignment for
the steering wheel control buttons. For example, you would like Seek-Up to become Mute.
Follow the steps below to remap the steering wheel control buttons:
1.
Ensure the AXDIS-TY1 is visible so you can see the L.E.D. flashes to confirm button
recognition.
Tip:
Turning the radio off is recommended.
2.
Within the first twenty seconds of turning the ignition on, press and hold the Volume-Up
button on the steering wheel until the L.E.D. goes solid.
3.
Release the Volume-Up button, the L.E.D. will then go out; The Volume-Up button has now
been programmed.
4.
Follow the list in the Button Assignment Legend to reference the order in which the steering
wheel control buttons need to be programmed.
Note:
If the next function on the list is not on the steering wheel, press the Volume-Up
button for (1) second until the L.E.D. comes on, and then release the Volume-Up button.
This will tell the AXDIS-TY1 that this function is not available and it will move on to the next
function.
5.
To complete the remapping process, press and hold the Volume-Up button on the steering
wheel until the L.E.D. in the AXDIS-TY1 goes out.
1. Volume-Up
2. Volume-Down
3. Seek-Up/Next
4. Seek-Down/Prev
5. Source/Mode
6. Mute
7. Preset-Up
8. Preset-Down
9. Power
10. Band
11. Play/Enter
12. PTT (Push to Talk) *
13. On-Hook *
14. Off-Hook *
15. Fan-Up *
16. Fan-Down *
17. Temp-Up *
18. Temp-Down *
Button assignment legend
Note:
Not all radios will have all of these commands. Please refer to the manual provided with the
radio, or contact the radio manufacturer for specific commands recognized by that particular radio.
*
Not applicable in this application


