background image


4/2017 

f.


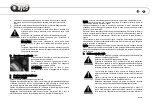
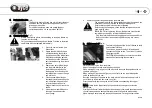
Dust extraction box (Fig.6) 

To attach the dust collection box, simply insert the dust 

extraction box into the extraction port and slide fully 
into keep it in position. 
For efficient operation, open and empty the dust 

collection box when it is no more than half full. 


g.


Changing the blade (Fig.7) 

Always wear sturdy gloves when handling or changing blades as 
they can be very sharp. 

Only use sharp and undamaged saw blades. Cracked or distorted 
saw blades must be replaced immediately. 


1.


Place the saw on its side on a 
flat surface. 

2.


Rotate the saw blade by hand 

whilst depressing the spindle 
lock button until the blade locks. 
Whilst depressing the spindle 

lock button, turn the blade bolt 
anti-clockwise using the wrench 
provided. 

3.


Remove the outer blade flange 
and the blade bolt. Raise the 
lower blade guard using the 

blade guard lever. Remove the 
saw blade from the inner flange 
and pull it out. 

4.


Clean the saw blade flanges 
thoroughly before mounting the 
new saw blade. Wipe a drop of 

oil onto the inner and outer 
flange where they will touch the 
blade. 

5.


Mount the new saw blade onto 
the spindle and against the 
inner flange. 

6.


Replace the outer flange and tighten the blade bolt. 

The direction in which the blade rotates has to be the same as the 

direction of the arrow marked on the upper blade guard. 
Ensure that the spindle lock button is released. 
Before using the saw again, check that the safety devices are in 

good working order. 
IMPORTANT: After replacing the saw blade, make sure that the 
saw blade runs freely by turning the blade by hand. 

Plug the machine into a power supply and run the saw under no 
load to check that it runs smoothly before using it to cut any 
material. 


h.


Switch on and off (Fig.8) 

The tool is equipped with a lock-off button to avoid 

unintentional starting. 
To switch on, depress the lock-off button and 
squeeze the trigger switch. To switch off, release 

the trigger switch. 
CAUTION: Allow the blade to come to a complete 
standstill before setting the saw down. 


3.


Operation for working 

a. Making a Cut 

Mark the line of cut on the work piece. 
Adjust the depth of cut and bevel angle as required. 
When making 90° cuts, align your line of cut with the outer blade guide notch on 

the base of the saw. 
When making 45° bevel cuts, align your line of cut with the inner blade guide 
notch on the base of the saw. 

Rest the front edge of the base on the work-piece. Make sure the power cord is 
out of the way of saw and not in the line of cut. 
Start the motor by depressing the lock-off button and squeezing the trigger 

switch. 
NOTE: Always let the blade reach full speed before you begin to cut into the 
work-piece. 

Slowly push the saw forward using both hands. Apply downward pressure to keep 
the saw steady and only enough forward pressure to keep the blade cutting. 
When making a cut always use steady, even pressure. Forcing the saw causes 

Fig.6 

Fig.8 

Fig.7 

106| 107 

GB 

108| 109 

GB 

Summary of Contents for 7613164482464

Page 1: ...NDKREISS GE SCIE CIRCULAIRE SEGA CIRCOLARE CIRCULAR SAW BERSETZUNG DER ORIGINALBETRIEBSANLEITUNG I TRADUCTION DE LA NOTICE ORIGINALE I TRADUZIONE DELLE ISTRUZIONI ORIGINALI I ORIGINAL INSTRUCTION MANU...

Page 2: ...arfen Kanten und beweglichen Teilen fern Besch digte oder verwickelte Kabel erh hen das Risiko eines elektrischen Schlags e Verwenden Sie bei Einsatz eines Elektrowerkzeugs im Freien nur f r den Ausse...

Page 3: ...enen die nicht mit diesem vertraut sind oder diese Bedienungsanleitung nicht kennen Elektrowerkzeuge stellen wenn sie von unerfahrenen Personen bedient werden eine Gefahrenquelle dar e Warten Sie Elek...

Page 4: ...r verstelltem S geblatt wobei die S ge unkontrolliert aus dem Werkst ck heraus zum Bediener hin hochschl gt Ist das S geblatt am Auslauf der Schnittfuge fest verklemmt oder festgefressen blockiert das...

Page 5: ...d lassen Sie den Griff los sobald das S geblatt in das Werkst ck eingedrungen ist Bei allen anderen S gearbeiten passt sich die Schutzhaube automatisch an Achten Sie immer darauf dass das S geblatt du...

Page 6: ...gerung des Verletzungsrisikos ist die Bedienungsanleitung vom Nutzer durchzulesen Vor dem Einsatz bitte das entsprechende Kapitel im Benutzerhandbuch lesen Diese Symbole zeigen die notwendigen Schutza...

Page 7: ...eramikplatten und Gummi bestimmt und soll ruhig auf den Werkst cken aufliegen Es ist geeignet zum Durchf hren gerader und runder Schnitte mit Gehrungswinkeln bis 56 LIEFERUMFANG Folgende Gegenst nde m...

Page 8: ...TECHNISCHE SPEZIFIKATIONEN Handkreiss ge Modell BGCS 1600L III Anschluss 230 V 50 Hz Nennaufnahmeleistung 1600 W Leerlaufdrehzahl 5 000 min S geblatt x Bohrungs 190x20mm Max Schnitttiefe bei 0 45 56...

Page 9: ...isation bestimmter Arbeitsmuster BETRIEB 1 Vor dem Betrieb Entfernen Sie s mtliches Verpackungsmaterial und lose Teile von dem Ger t berpr fen Sie die Zubeh rteile vor der Inbetriebnahme Sie sollten d...

Page 10: ...er gesamten L nge des Holzst cks aufliegt um einen konsistenten Parallelschnitt zu gew hrleisten e Benutzung des Lasersystems Abb 5 Vergewissern Sie sich dass der Abschnitt ber die Zus tzlichen Sicher...

Page 11: ...e S geblatt auf die Spindel und den inneren Flansch 6 Legen Sie den usseren Flansch wieder auf und ziehen Sie die S geblattschraube fest Die Drehrichtung des S geblatts muss mit der Richtung des Pfeil...

Page 12: ...wie erforderlich ein Stellen Sie den Schnittwinkel auf 0 ein Heben Sie den unteren S geblattschutz zur Freilegung des S geblatts an und legen Sie die Vorderseite der Grundplatte flach gegen das Werkst...

Page 13: ...bere T cher zur Entfernung von Schmutz Kohlestaub und anderen Verunreinigungen AUFBEWAHRUNG Bewahren Sie die Maschine die Bedienungsanleitung und gegebenenfalls das Zubeh r in der Originalverpackung a...

Page 14: ...behalten das Ger t gem ss geltenden Garantiebestimmungen entweder zu reparieren oder auszutauschen Bitte schicken Sie folgende Dokumente bei der R ckgabe Ihres Produktes zur Reparatur mit 1 Kassenzett...

Page 15: ...rkl rung erf llt die einschl gigen Harmonisierungsrechtsvorschriften der Union 2006 42 EC Maschinenrichtlinie 2014 30 EU EMV Richtlinie 2011 65 EU RoHS 6 Angabe der einschl gigen harmonisierten Normen...

Page 16: ...ing 4 5 x 0 8 1 21 Sicherungsfeder 1 22 Sicherungsstift 1 23 Kopf 1 24 Kontermutter M6 1 25 Ritzel 1 26 Lager 1 27 Schraube M4 8 2 28 Zierring 1 29 Windring 1 30 Rotor 1 31 Lager 1 32 Lagergeh use 1 3...

Page 17: ...utiliser un prolongateur adapt l utilisation ext rieur L utilisation d un cordon adapt l utilisation ext rieure r duit le risque de choc lectrique f Si l usage d un outil dans un emplacement humide es...

Page 18: ...CIALES a DANGER N approchez pas les mains de la zone de coupe et de la lame Gardez la deuxi me main sur la poign e auxiliaire ou sur le bo tier du moteur Si les deux mains tiennent la scie elles ne pe...

Page 19: ...ustement de la lame d rive pendant la coupe cela peut provoquer un grippage et un recul g Soyez d autant plus prudent lorsque vous faites une coupe plongeante dans des parois existantes ou dans d autr...

Page 20: ...clats lorsque la machine est en marche AVERTISSEMENT Danger de br lures Durant l utilisation l outil peut se surchauffer durant le remplacement de l outil durant la d pose de l outil Conformer la vite...

Page 21: ...ribuez r duire le volume des d chets incin r s ou enfouis et diminuer tout impact n gatif sur la sant humaine et l environnement DOMAINE D UTILISATION Cet outil est con u pour effectuer des coupes de...

Page 22: ...14 Guide de coupe 15 Cl six pans CARACT RISTIQUES TECHNIQUES Scie circulaire N de commande BGCS 1600L III Alimentation 230 V 50 Hz Puissance nominale de r ception 1600 W Vitesse de rotation vide 5 000...

Page 23: ...e l outil lectroportatif et des outils de travail maintenir les mains chaudes organisation des op rations de travail UTILISATION 1 Avant utilisation Retirez tous les l ments d emballage et les pi ces...

Page 24: ...all le dans les trous de la semelle pr vus cet effet 3 R glez la position du guide parall le par rapport la scie puis resserrez le bouton de verrouillage pour le fixer dans cette position 4 Veillez ce...

Page 25: ...me de scie Appliquez une goutte d huile sur les surfaces de contact entre les brides int rieure et ext rieure et la lame 5 Ins rez une nouvelle lame de scie sur la broche contre la bride int rieure 6...

Page 26: ...ion quand vous r alisez une coupe plongeante R glez la profondeur de coupe requise R glez l angle vertical sur 0 Relevez le levier du carter de protection inf rieur pour d nuder la lame puis appuyez f...

Page 27: ...tilisez des chiffons propres pour liminer la salet les poussi res de carbone etc STOCKAGE Rangez la machine les instructions d utilisation et les accessoires dans leur emballage d origine De cette man...

Page 28: ...r tion de r parer ou d changer l appareil conform ment la l gislation portant sur la garantie Fournissez les documents suivants lors du retour de votre produit pour r paration 1 Le re u preuve d achat...

Page 29: ...claration d crit ci dessus est conforme la l gislation d harmonisation de l Union applicable 2006 42 EC Machines 2014 30 EU Compatibilit lectromagn tique 2011 65 EU RoHS 6 R f rences des normes harmo...

Page 30: ...12 Engrenage 1 13 Plaque de pression de palier 1 14 Rondelle ondul e 1 15 Circlip 1 16 Vis M4 12 3 17 Palier 1 18 Poign e lat rale 1 19 Vis ST3 9 25 4 20 Rondelle fendue 4 5 x 0 8 1 21 Ressort autobl...

Page 31: ...rt h lico dal 1 44 T moin d alimentation 1 45 Tige de traction 4 46 Fixation de c ble 1 47 Vis ST3 9 12 2 48 Capacitance 1 49 Interrupteur 1 50 Protection arri re 1 51 Protection d indicateur lumineux...

Page 32: ...eggiato o aggrovigliato e Qualora si lavori all esterno utilizzare solo prolunghe concepite per un tale impiego In questo modo possibile evitare i rischi di scosse elettriche f Se non possibile evitar...

Page 33: ...one che non sanno utilizzarli e Trattare gli apparecchi con cura Controllare l allineamento dei componenti mobili Verificare che non vi siano componenti rotti Controllare il montaggio ed altri eventua...

Page 34: ...taglio i denti sulla parte posteriore della lama possono scavare la superficie superiore del legno facendo fuoriuscire la lama dall intaccatura che in questo modo scatter verso l operatore Il contracc...

Page 35: ...polvere guanti di protezione scarpe antiscivolo robuste e cuffie di protezione acustica La polvere provocata durante la lavorazione con questo utensile pu essere dannosa alla salute e per questo motiv...

Page 36: ...spondente sezione del presente manuale Durante l uso del prodotto indossare dispositivi di protezione individuale per le orecchie gli occhi il sistema respiratorio e le mani AVVERTENZA Indossare sempr...

Page 37: ...ma con l apparecchio saldamente appoggiato sul pezzo da lavorare adatto per tagli dritti o curvi con angoli fino a 56 CONTENUTO DELLA CONFEZIONE I seguenti articoli dovrebbero essere contenuti nella c...

Page 38: ...60745 1 Indossare dispositivi di protezione per le orecchie Il livello di vibrazioni indicato nelle presenti istruzioni stato rilevato seguendo una procedura di misurazione conforme alla norma EN 6074...

Page 39: ...angolo di smussatura Fig 3 Assicurarsi sempre che la sega sia spenta e scollegata dalla presa elettrica prima di effettuare qualsiasi regolazione La sega pu essere regolata per tagliare a qualsiasi a...

Page 40: ...rilasciare l interruttore a grilletto e attendere che la lama sia completamente ferma 9 Non rimuovere la sega dal pezzo mentre la lama in 10 Una volta ultimato il lavoro premere il pulsante laser per...

Page 41: ...e il motore rilasciando il pulsante di blocco e premendo il pulsante di avvio NOTA Lasciare sempre che la lama raggiunga la massima velocit prima di cominciare a tagliare il pezzo di legno Spingere le...

Page 42: ...o rovinare la maggior parte dei componenti in plastica Utilizzare un panno pulito per rimuovere lo sporco la polvere di carbone ecc CONSERVAZIONE Conservare la macchina le istruzioni d uso e laddove n...

Page 43: ...presso qualsiasi punto vendita Jumbo I prodotti verranno riparati o sostituiti a discrezione del costruttore e conformemente alle leggi vigenti in materia di garanzia Quando si restituisce un prodott...

Page 44: ...oggetto della dichiarazione di cui sopra conforme alla pertinente normativa di armonizzazione dell Unione Macchine Machinery 2014 30 EU Compatibilit elettromagnetica 2011 65 EU RoHS 6 Riferimento alle...

Page 45: ...one del cuscinetto 1 14 rondella ondulata 1 15 Anello elastico 1 16 Vite M4 12 3 17 Cuscinetto 1 18 impugnatura laterale 1 19 Vite ST3 9 25 4 20 rondella fessurata 4 5x0 8 1 21 molla autobloccante 1 2...

Page 46: ...1 44 spia alimentazione 1 45 barra di trazione 4 46 fermacavo 1 47 vite ST3 9 12 2 48 capacitanza 1 49 interruttore 1 50 copertura posteriore 1 51 copertura lampada spia 1 52 vite ST3 9 10 1 53 pin c...

Page 47: ...le you are tired or under the influence of drugs alcohol or medication A moment of inattention while operating power tools may result in serious personal injury b Use personal protective equipment Alw...

Page 48: ...ing cut in your hands or across your leg Secure the work piece to a stable platform It is important to support the work properly to minimize body exposure blade binding or loss of control e Hold the p...

Page 49: ...and bevel adjusting locking levers must be tight and secure before making cut If blade adjustment shifts while cutting it may cause binding and kickback g Use extra caution when sawing into existing w...

Page 50: ...machined it has pierced through the material to be machined the power tool is overloadedDo not reach into the machine while it is running Chips and splinters must not be removed while the machine is...

Page 51: ...rked item from household waste you will help reduce the volume of waste sent to incinerators or land fill and minimize any potential negative impact on human health and the environment INTENDED USE Th...

Page 52: ...CAL SPECIFICATIONS Circular saw Model BGCS 1600L III Voltage 230 V 50 Hz Power consumption 1600 W Rated speed 5 000 min Saw blade dia x hole dia 190x20mm Max Cutting depth at 0 45 56 64 46 35mm Sound...

Page 53: ...tor from the effects of vibration such as maintain the tool and the accessories keep the hands warm organization of work patterns OPERATION 1 Before use Remove any packing material and loose parts fro...

Page 54: ...t the parallel fence rests against the wood along its entire length to give a consistent parallel cut e Using the laser Fig 5 Before proceeding to use the laser line system ensure that the Additional...

Page 55: ...utton is released Before using the saw again check that the safety devices are in good working order IMPORTANT After replacing the saw blade make sure that the saw blade runs freely by turning the bla...

Page 56: ...the blade is moving If the corners of your pocket cut are not completely cut through use a jig saw or hand saw to finish the corners Always cut in a forward direction when making a pocket cut Cutting...

Page 57: ...evice in accordance with warranty legislation Please include the following when returning your product for repair 1 The receipt proof of purchase 2 This warranty certificate with your name address con...

Page 58: ...ect of the declaration described above is in conformity with the relevant Union harmonisation legislation 2006 42 EC Machinery 2014 30 EU Electro Magnetic Compatibility 2011 65 EU RoHS 6 References to...

Page 59: ...17 bearing 1 18 side handle 1 19 screw ST3 9 25 4 20 split washer 4 5x0 8 1 21 self lock spring 1 22 self lock pin 1 23 head 1 24 locknut M6 1 25 pinion 1 26 bearing 1 27 screw M4 8 2 28 decorative ri...

Page 60: ...4 2017 49 switch 1 50 back cover 1 51 indicator lamp cover 1 52 screw ST3 9 10 1 53 wire connector pin 2 54 sheath 1 55 cable 1 56 handle 1 118 119 GB...

Page 61: ...CH Import Distributed exclusively by Jumbo Markt AG 8305 Dietlikon www jumbo ch Tel 044 805 61 11 WWW AYCE CH...

Reviews: