background image

 Remark: Before installing the backup software, ensure that the HDD is properly
                installed and connected to the computer.

6. Driver Installation and Use

A. Driver Installation:

    USB drivers only needs to be installed if you are using Windows 98SE. Search the folder 
    named 

win98driver

 in the CD and run the 

Setup.exe

 file in the folder. The program will install the 

    drivers to your PC. Next time when you connect the device to the same computer there is no need to
    reinstall the driver. The OS will automatically recognize the device.

B. Free Installation:

This enclosure does not need any drivers when used with any OS newer than Win 98.

C. Connections:

   1). Connect the device to POWER.
   2). Connect the device to computer via USB cable.
   3). Switch the power on.

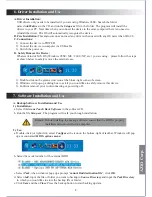
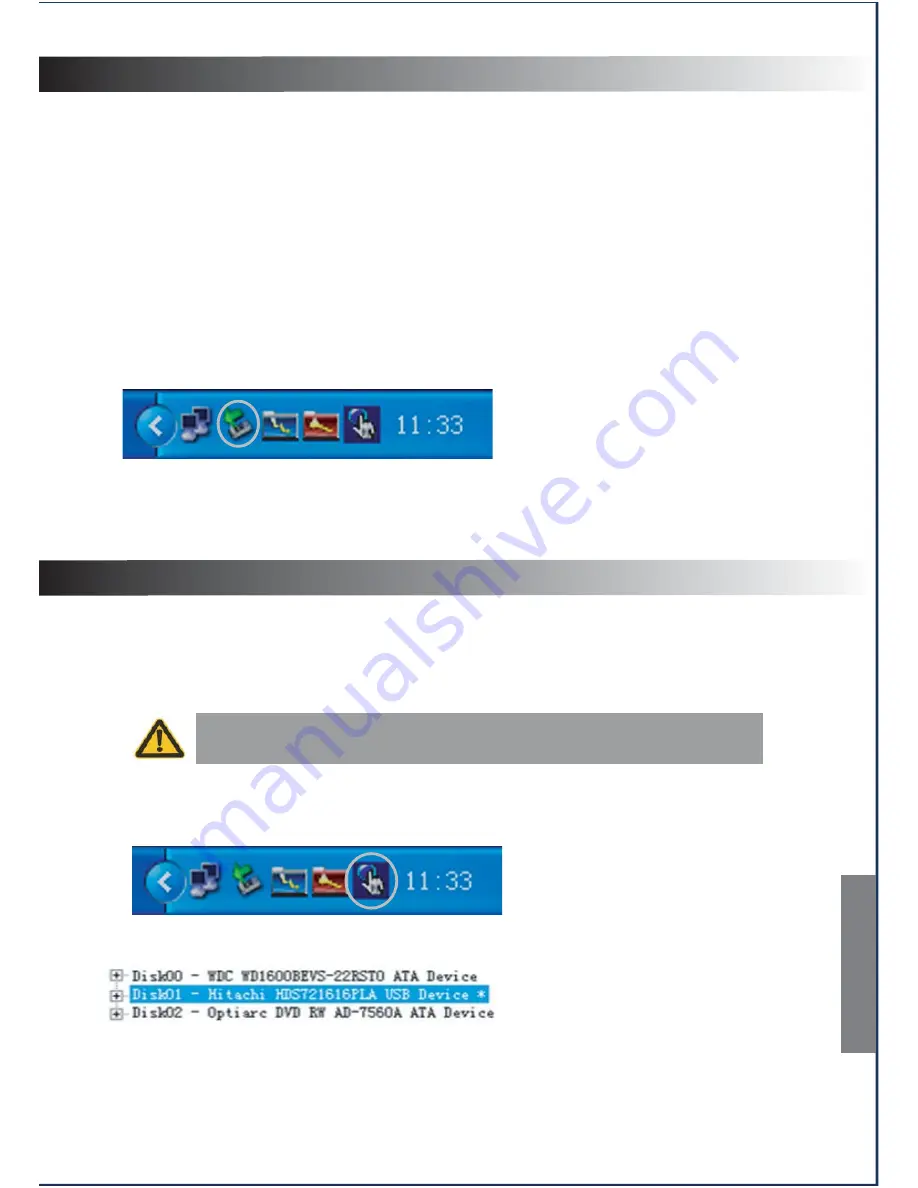
D.  Safely Remove the Device:

    Whatever kind of M.S. OS (Windows 98SE / ME / 2000 / XP, etc.) you are using

please follow the steps

    as shown below to safely remove the external case.


   1). Double-click on the green arrow icon at the bttom-right corner of screen. 
   2). Windows will pop-up a dialog box to ask if you would like to safely remove this device.
   3). Confirm removal prior to disconnecting or powering off.

7.  Software Installation and Use


A. Backup Software Installation and Use
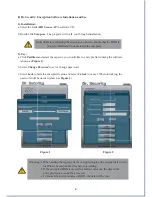
1). Installation: 

 a. Select folder 

one Touch Back Software

 in the software CD. 

 b. Run the file 

Setup.exe

. The program will walk you through installation.
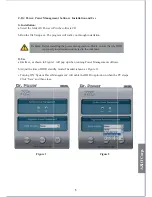
2). Use: 

 a. Double-click (or right-click, select 

Configure

) the icon on the bottom-right of taskbar. Windows will pop

    up a menu named 

HDDs options menu

.


 b. Select the model number of the external HDD.

 c. Select 

Task

, when windows pops up a prompt “

cannot find destination file

”, click

 OK

.

 d. Select 

Add

, input the file or folder you want to backup to 

Source Directory

 and input the 

Task Directory

     in which you would like to store the backup file or folder.
 e. Click 

Save

 and then 

Close

. Press the backup button to start backing up data.

3

AZiO Corp.

Summary of Contents for E377-S31

Page 1: ...Model Model E377 S31 E377 S31 External 3 5 USB 2 0 HDD Enclosure En En User Manual ...

Page 2: ...installation 2 6 Driver Installation and Use 3 7 Software Installation and Use 3 A Backup Software Installation and Use 3 B Dr Security Encryption Software Installation and Use 4 C Dr Power Power Management Software Installation and Use 5 8 Troubleshooting 6 9 Support Warranty 6 A Driver Installation 3 B Free Installation 3 C Connection 3 D Safely Remove the Device 3 ...

Page 3: ...rface C Supports OTB for easy backup access D Supports encryption security function Separates the disk into common regions and encrypted regions E Supports P SAVE sleep function 1 When PC is in a dormant state the external HDD will spin down to power save mode B Preset time for spinning down external HDD and enter power save mode F LED indicates data access and backup G Built in 3 inch cooling fan...

Page 4: ...kets out as illustrated 2 Insert the HDD 3 Push the HDD back until the connectors 4 Push back the mounting brackets to connects completely secure the HDD 5 Push the installed HDD back into the casing to finish Push the HDD installed tray back into the casing until the tray and casing are fitted securely You will notice the release button is back in its original position Installation is complete 2 ...

Page 5: ...se follow the steps as shown below to safely remove the external case 1 Double click on the green arrow icon at the bttom right corner of screen 2 Windows will pop up a dialog box to ask if you would like to safely remove this device 3 Confirm removal prior to disconnecting or powering off 7 Software Installation and Use A Backup Software Installation and Use 1 Installation a Select folder one Tou...

Page 6: ...ld like to encrypt after running the software shown as Figure 1 b Select Change Password to set or change password c Select Lock to hide the encrypted region and select Unlock to cancel When unlocking the password will be needed shown as Figure 2 Warming a When setting the capacity of the encrypted region the original data will be lost Please backup all the data before re setting b If the encrypte...

Page 7: ...he folder Dr Power AP in the software CD b Run the file Setup exe The program will walk you through installation 2 Use a Interface as shown in Figure 1 will pop up when running Power Management software b Adjust the time of HDD standby mode if needed shown as Figure 2 c Turning ON System Power Management will eable the HDD to spin down when the PC sleeps Click Save and then close 5 AZiO Corp Figur...

Page 8: ...ear Warranty AZiO Corporation warrants this product against defect in material or workmanship for 1 year from the date of purchase If this product proves to be defective contact AZiO for repair or replacement Return units cannot be processed without the proof of original date of purchase This warranty applies only to the original purchase of the product and is not transferrable This warranty does ...

Reviews: